7. USB socket. Connect a USB Flash Drive. Its files will be used when the NDX500 is
on USB mode.
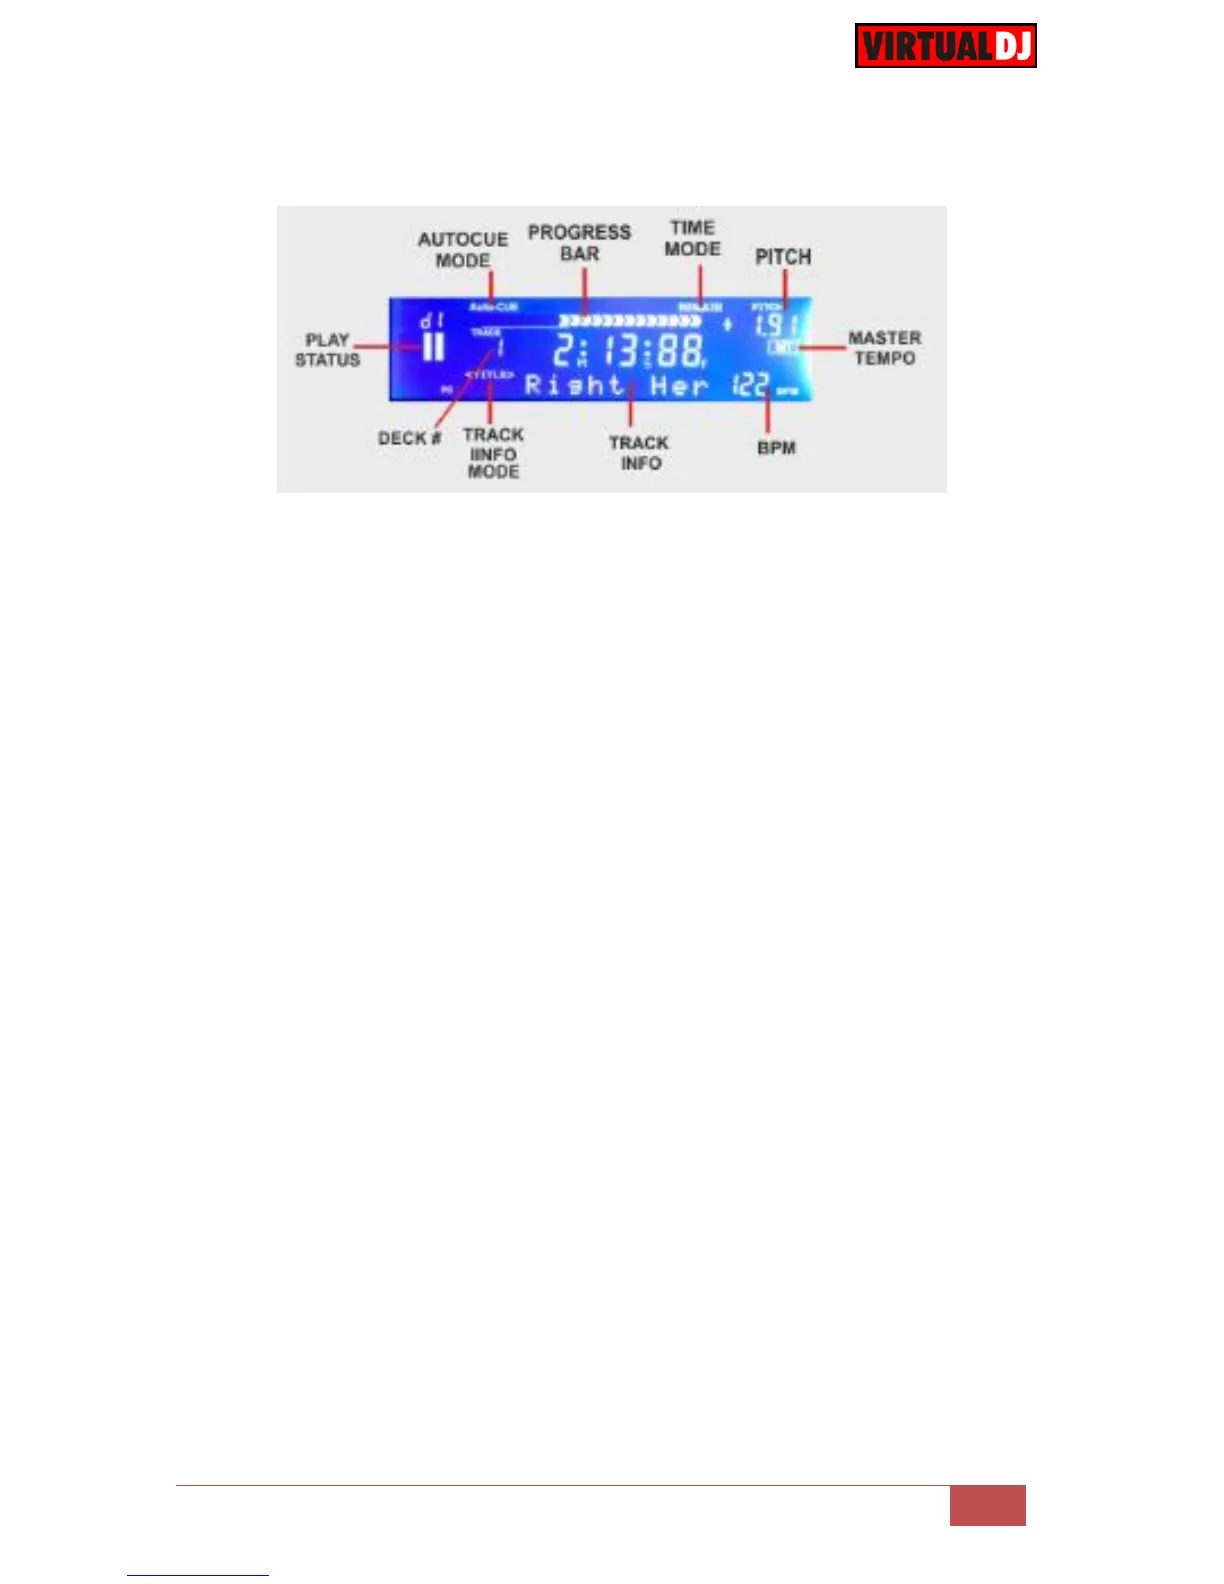
8. LCD. The LCD screen will show all the Track’s and VirtualDJ Deck information, such
as Elapsed/Remain/total times, BPM and pitch, Title, Artist and Album, Play status,
assigned Deck number etc.
9. TIME. Use this button to cycle through the available Time Display modes (Remain,
Elapsed and Total). Each time a Display mode is selected the Time and the mode
will be displayed on the LCD screen, and the progress bar will be also adjusted to the
selected mode.
10. SINGLE. Use this button to enable/disable Automix. An indicator (CONTINUE) will
be displayed on the LCD screen if Automix is enabled.
11. PROG. Use this button to cycle through the 4 available Text modes on the LCD
screen (Title, title-Artist, Artist and Album)
Hold SHIFT down and then use this button to assign a different VirtualDJ deck to
this unit. The number of the assigned deck will be displayed on the LCD screen. The
number of the available VirtualDJ decks along with the possible assigned deck on
each unit, depends on the total number of the deck son the used GUI or the total
number that the connected units can control. Manually assign of a VirtualDJ deck can
be made from the Controllers tab of the VirtualDJ Settings window.
By default, if 2 NDX500 are connected and a 4 decks skin is used, the left unit will be
assigned to deck 1 and will toggle between decks 1 and 3, and the right unit will be
automatically assigned to deck 2 and will toggle between decks 2 and 4.
12. LOOP IN. Use this button to set the Entry point of a manual loop. If a loop is
triggered/enabled, use this button to set the Jogwheel to Loop In mode (led will
flash) and then use the Jogwheel to fine-adjust the Loop In point.
Hold SHIFT down and then use this button to half the size of the selected loop.
13. LOOP OUT. Use this button to set the Exit point of a manual loop. If a loop is
triggered/enabled, use this button to set the Jogwheel to Loop Out mode (led will
flash) and then use the Jogwheel to fine-adjust the Loop Out point.
Hold SHIFT down and then use this button to double the size of the selected loop..