6 7
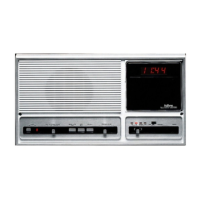
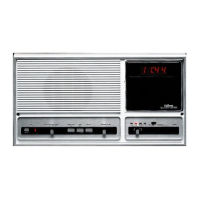
Digital Clock
SETTING THE TIME
1.
Press the TIME SET key one time.
The display will begin flashing, and
the words SET TIME will be displayed.
2. Within 5 seconds, press the HOUR key
to advance the hours. Use the HOUR key
to select AM/PM by advancing past 12:00 on the display.
3. Within 5 seconds, press the MIN key to advance the minutes.
4. After entering the correct time, release the key. The display will stop flashing after
5 seconds, and the time will be set.
RADIO TIMER
A timer has been incorporated to turn the radio on or off at preset times.
NOTE: If the master has been selected to the CD/TAPE or AUX program
position, the radio timer will not function.
SETTING THE RADIO ON TIME
1. Press the TIME SET key twice.
The display will begin flashing
and the words “SET RADIO
ON
TIME” will be displayed.
2. Press the HOUR key to advance the hours.
Use the HOUR key to select AM/PM by advancing past 12:00 on the display.
3. Press the MIN key to advance the minutes.
4. After setting the correct RADIO ON TIME, release the key. The display will stop
flashing after 5 seconds, and the RADIO ON TIME will be stored into memory.
5. The last program radio mode and frequency used will be the frequency played
when the timer turns on the radio.
SETTING THE RADIO OFF TIME
1. Press the TIME SET key 3 times.
The display will begin flashing,
and the words “SET RADIO
OFF
TIME” will display.
2. Press the HOUR key to advance the hours.
Use the HOUR key to select AM/PM by advancing past 12:00 on the display.
3. Press the MIN key to advance the minutes.
4. After setting the correct RADIO OFF TIME, release the key. The display will stop
flashing after 5 seconds, and the RADIO OFF TIME will be stored into memory.
ENABLING/DISABLING THE RADIO TIMER
1. Press the TIMER key. The light next to the key will illuminate, and the TIMER
is enabled.
2. To disable the TIMER press the TIMER key again.
Audio Source Selection
NOTE: Initial operation of the system requires:
• All Station Status Switches set to RADIO/INTERCOM mode.
• System Volume set to approximately
1
⁄3 level.
• Master Volume set to approximately
2
⁄3 level.
• Remote Station Volumes set to approximately
2
⁄3 level.
Select any of the 4 audio sources by pressing: AM, FM, CD/TAPE or AUX. The
corresponding LED will illuminate. To turn off the selected program audio source,
press the PROGRAM OFF key.
RADIO OPERATION
1. Select AM or FM by pressing the appropriate key.
2. Tune the radio to the desired frequency using one of the following methods:
• RAPID TUNE: Depress and hold either the
▲ or ▼ tuning keys until you reach
the frequency you desire. Release the tuning key.
• STEP TUNE: Momentarily touch either the ▲ or ▼ tuning keys and the radio
will tune to the next radio frequency.
• SCAN: Momentarily touch the SCAN key. The radio tunes up in frequency
to the next strong signal. It remains on this signal for five (5) seconds, then
moves to the next strong signal. When the desired station is found, press the
SCAN key to stop the scan operation.
RADIO MEMORY
6 AM and 6 FM radio frequencies may be stored in the system’s memory for instant
recall by using the following procedure.
STORING FREQUENCIES INTO MEMORY
1. Set the radio into the FM program mode and tune to the desired frequency using
the ▲▼or scan keys.
2. Within 5 seconds, press the MEMORY SET key (behind right panel door) and
a MEMORY channel (1-6) where the frequency will be stored.
3. Repeat this procedure for all six FM memory channels.
4. Set the radio into the AM program mode, and repeat the programming procedure
for six AM memory channels.
NOTE: It is recommended that the lowest frequency be programmed into Memory
1 and the next higher frequency into Memory 2, etc.
RECALLING FREQUENCIES
1. Select AM or FM mode.
2. Press one of the Memory 1-6 keys. The radio station that has been stored in the
selected memory location will be heard.
 Loading...