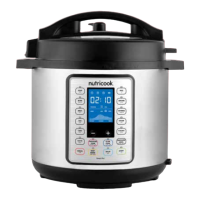
Cooking
Programs
Cooking
Modes
Suggested
Use
Venting
Method
Notes
Cake
Low Moist cake
Quick
release
Press Cake repeatedly to set the
cooking mode. Adjust time using - or
+ for desired result according to your
recipe.
Med
Denser moist
cake
High
New York style
cheesecake
Rice
Low
Tender but firm
to bite
Natural
release
When using the Rice program, you
cannot manually adjust the time
settings.
Use Natural Release method to vent
out pressure after cooking cycle is
completed so that the rice will not stick
on the bottom of the inner pot.
It is not recommended to leave cooked
rice in Keep Warm state for too long as
it may aect the texture.
Med
Normal texture
white rice
High
Softer texture
white rice
Biryani
Low
Rice with
vegetables
Quick
release -
Vegetable
Biryani
Natural
release -
Biryani with
Meat
Use Quick Release method for
Vegetable Biryani and Natural Release
method for Biryani with meat.
Med
Rice with chicken,
lamb and any
other meat
High
Brown rice with
meat
Oatmeal
Low
Oatmeal - rolled
or quick cooking
Natural
release
Adjust time as directed in recipe.
Always use Natural Release method to
release pressure when cooking foods
that expand.
Med
Oatmeal - steel
cut
High
Oatmeal - large
batch cooking
Steam
Low Vegetables
Quick
release
Use steam rack provided to elevate
food above the cooking liquid.
Use Quick Release method to release
pressure to prevent food from
overcooking.
Med
Fish and
Seafoods
High Meat
Pressure cook
Low
Manual
programming
Natural
or Quick
release -
Depends on
the recipe
Manually set the time and pressure
level according to recipe for desired
results.
Med
High
Note: The cooking modes - Low, Med, High refer to preset time.
Follow the below steps for safe use.
1. Open and remove lid.
2. Remove the inner pot from the cooker base.
3. Add food including the liquid ingredients in the inner pot.
Note:
• For pressure cooking programs, do not fill the inner pot
higher than the MAX line.
• When cooking food that expand such as rice, beans and
pasta, DO NOT fill the inner pot higher than the ½ line.
• For certain recipes, use the provided steam rack to elevate
food and avoid direct contact with liquids. This will also
prevent the food from being stuck on the bottom of the inner
pot.
4. Place the inner pot into the cooker base.
WARNING: Ensure that the outside surface especially the bottom
part of the inner pot is completely dry before placing in the
cooker base.
5. Place the pressure cooking lid in the cooker base rim and lock in
properly.
6. Turn the pressure release valve to Sealing position.
Note:
• For all pressure cooking programs, the pressure release valve
must be in Sealing position.
7. Plug in cooker to a power outlet.
8. Select a Pressure Cooking Program based on your recipe.
9. Press the selected Pressure Cooking Program repeatedly to
cycle through Low, Med, High modes for time options.
10. Optionally, adjust the cooking time using – or + button.
Note:
• Refer to the Smart Cooking Programs Table for the default
time for each cooking mode including the adjustable time
range.
• The Rice program is fully automatic. The time cannot be
manually adjusted.
11. Press Pressure Level to toggle between Low and High Pressure.
12. For every pressure cooking program selection, the Auto Keep
Warm function is automatically turned on which will be activated
after the pressure cooking time has been completed. If you wish
to turn off the Auto Keep Warm function, press the Keep Warm
button. The indicator light goes off.
Note:
• You can deactivate the Auto Keep Warm function during
pressure cooking program selection or during the cooking
cycle.
4342
 Loading...