• The Auto Keep Warm is not recommended for Rice and other
foods that may become overcooked when left in Keep Warm
mode for too long.
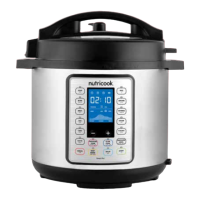
13. Press START to begin cooking.
Note:
• If START is not pressed after program settings, the cooker
automatically begins cooking after 10 seconds.
14. Once cooking begins, the screen displays On to indicate that it is
Preheating.
Note:
• Preheating time (pressure building time) depends on the
volume of food placed in the inner pot.
• Pressure cooking cold or frozen foods will take longer time to
build pressure.
15. When maximum pressure level is reached, float valve pops out
and screen displays the countdown time.
16. When cooking time has been completed and Keep Warm
function is turned off, screen displays End.
Note:
• If Auto Keep Warm is activated, the cooker goes to Keep
Warm mode immediately after the cooking cycle and counts
up from 00:00.
*See Auto Keep Warm section of this User Guide for more details.
17. Use the proper Venting method applicable to your recipe to
depressurize the pressure cooker.
CAUTION: Always follow safety measures while venting
pressure to avoid serious physical injury and property damage.
The Slow Cook program does not use pressure during the cooking
process. This program cooks similar to common slow cookers using
lower temperatures.
Note: The cooking modes - Low, Med, High refer to dierent temperatures.
Follow the below steps for safe use.
1. Open and remove lid.
2. Remove the inner pot from the cooker base.
3. Add food including the liquid ingredients in the inner pot.
4. Place the inner pot into the cooker base.
WARNING: Ensure that the outside surface especially the bottom
part of the inner pot is completely dry before placing in the
cooker base.
5. Place the pressure cooking lid in the cooker base rim and lock in
properly.
6. Turn the pressure release valve to Venting position.
Note:
• When using Slow Cook program, the pressure release valve
must always be in Venting position and ensure that float
valve does not pop up during the cooking cycle.
7. Plug in cooker to a power outlet.
8. Press Slow Cook button.
9. Press Slow Cook button repeatedly to cycle through Low, Med,
High modes for temperature options.
10. Adjust the cooking time using – or + button.
Note:
• Refer to the Smart Cooking Programs Table for the default
time for each cooking mode including the adjustable time
range.
Slow cook.
Cooking
Program
Cooking
Mode
Suggested Use Notes
Slow Cook
Low
Corresponds to Low on
common slow cookers.
The Slow Cook function can operate with the lid
either open or close.
When the lid is closed while initiating the Slow
Cook program, the pressure release valve must
be in the Venting position. Optionally, use a glass
lid for slow cooking.
Med
Corresponds to
Medium on common
slow cookers.
High
Corresponds to High
on common slow
cookers.
4544
 Loading...