6
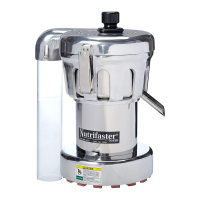
ASSEMBLING YOUR NUTRIFASTER COMMERCIAL JUICE EXTRACTOR
1. Pre-mix 1 level teaspoon of sanitizing powder in a glass of hot water, and mix with cold water to make 1
gallon of 100 ppm chlorine sanitizing solution. If you are using a liquid sanitizing solution follow the
directions on the container.
2. Install the Juice Pan by placing the spout through an opening in the castle. Point the spout in the
direction you wish your juice to be served. Do not touch the inside of the juice pan.
3. Install the Basket and Cutter Plate. Place the cutter plate inside the basket. Align the center hole over
the center hub, and lower the parts into the juice pan. Make sure both parts are seated properly on the
hub.
4. Make sure the motor shaft is dry, and hand tighten the blade nut on the motor shaft. Hold the screen
basket and use the wrench to tighten the blade nut an additional ¼ turn clockwise, securing the
blade/basket assembly. Do not store the blade nut on a wet motor shaft over night.
5. Store the Wrench. Clean the wrench and return it to its storage place near the juicer. This wrench is
specially designed to be used with your Nutrifaster.
6. Wrap a dry dishtowel around the base to cover the Power Switch and Power Cord. Set a waste container
under the juice pan spout. Spray approximately 1 pint of the sanitizing solution around the perimeter of
the basket screen, inside the basket screen, and onto the cutter plate and blade nut. Once done, remove
the dishtowel and thoroughly dry the base.
7. Replace the Top. Hold the top over the basket and align the latch strikes with the latches on the castle of
the juicer. Carefully lower the top onto the juicer body until it is resting on the castle.
8. Lock the Latches. Hook the inner latch attached to the castle over the latch strike on the top. Assure
proper alignment of the latch to latch strike. Lift both the outer latch arms together until the latches lock
in place. Ensure even tension on both latches. You should hear an audible SNAP sound when properly
adjusted.
9. Insert the Pulp Tube into the pulp spout of the lid. (The pulp tube is designed to penetrate the counter
top or hang over the edge of the counter. It may also be cut to length if you choose to put a pulp
receptacle on top of the counter.) The pulp tube is held in by a thumb screw. Use your hand to adjust the
screw, it should be adjusted so that the tube can stay in firmly in place.
10. With receptacles under the juice spout and pulp tube, spray 1 quart of sanitizing solution down the feed
chute while the juicer is running. Follow by rinsing the sanitizing solution from the juicer by spraying
one-quart tap or distilled water into the feed chute while the motor is running. Allow the juice pan to
drain. Dispose of the waste solution.
11. Clean the Pusher with sanitizing solution and rinse thoroughly. The juicer is now ready for operation.
12. Test Before Use. Before use, check to make sure all parts are in proper alignment. Plug your juicer into
a grounded electrical outlet and test before use.
DO NOT PLUG MACHINE INTO AN ELECTRICAL OUTLET UNTIL ASSEMBLY
IS COMPLETE. Wear vinyl gloves (as used in food handling) during operation.
 Loading...