16
Owner’s Manual
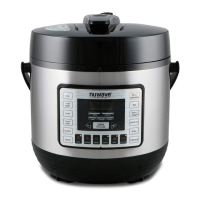
SILICONE GASKET INSTALLATION
Removal
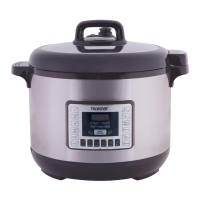
Installation
MAKE SURE THE SILICONE GASKET HAS NO CRACKS OR IS IN ANY
WAY DAMAGED.
Remove Lid from the Pressure Cooker.
• Rotate counterclockwise; this will detach the Lid.
• With one hand holding the Lid down, gently pull the Silicone Gasket
up from the Inner Lid.
Installing the Silicone Gasket
• Line up the Silicone Gasket on top of the metal ring.
• Gently push the Silicone Gasket, making sure you see the metal ring is
inside the Silicone Gasket’s grove. Continue pushing the Silicone Gasket
all around.
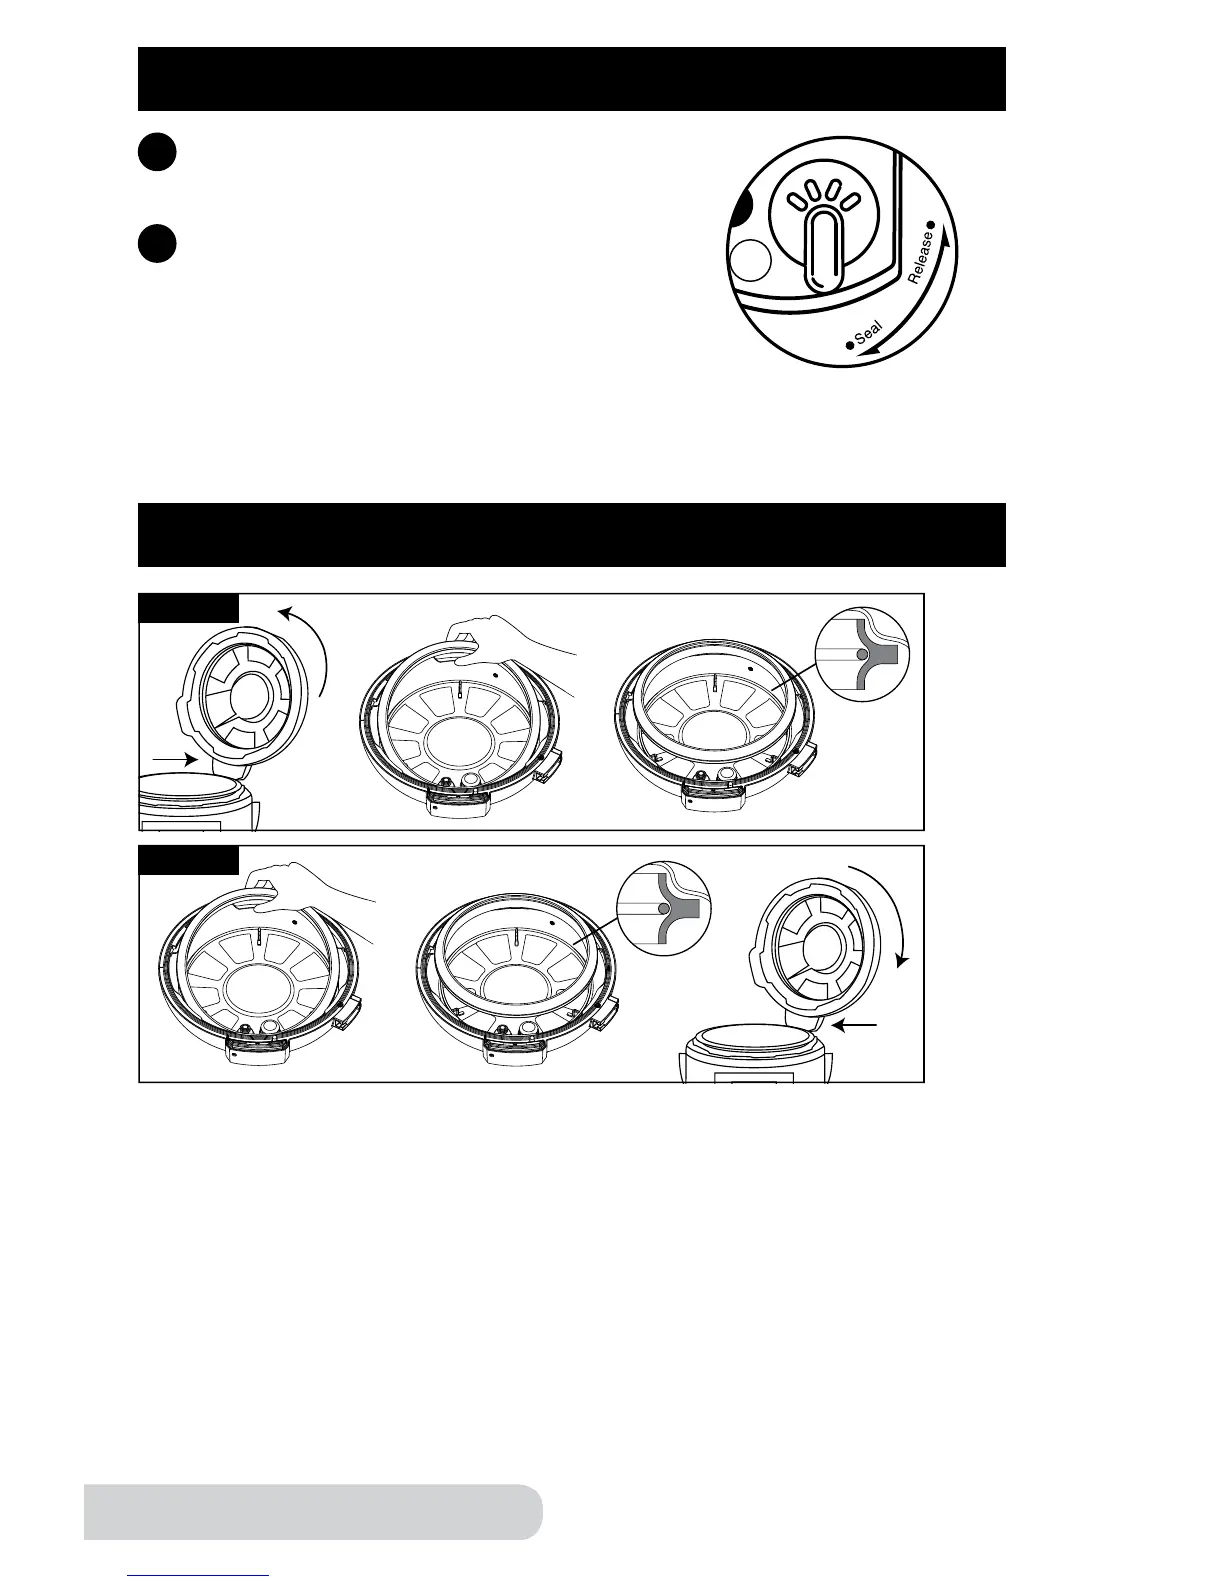
OPERATING INSTRUCTIONS (Continued)
Once the Lid is locked, turn the Pressure
Release Switch to “Seal”.
7
6
Plug the NuWave Nutri-Pot Digital Pressure
Cooker into an electric power supply. The
LCD display will show “--:--” and the unit will
go into standby mode.
Releasing the Pressure
Gently turn the Pressure Release Switch to “Release” to release pressure. Do
not cover the opening where steam is released. Always use caution when
releasing steam.