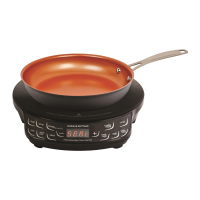
1X:DYH3,&3UR&RPSOHWH&RRNERRN
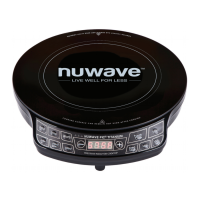
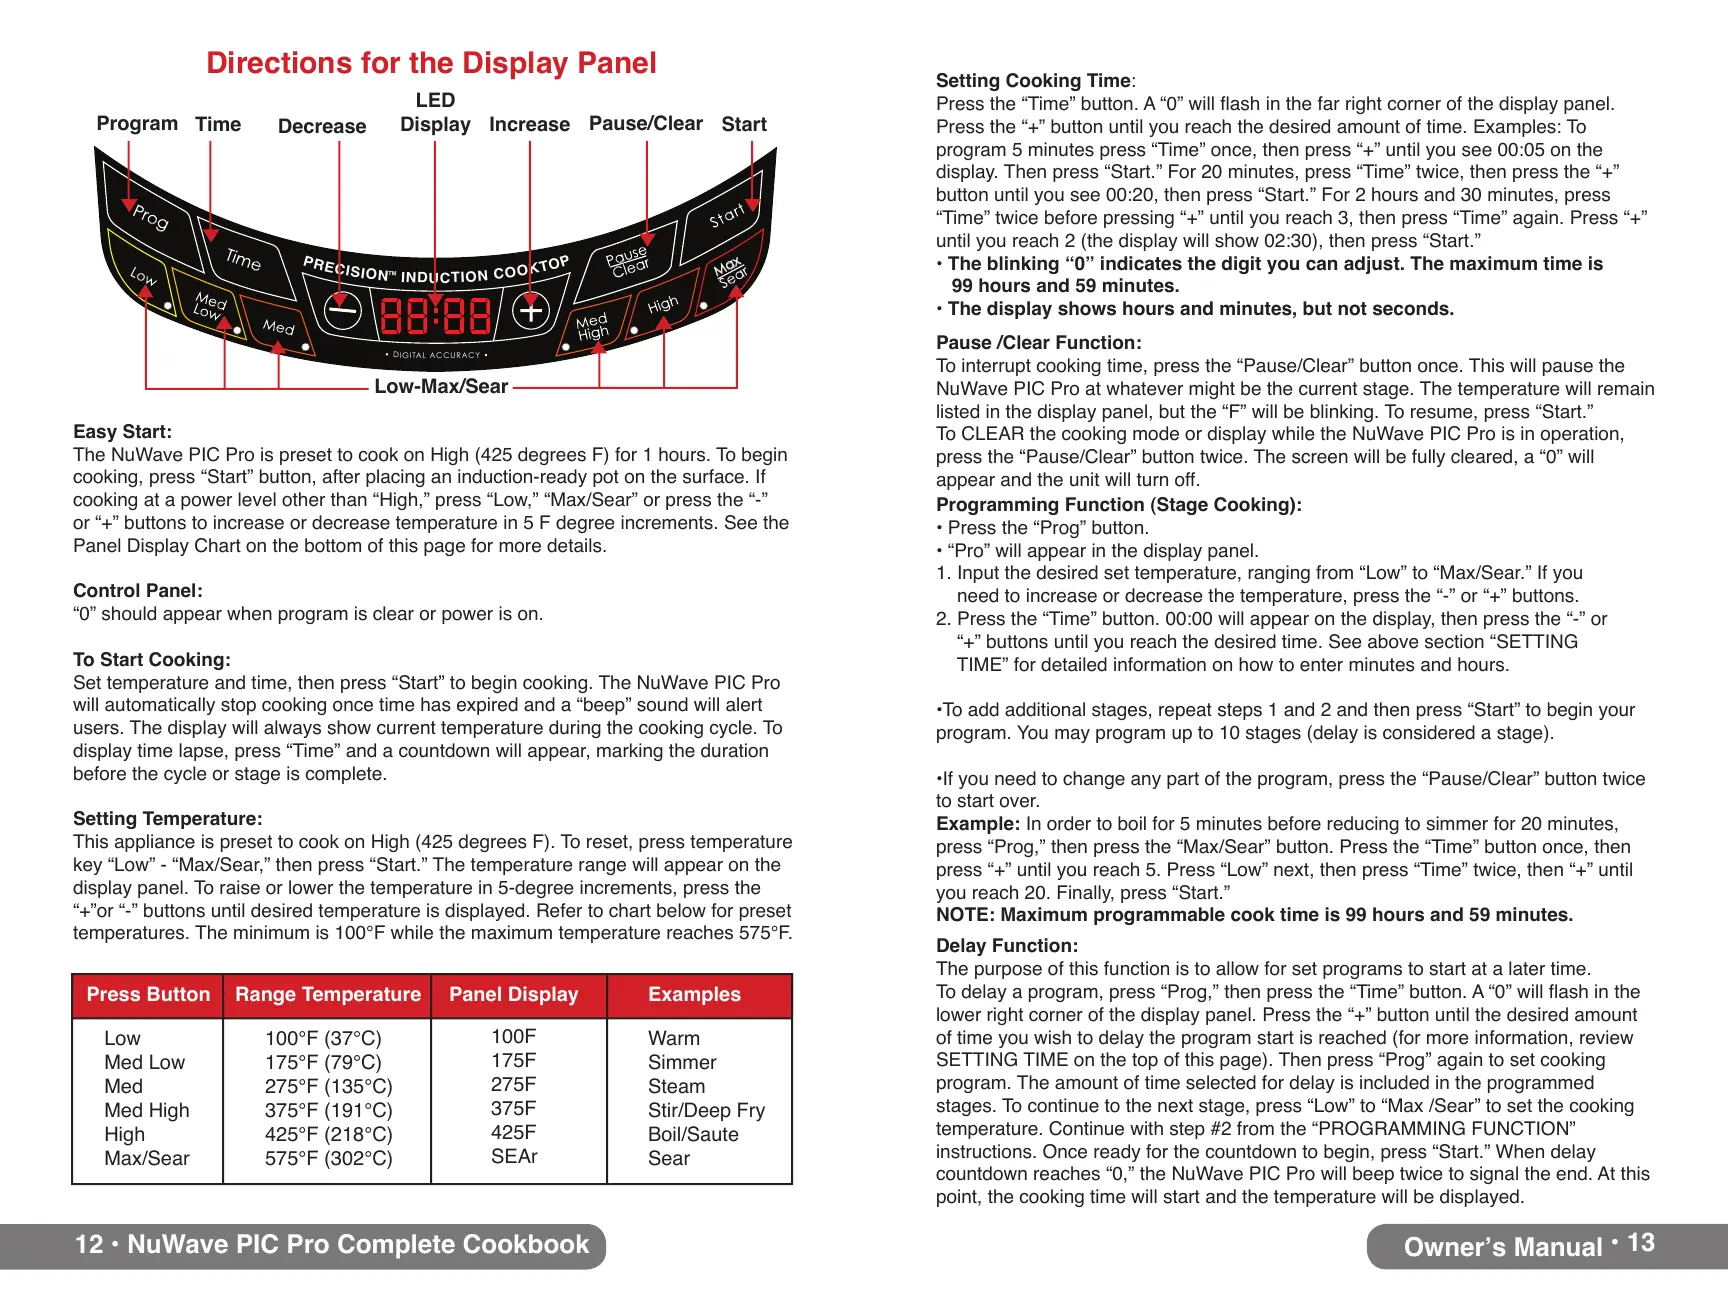
'LUHFWLRQVIRUWKH'LVSOD\3DQHO
(DV\6WDUW
The NuWave PIC Pro is preset to cook on High (425 degrees F) for 1 hours. To begin
cooking, press “Start” button, after placing an induction-ready pot on the surface. If
cooking at a power level other than “High,” press “Low,” “Max/Sear” or press the “-”
or “+” buttons to increase or decrease temperature in 5 F degree increments. See the
Panel Display Chart on the bottom of this page for more details.
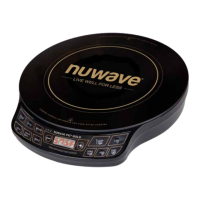
&RQWURO3DQHO
“0” should appear when program is clear or power is on.
7R6WDUW&RRNLQJ
Set temperature and time, then press “Start” to begin cooking. The NuWave PIC Pro
will automatically stop cooking once time has expired and a “beep” sound will alert
users. The display will always show current temperature during the cooking cycle. To
display time lapse, press “Time” and a countdown will appear, marking the duration
before the cycle or stage is complete.
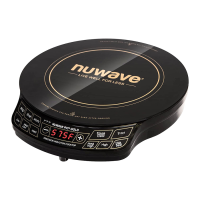
6HWWLQJ7HPSHUDWXUH
This appliance is preset to cook on High (425 degrees F). To reset, press temperature
key “Low” - “Max/Sear,” then press “Start.” The temperature range will appear on the
display panel. To raise or lower the temperature in 5-degree increments, press the
“+”or “-” buttons until desired temperature is displayed. Refer to chart below for preset
temperatures. The minimum is 100°F while the maximum temperature reaches 575°F.
100°F (37°C)
175°F (79°C)
275°F (135°C)
375°F (191°C)
425°F (218°C)
575°F (302°C)
3UHVV%XWWRQ 5DQJH7HPSHUDWXUH ([DPSOHV
Low
Med Low
Med
Med High
High
Max/Sear
Warm
Simmer
Steam
Stir/Deep Fry
Boil/Saute
Sear
100F
175F
275F
375F
425F
SEAr
3DQHO'LVSOD\
Max
Max
P
R
E
C
I
S
I
O
N
I
N
D
U
C
T
I
O
N
C
O
O
K
T
O
P
TM
D
I
G
I
T
A
L
A
C
C
U
R
A
C
Y
3URJUDP
7LPH
'HFUHDVH
/('
'LVSOD\
/RZ0D[6HDU
,QFUHDVH
3DXVH&OHDU
6WDUW
2ZQHUҋV0DQXDO
'HOD\)XQFWLRQ
The purpose of this function is to allow for set programs to start at a later time.
7RGHOD\DSURJUDPSUHVV´3URJµWKHQSUHVVWKH´7LPHµEXWWRQ$´µZLOOÁDVKLQWKH
lower right corner of the display panel. Press the “+” button until the desired amount
of time you wish to delay the program start is reached (for more information, review
SETTING TIME on the top of this page). Then press “Prog” again to set cooking
program. The amount of time selected for delay is included in the programmed
stages. To continue to the next stage, press “Low” to “Max /Sear” to set the cooking
temperature. Continue with step #2 from the “PROGRAMMING FUNCTION”
instructions. Once ready for the countdown to begin, press “Start.” When delay
countdown reaches “0,” the NuWave PIC Pro will beep twice to signal the end. At this
point, the cooking time will start and the temperature will be displayed.
3URJUDPPLQJ)XQFWLRQ6WDJH&RRNLQJ
3UHVVWKH´3URJµEXWWRQ
´3URµZLOODSSHDULQWKHGLVSOD\SDQHO
1. Input the desired set temperature, ranging from “Low” to “Max/Sear.” If you
need to increase or decrease the temperature, press the “-” or “+” buttons.
3UHVVWKH´7LPHµEXWWRQZLOODSSHDURQWKHGLVSOD\WKHQSUHVVWKH´µRU
“+” buttons until you reach the desired time. See above section “SETTING
TIME” for detailed information on how to enter minutes and hours.
7RDGGDGGLWLRQDOVWDJHVUHSHDWVWHSVDQGDQGWKHQSUHVV´6WDUWµWREHJLQ\RXU
program. You may program up to 10 stages (delay is considered a stage).
,I\RXQHHGWRFKDQJHDQ\SDUWRIWKHSURJUDPSUHVVWKH´3DXVH&OHDUµEXWWRQWZLFH
to start over.
([DPSOH In order to boil for 5 minutes before reducing to simmer for 20 minutes,
press “Prog,” then press the “Max/Sear” button. Press the “Time” button once, then
press “+” until you reach 5. Press “Low” next, then press “Time” twice, then “+” until
you reach 20. Finally, press “Start.”
127(0D[LPXPSURJUDPPDEOHFRRNWLPHLVKRXUVDQGPLQXWHV
3DXVH&OHDU)XQFWLRQ
To interrupt cooking time, press the “Pause/Clear” button once. This will pause the
NuWave PIC Pro at whatever might be the current stage. The temperature will remain
listed in the display panel, but the “F” will be blinking. To resume, press “Start.”
To CLEAR the cooking mode or display while the NuWave PIC Pro is in operation,
press the “Pause/Clear” button twice. The screen will be fully cleared, a “0” will
appear and the unit will turn off.
6HWWLQJ&RRNLQJ7LPH
3UHVVWKH´7LPHµEXWWRQ$´µZLOOÁDVKLQWKHIDUULJKWFRUQHURIWKHGLVSOD\SDQHO
3UHVVWKH´µEXWWRQXQWLO\RXUHDFKWKHGHVLUHGDPRXQWRIWLPH([DPSOHV7R
SURJUDPPLQXWHVSUHVV´7LPHµRQFHWKHQSUHVV´µXQWLO\RXVHHRQWKH
display. Then press “Start.” For 20 minutes, press “Time” twice, then press the “+”
EXWWRQXQWLO\RXVHHWKHQSUHVV´6WDUWµ)RUKRXUVDQGPLQXWHVSUHVV
“Time” twice before pressing “+” until you reach 3, then press “Time” again. Press “+”
XQWLO\RXUHDFKWKHGLVSOD\ZLOOVKRZWKHQSUHVV´6WDUWµ
7KHEOLQNLQJ´µLQGLFDWHVWKHGLJLW\RXFDQDGMXVW7KHPD[LPXPWLPHLV
KRXUVDQGPLQXWHV
7KHGLVSOD\VKRZVKRXUVDQGPLQXWHVEXWQRWVHFRQGV
 Loading...