7
LCD MONITOR
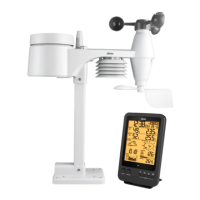
Stand and batteries installation
The unit is designed for desktop or wall mount for easy viewing.
1. Remove the battery door of the main unit.
2. Insert 3 new AA size batteries according to the “+/-” polarity mark on the battery compartment.
3. Replace the battery door.
4. Once the batteries are inserted, all the segments of the LCD will be shown briefly.
Note:
1. If no display appears on the LCD after inserting the batteries, press the RESET button by using a pointed object.
Pairing of Wireless Sensor with LCD Monitor
After insertion of batteries, the Display Main Unit will automatically search and connect the wireless 5-in-1
sensor (antenna blinking).
Once the connection is successful, antenna mark and readings for outdoor temperature, humidity, wind speed,
wind direction, and rainfall will appear on the display.
Changing batteries and manual pairing of sensor
Whenever you changed the batteries of the wireless 5-in-1 sensor, pairing must be done manually.
1. Change the batteries to new ones.
2. Press and hold the [SCAN] button for 2 seconds.
3. Press the [RESET] button on the sensor.
Note:
1. Pressing [RESET] button at bottom of wireless 5-in-1 sensor will generate a new code for pairing purpose.
2. Always dispose old batteries in an environmental safe manner.
8
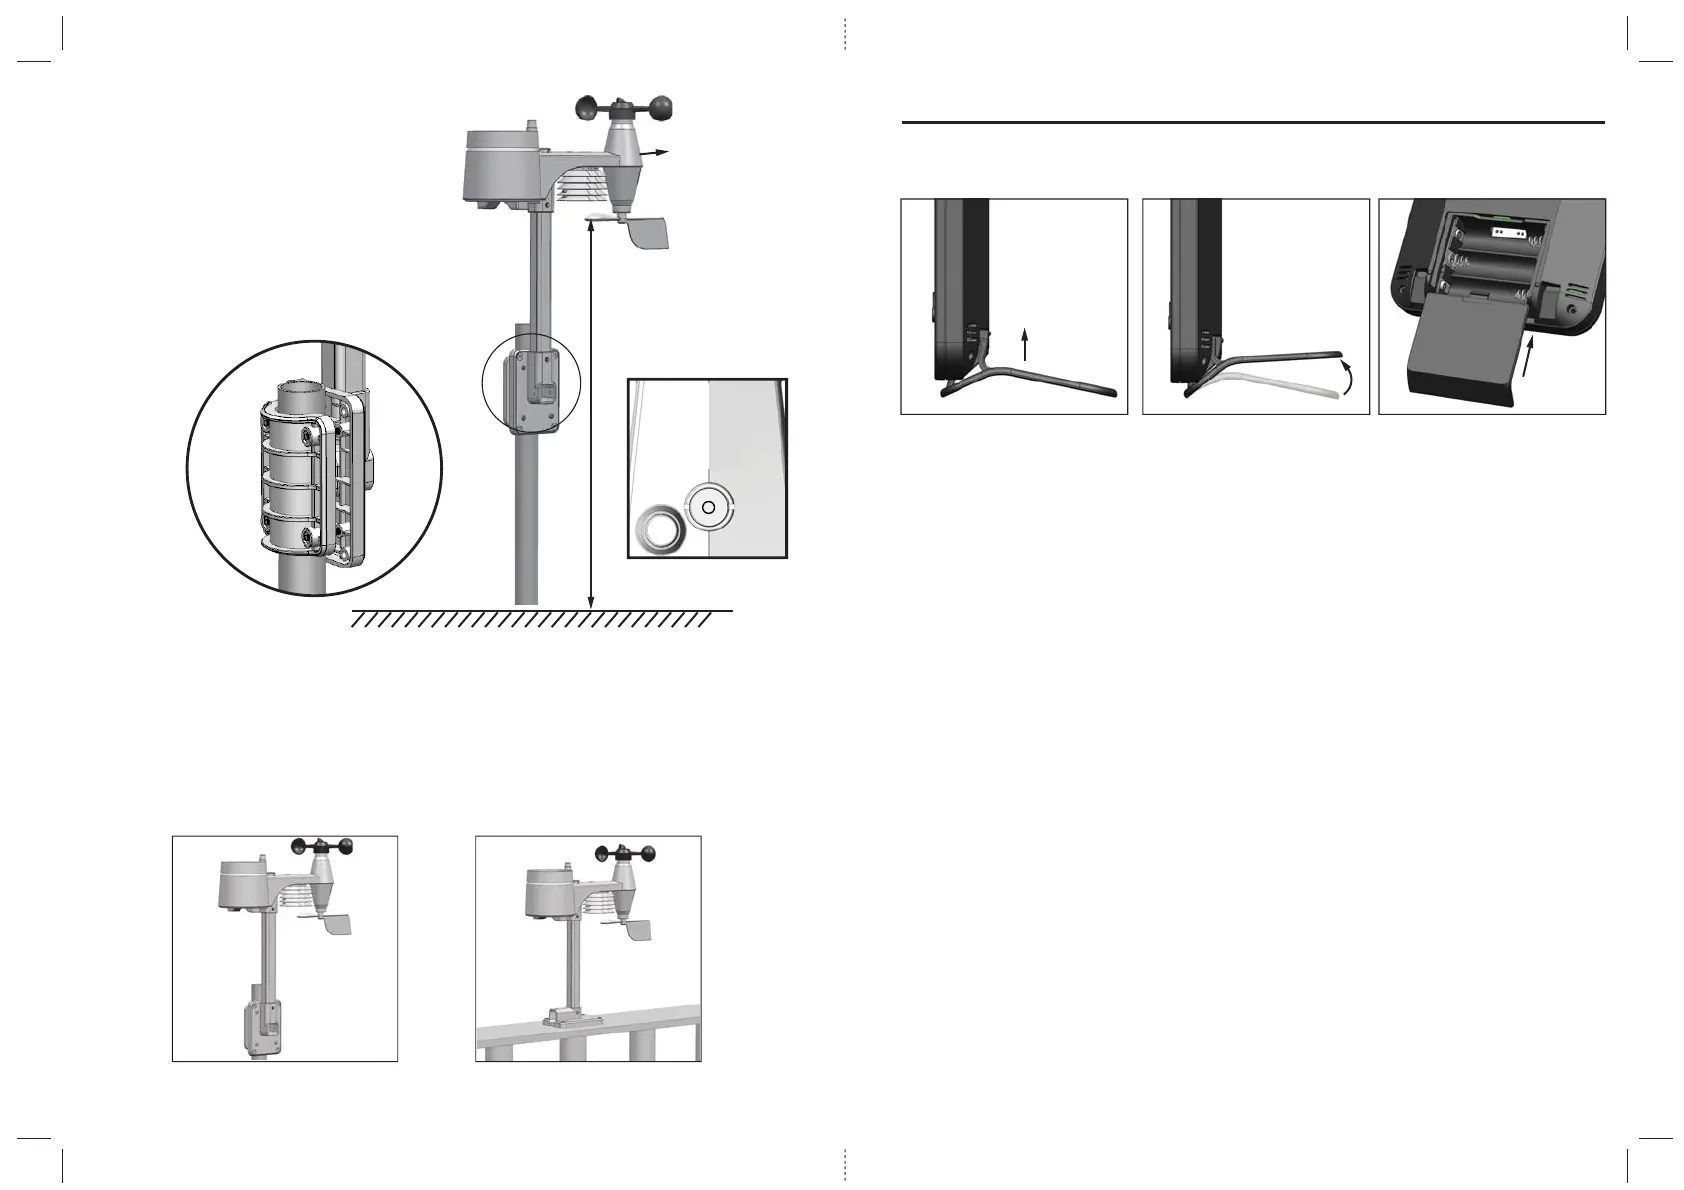
A. Mounting on pole (Pole Diameter 1”~1.3” (25~33mm) B. Mounting on the railing
1.5 meter off the ground
Points to
NORTH
Install the wireless sensor in an
open location with no obstructions
above and around the sensor for
accurate rain and wind measurement.
Install the sensor with the smaller end
facing the North to properly orient the
wind direction vane (or south if located
in the Southern Hemisphere).
Secure the mounting stand and bracket
(included) to a post or pole, and allow
minimum 1.5m off the ground.
Mounting guidelines:
1. Install the wireless sensor at least 1.5m off the ground for better and more accurate wind measurements.
2. Choose an open area within 150 meters from the LCD display Main Unit.
3. Install the wireless sensor as level as possible to achieve accurate rain and wind measurements.
A bubble level device is provided to ensure a level installation.
4. Mount the wireless sensor with the wind meter end pointing to the North to correctly orient direction of
the wind vane (or South if located in the Southern Hemisphere).