87
Display Module Battery Hatch Removal
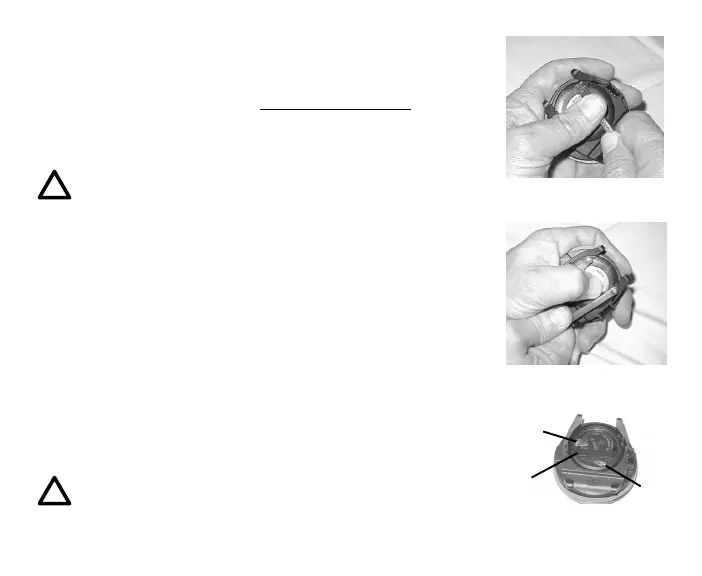
• Locate the Battery Compartment on the back of the module.
• While applying steady inward pressure on the clear Battery
Hatch, rotate the Hatch Ring clockwise 10 degrees by
pressing on the upper/right arm of the Ring with a small
blade screwdriver (Fig. 106A).
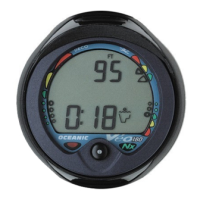
NOTE: If available, an adjustable face spanner tool or
a pair of pointed pliers can be used instead of the
screwdriver by inserting the tips of the tool in the
small holes in the Ring (Fig. 106B).
• Lift the Hatch Ring up and away from the Housing.
• Remove the clear Battery Hatch.
Battery Removal
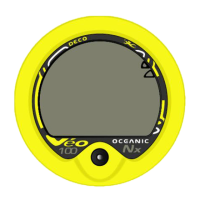
• Remove the Retaining Bar located across the lower portion of
the Battery (Fig. 107a).
• Remove the Hatch O-ring. DO NOT use tools
• Using care not to damage the Battery Contacts (Fig. 107 b/
c), slide the Battery up and out of the right side of the Battery
Compartment.
NOTE: DO NOT allow a metal object to short circuit
the top of the Battery which is positive (+) to the
negative ( - ) contact of the Battery Compartment.
Fig. 106A - Display Module
Battery Hatch Removal
Fig. 106B - Alternate
Battery Hatch Removal
Fig. 107 - Display Module
Battery Hatch Removal
a
b
c