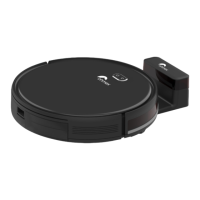
ROB 4600
52
EN
19
CAUTION:
• If something gets stuck in the nozzle during operation
and obstructs the appliance, switch off the appliance
immediately and remove the obstruction.
1. Before each use, make sure that the dust container and
lters are inserted and empty or cleaned.
2. Briey press and hold the
button on the appliance to
switch it on.
3. Press the button. If the room conditions allows it, the
appliance cleans the room in zigzag mode.
4. If necessary, select another cleaning mode.
5. The appliance cleans the oor until it has completely
cleaned the room or the battery capacity has dropped to
about 15 %. The appliance then automatically returns to
the charging station.
- If you press the
button, the appliance stops
operating and searches for the charging station, even
if there is still enough battery charge.
Using the Appliance with the Wiping Function
Before using the appliance as described previously, mount
the water tank with the attached cleaning eece. See also
illustrations J to K on page 4.
1. If necessary, remove the cleaning eece to be able to
open the water tank cap.
2. Open the rubber cover of the water tank and ll the water
tank. If necessary, add some cleaning agent to the water.
3. Attach the cleaning eece to the water tank and place
the water tank on the underside of the appliance.
4. Important! Start the operation of the appliance imme-
diately to avoid damage to the oor covering by the
dripping water!
The condition of the oor covering is decisive for the wiping
result.
Ending Operation
1. Stop the appliance by pressing the
button.
2. Switch off the appliance by pressing and holding the
button for approx. 4 seconds.
3. Remove the water tank and pull off the cleaning eece.
Empty the dust container and clean the lters and sen-
sors as well as the cleaning eece as described under
“Maintenance and Cleaning”.
Maintenance and Cleaning
WARNING:
• Always switch off the appliance before maintenance
or cleaning!
• Never immerse the appliance in water for cleaning. It
could cause an electric shock or re.
CAUTION:
• Do not use a wire brush or other abrasive objects.
• Do not use harsh or abrasive cleaners.
Do not attempt to lubricate the rollers with grease or oil. This
would cause dust or dirt to stick to the rollers more.
• Clean the housing with a soft, dry cloth without any
additives.
• Clean the sensors (10 / 14 / 17) carefully with a dry soft
cloth.
CAUTION:
Check that the sensors are clean after and before
each use. Otherwise the appliance could fall down a
staircase.
• After and before each use, make sure the nozzle and air
vents are clear.
• For a good performance of the appliance, empty the dust
container and clean the lters after each use.
Emptying the Dust Container and Cleaning the Filters
CAUTION:
Never wash the lters.
Also refer to illustrations D to I on page 4.
1. Remove the water tank, if still attached.
2. Reach into the recess and press the lock. Now you can
pull the dust container out of the appliance. (Illustra-
tion D)
3. Fold the dust container apart and lift the cover for the
HEPA lter. (Illustration E)
4. Pull the HEPA lter out of the dust container. (Illustra-
tion F)
5. Clean the HEPA lter and the socket by gently tapping
them out.
We recommend replacing the HEPA lter once a year.
CAUTION:
Do not use a brush to clean the HEPA lter. Using a
brush could damage the lter material.
6. Empty the dust container over a dustbin. (Illustration G)
7. You can clean the dust container under running water.
Clean the frame with a soft brush. (Illustration H)
CAUTION:
• Allow the dust container to air dry. However, do not
place it in the sunshine.
• Only reinsert the lters in the dust container when
they are completely dry!
8. Put the lters back into the dust container. Make sure
that both the socket and the HEPA lter are inserted
correctly. (Illustration I)
9. Put the dust container back into the appliance. It should
lock into place with a “click”.