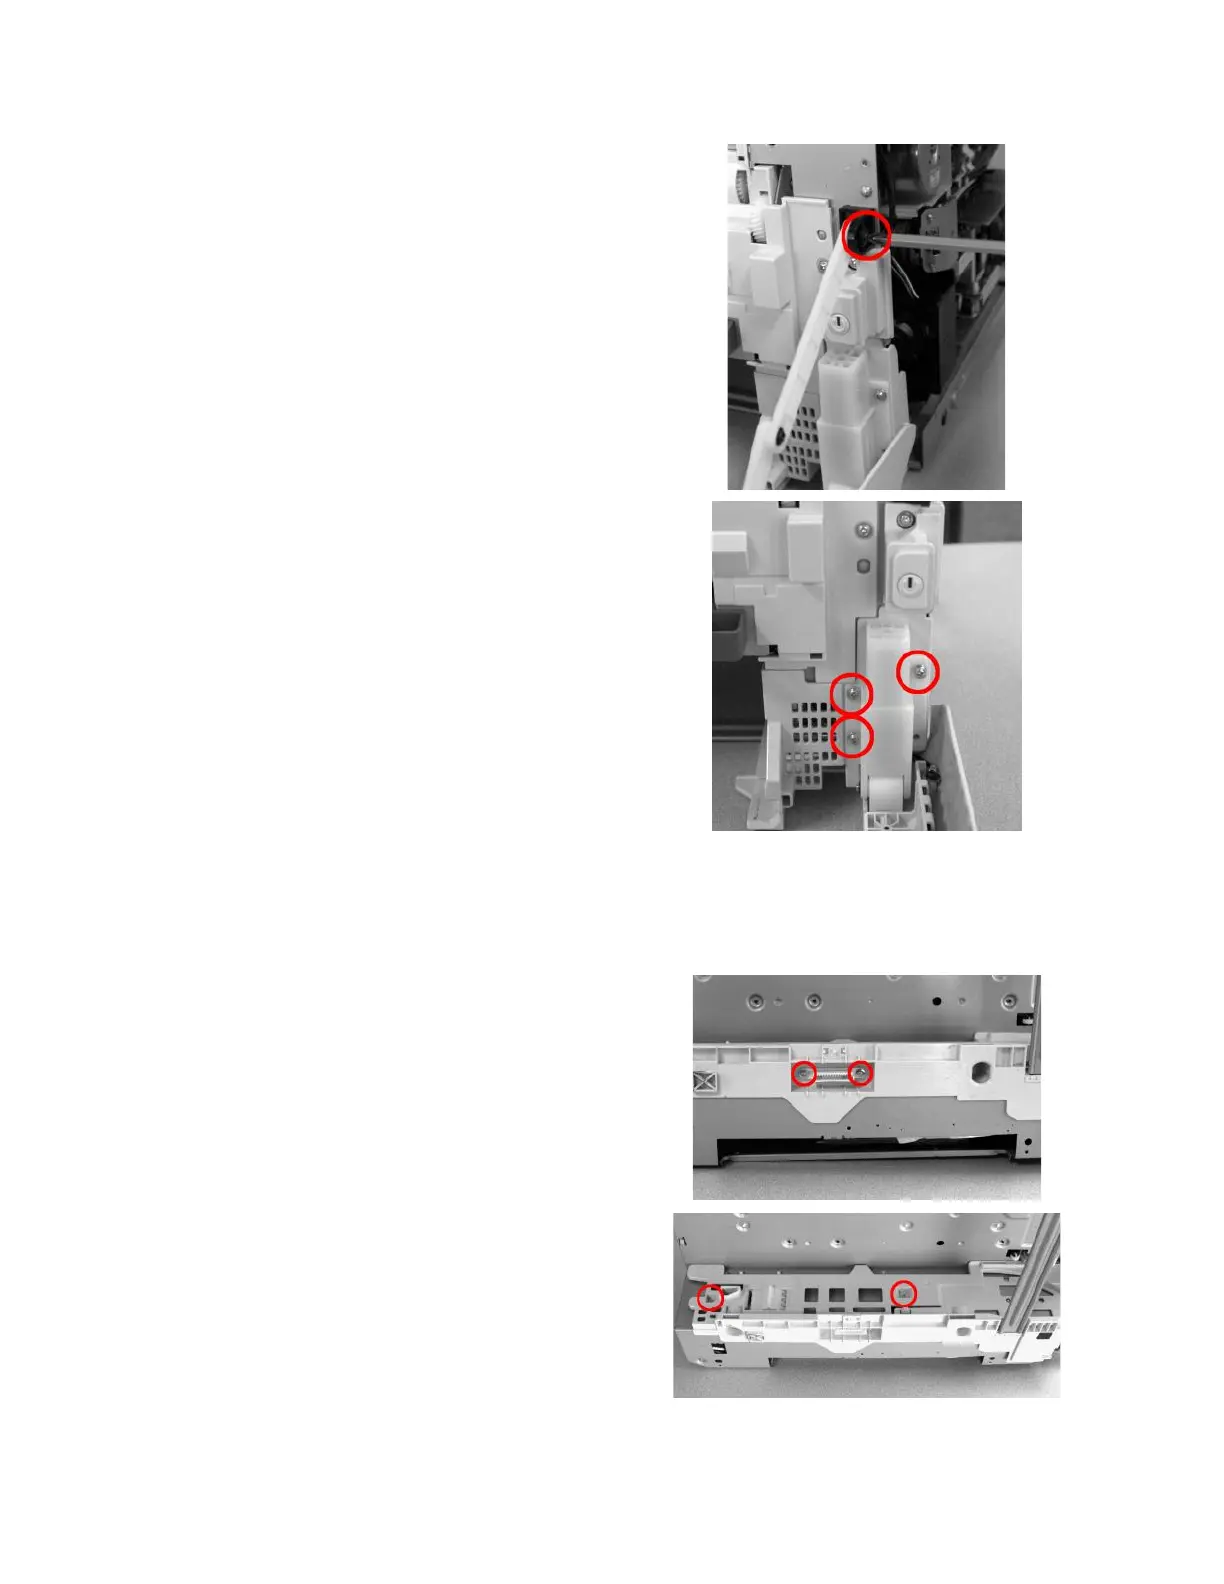
24
Remove the screw from the right Front
Cover Stay and disconnect the right hinge
arm.
25
Remove the 3 screws from the right Front
Hinge assembly and remove the hinge
assembly. The right side of the front cover is
not disconnected from the right side
cassette tray guide. Carefully unthread the
wires from the frame to the front cover.
26
Close the Top Cover and the Front Cover, being careful not to pinch any of the cables at the
front cover.
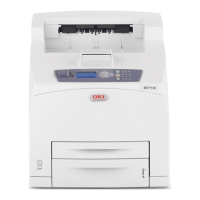
27
Gently flip the printer on its right side and
remove 2 screws from the 2
nd
paper tray
connector and remove the connector.
28
Remove 2 recessed screws from the right
side cassette tray guide