Do you have a question about the Oki MB451w and is the answer not in the manual?
This document outlines the manual setup process for the OKI MB451-471w Wireless option, providing a step-by-step guide for configuring wireless connectivity and managing network settings. The device, likely a multifunction printer or similar office equipment, offers both wired and wireless networking capabilities, with a focus on enabling the wireless function through its integrated control panel.
The OKI MB451-471w is a device that supports wireless communication, allowing it to connect to a network without a physical Ethernet cable. This wireless option enables the device to be placed in various locations within a network's range, offering flexibility in office layouts. The manual details how to switch between wired and wireless modes, configure security settings, and manage the device's IP address. The core function described is to establish a secure wireless connection to an existing network, thereby enabling network-dependent features such as printing, scanning, or faxing over Wi-Fi. It supports common wireless security protocols like WEP, WPA-PSK, and WPA2-PSK, ensuring data privacy and network integrity.
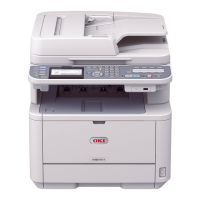
The device's wireless option is configured through its control panel, which features a display screen and navigation buttons (settings, down arrow, enter, right arrow, back).
Initial Setup and IP Address Configuration: Before setting up wireless, the device requires an IP address. The manual suggests temporarily connecting the device via a network cable to automatically obtain an IP address. Once obtained, the user is guided to change the IP address setting from "auto" to "manual" within the "Admin Setup/Network Menu" to ensure the IP address remains constant. This involves navigating through menus like "Network Setup," "IP Address Set," and inputting specific IP details (IPv4 Address, Subnet Mask, Gateway Address) if required, though the manual primarily focuses on the "auto to manual" switch. Access to these settings is protected by a password, specified as "6 lower case a's."
Wireless Connection Setup:
Re-enabling Wired Connection: If a user wishes to revert to a wired connection, the manual provides instructions to re-enable it. This involves plugging the network cable back into the LAN port and navigating through the "Admin Setup/Network Menu" to "Network Setup" and then to "Enabling Wired Communications." Confirming this option will re-enable the wired connection, and the LAN port LEDs will light up again.
While the document primarily focuses on setup and configuration, the ability to switch between wired and wireless connections can be considered a maintenance feature, allowing administrators to troubleshoot network issues or change the device's connectivity method as needed. The password-protected "Admin Setup" ensures that only authorized personnel can make critical network configuration changes, maintaining network security and device stability. The clear steps for re-enabling wired communication provide a reliable fallback option if wireless connectivity issues arise or if a wired connection is preferred for certain tasks or network environments. The manual's emphasis on knowing network credentials (SSID, pre-shared key, security type, encryption type) before starting the setup process highlights the importance of proper network documentation, which is a key aspect of network maintenance.
| Functionality | Print, Copy, Scan, Fax |
|---|---|
| Print Technology | Laser |
| Print Resolution | 1200 x 1200 dpi |
| Duplex Printing | Yes |
| Automatic Document Feeder (ADF) | Yes |
| Paper Capacity | 250 sheets |
| Connectivity | USB, Ethernet, Wi-Fi |
| Scan Resolution | 600 x 600 dpi |
| Fax Modem Speed | 33.6 kbps |
| Operating System Compatibility | Windows, Mac, Linux |
| Mobile Printing | Yes (AirPrint, Google Cloud Print) |
| Display | LCD |
| Scanner Type | Flatbed |