GB
1 GENERAL INFORMATION
1.1 GENERAL INFORMATION and WARNINGS
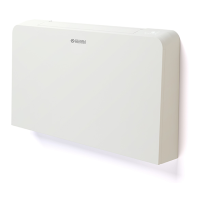
This manual is an integral part of the installation and use manual provided with
OLIMPIA SPLENDID series Bi2 terminals. Both manuals must be stored carefully
and ALWAYS stay with the appliance, even if it is sold to another owner or user, or
moved to another system. If it is damaged or lost, request another from your local
OLIMPIA SPLENDID Service Technician.
7KLVPDQXDOLVWREHXVHGVROHO\E\WKHTXDOL¿HGDQGDXWKRULVHGLQVWDOOHUZKRPXVW
be suitably trained and of sound body and mind in compliance with the law. All the
installation operations described here must be carried out carefully and properly,
in compliance with current safety regulations.
For all other general information and warnings to be complied with during installation
and use of the B0658 kit, consult the instruction booklet provided with OLIMPIA
SPLENDID series Bi2 terminals.
1.2 COMPLIANCE
OLIMPIA SPLENDID Bi2 ventil radiators/fan coils equipped with the B0658
electronic kit comply with European Directives:
/RZ9ROWDJH'LUHFWLYH(&
(OHFWURPDJQHWLF&RPSDWLELOLW\'LUHFWLYH(&
2 ASSEMBLY INSTRUCTIONS
2.1 OPENING THE SIDES
'LVPRXQWWKHXSSHUJULOO¿JUHI$E\XQVFUHZLQJWKHWZR¿[LQJVFUHZV¿J
UHI%
2SHQWKHVLGHLQVSHFWLRQÀDS¿JUHI&
2QWKHOHIWKDQGVLGHXQVFUHZWKHVFUHZ¿JUHI)IDVWHQLQJWKHOHIWSDQHO
¿JUHI*WKHQPRYHLWVOLJKWO\WRWKHOHIWDQGOLIWLWRXW
8QVFUHZWKHVFUHZIDVWHQLQJWKHSDQHORQWKHRSSRVLWHVLGH¿JUHI/
0RYHWKHVLGHSDQHOVOLJKWO\WRWKHULJKWDQGOLIWLWRXW¿JUHI3
2.2 CONFIGURATION
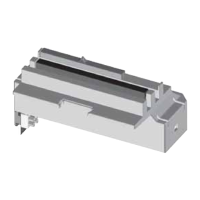
7KHHOHFWURQLFERDUGRIWKH%SDQHOPXVWEHFRQ¿JXUHGDFFRUGLQJWRWKH%L
YHQWLOUDGLDWRUIDQFRLORQZKLFKLWLVLQVWDOOHGRU7KH
WKUHHVHOHFWRUVPXVWEHSRVLWLRQHGDVVKRZQLQWKHWDEOHLQ¿JXUH,IQHHGHGXVH
the spare selectors provided.
Ensure that the appliance is not connected to the mains before carrying
out this operation.
2.3 INSTALLATION
- Slide the control panel into its seat at the top of the ventil radiator / fan coil and
IDVWHQLWWRWKHVLGHZDOOZLWKWKHWZRVFUHZVSURYLGHG¿JUHI$7KH¿QDO
position of the control panel must be against the side panel.
- To position the electronic control on the right-hand side of the appliance, see the
instructions given in the installation and use booklet provided with the Bi2 ventil
radiator / fan coil.
2.4 ELECTRICAL CONNECTIONS
Ensure that the appliance is not connected to the mains before carrying
out this operation.
- Fasten the earth cable to the appliance structure using the screw and washer
VXSSOLHGWKHPLQLPXPVFUHZLQJIRUFHWKDWPXVWEHH[HUWHGLVDERXW1VHH
¿JUHI$
FRQQHFWWKHSROHFRQQHFWRUWRWKHPRWRUFDEOH¿JUHI%
FRQQHFWWKHSROHFRQQHFWRUWRWKHVROHQRLGYDOYHFDEOHLISUHVHQW¿JUHI
&
LQVHUWWKHFDEOHJULSSURYLGHGLQWRWKHKROHLQGLFDWHGLQ¿JUHI$
FRQQHFWWKHSRZHUFDEOHWRWKHWHUPLQDOERDUG¿JUHI%DQGIDVWHQLWZLWK
WKHFDEOHJULS8VHFDEOHVZLWKDPLQLPXPVHFWLRQRIPP
2
FRQQHFWWKHHQDEOLQJGHYLFHWLPHUUHPRWHVZLWFKHWFRUDURRPWKHUPRVWDW
RXWVLGHWKHWHUPLQDOERDUG¿JUHI&7KHFRQWDFWFRQQHFWHGWRWKLVWHUPLQDO
ERDUGPXVWKDYHDPLQLPXPUDWHGFXUUHQWRI$9DF,IXVLQJWKLVLQOHW
HOLPLQDWHWKHEULGJHSURYLGHGDQGLQVHUWHGEHWZHHQWHUPLQDOV$DQG%¿JUHI
;
2.5 CLOSING THE APPLIANCE
0RXQWWKHDHVWKHWLFVLGHSDQHORQWKH&RROHUFRQYHFWRUFRROHUUDGLDWRU
WLJKWHQWKHWRSVFUHZIDVWHQLQJWKHVLGHSDQHO¿JUHI/RUUHI)
UH¿WWKHDLURXWOHWVDIHW\JULOO¿JUHI$
:,5,1*',$*5$0¿J
M1 Fan motor
Y1:DWHUVROHQRLGYDOYH9+]PD[:
S1 Intake grill safety microswitch
S2([WHUQDOFRQWDFWPLQLPXPFDUU\LQJFDSDFLW\$9URRPWKHUPRVWDWWLPHU
HWF,IFRQQHFWHGHOLPLQDWHEULGJH;EHWZHHQWHUPLQDOV$DQG%
3 USE
3.1 POWERING ON
To manage the Bi2 fan coil / ventil radiator through the B0658 control panel, the
DSSOLDQFHPXVWEHFRQQHFWHGWRWKHPDLQV,IWKHSRZHUOLQHLV¿WWHGZLWKDPDLQ
switch, it must be on.
3.2 OPERATING MODE
8VH VHOHFWRU$ ¿J WR YDU\ WKH YHQWLODWLRQ VSHHG EHWZHHQ PLQLPXP
and
PD[LPXP
. When set to VHOHFWRUDOOWKHZD\WRWKHOHIWWKHDSSOLDQFHLV
LQDFWLYHWKHIDQLVVKXWRIIDQGDQ\ZDWHUYDOYH¿WWHGLVFORVHG
NOTE: if an external contact S2 is connected to the appliance, the above
RSHUDWLRQLVRQO\JXDUDQWHHGZLWKWKHH[WHUQDOFRQWDFWFORVHG
3.3 SHUTDOWN FOR PROLONGED PERIODS
If the appliance is to be switched off for a prolonged period, proceed as follows:
'HDFWLYDWHWKHDSSOLDQFHVHOHFWRU$¿JVHWWR
- Set the system master switch to OFF.
 Loading...