12
Press the
/ buttons to set the hour of the desired time interval. Then switch to the next
eld, “Min”, using the button. Press the / buttons to set the minutes of the desired
time interval. Then switch to the next eld, “Sec”, using the button. Press the / but-
tons to set the seconds of the desired time interval. Conrm your selection with the OK button.
Afterwards, press the MENU button to close this sub-menu.
Note: If Time Lapse is “ON”,”Interval”and ”Sense Level” function are unavailable.
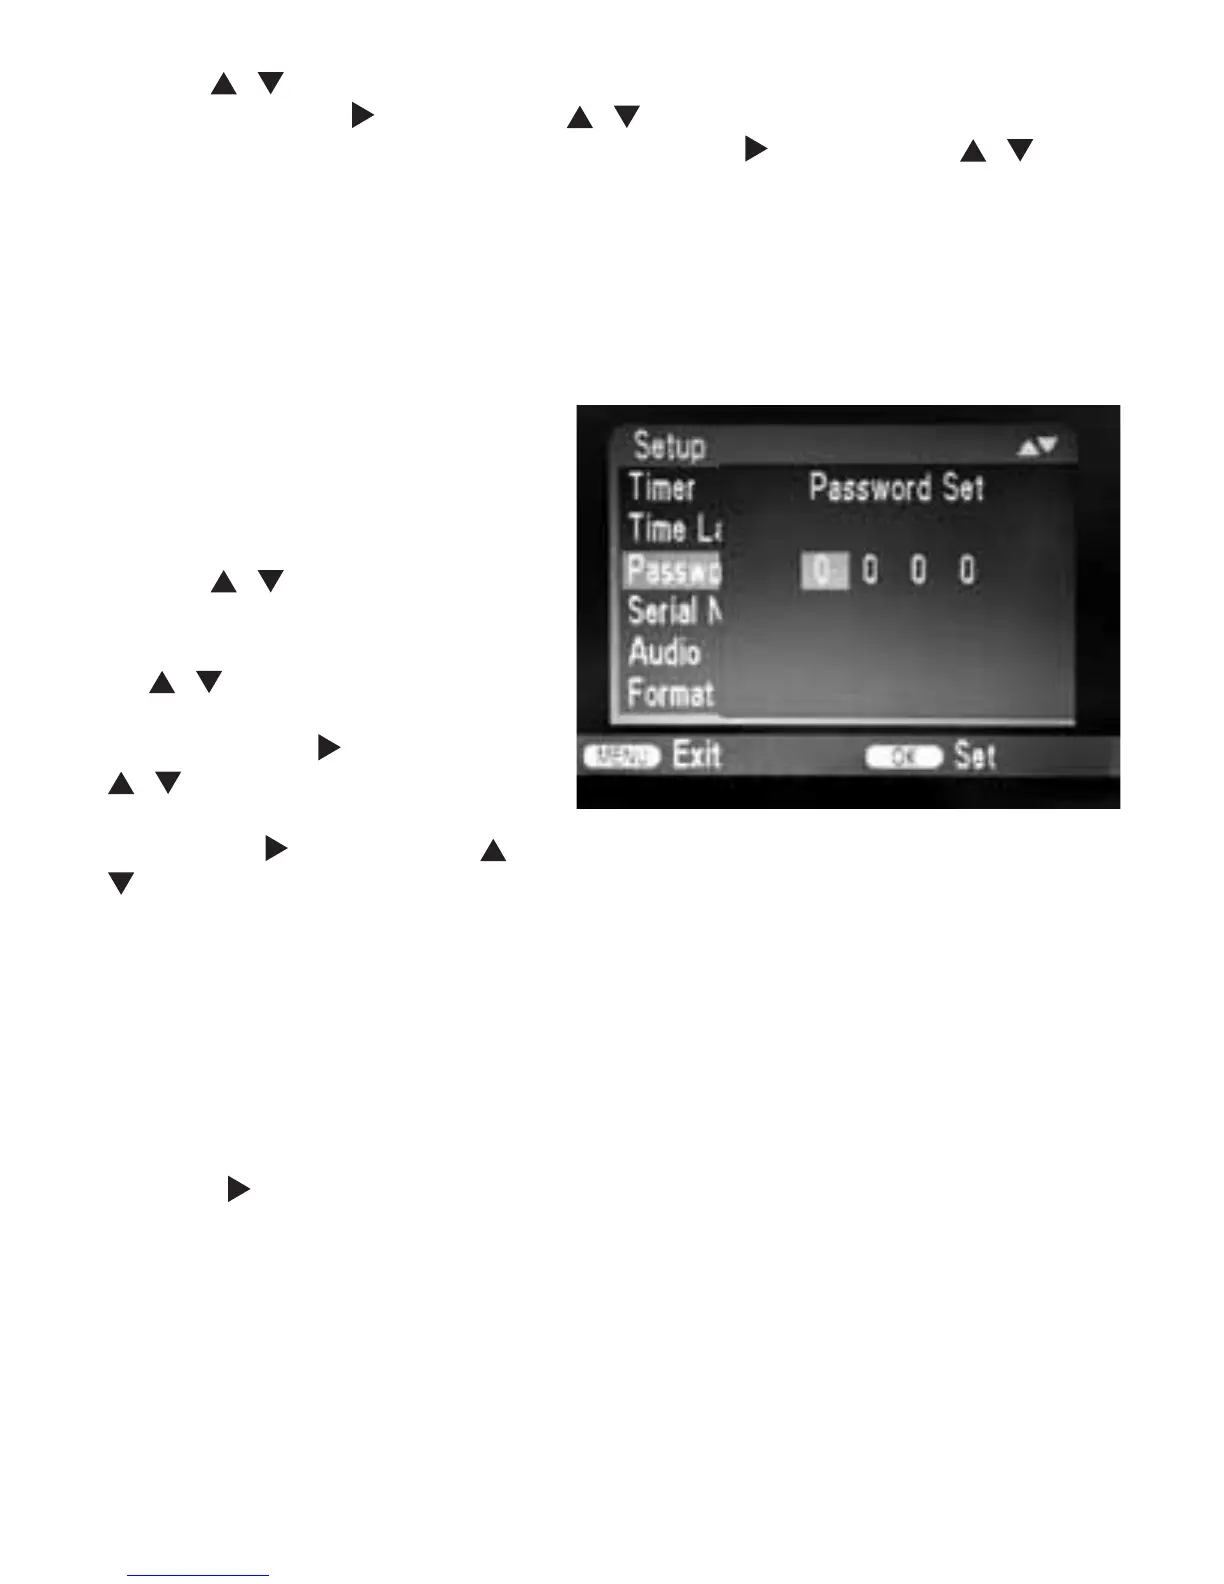
3.13 Password Set
Select “On” if you want to use a pass-
word to protect the camera from un-
wanted access. In the following screen
menu, you can set a 4-digit combination:
Press the
/ buttons to select the
rst digit between 0-9. Then switch to
the next eld using the button. Press
the / buttons to select the second
digit between 0-9. Then switch to the
next eld using the button. Press the
/ buttons to select the third digit
between 0-9. Then switch to the next
eld using the button. Press the /
buttons to select the fourth digit between 0-9.
Conrm your selection with the OK button. Afterwards, press the MENU button to close this
sub-menu.
The set number combination must now be entered each time the camera is switched on in
TEST mode before the unit can be operated.
If you forget the number combination, proceed as follows to unlock the camera and to reset it
to its factory default settings:
• Keep the
RIGHT BUTTON pressed while moving the operating mode selector switch to the
TEST position. Keep the button pressed until you see the boot screen.
• After about 5 seconds the camera will switch on and can now be used without a password.
NOTE: This procedure will permanently delete any previously made settings.