Optional Offset/Elbow Installation: Since a completely vertical chimney provides optimal draft it is best to
avoid elbows if at all possible. However, when elbows are necessary to avoid obstructions such as joists, rafters,
etc. use no more than two pairs of elbows (total of four elbows) and do not exceed a maximum angle of 30
degrees. Refer to Table 2 to determine what elbows and chimney sections will be needed for the required offset.
1 – Install the first elbow onto the chimney. Turn the elbow to the required direction and secure it to the
chimney with a minimum of four self drilling screws.
2 – Place the required length of chimney section to the elbow. A telescoping chimney section is useful to obtain
exact length desired. Secure the section to the elbow with a minimum of four self drilling screws.
3 – Install the second elbow to return the chimney to vertical. Secure the elbow to the chimney section with a
minimum of four self drilling screws.
4 – An offset support bracket or a roof support bracket must be installed above each offset to support the
chimney weight above the offset.
Note: After the offset, use a level to ensure that the chimney returns to vertical.
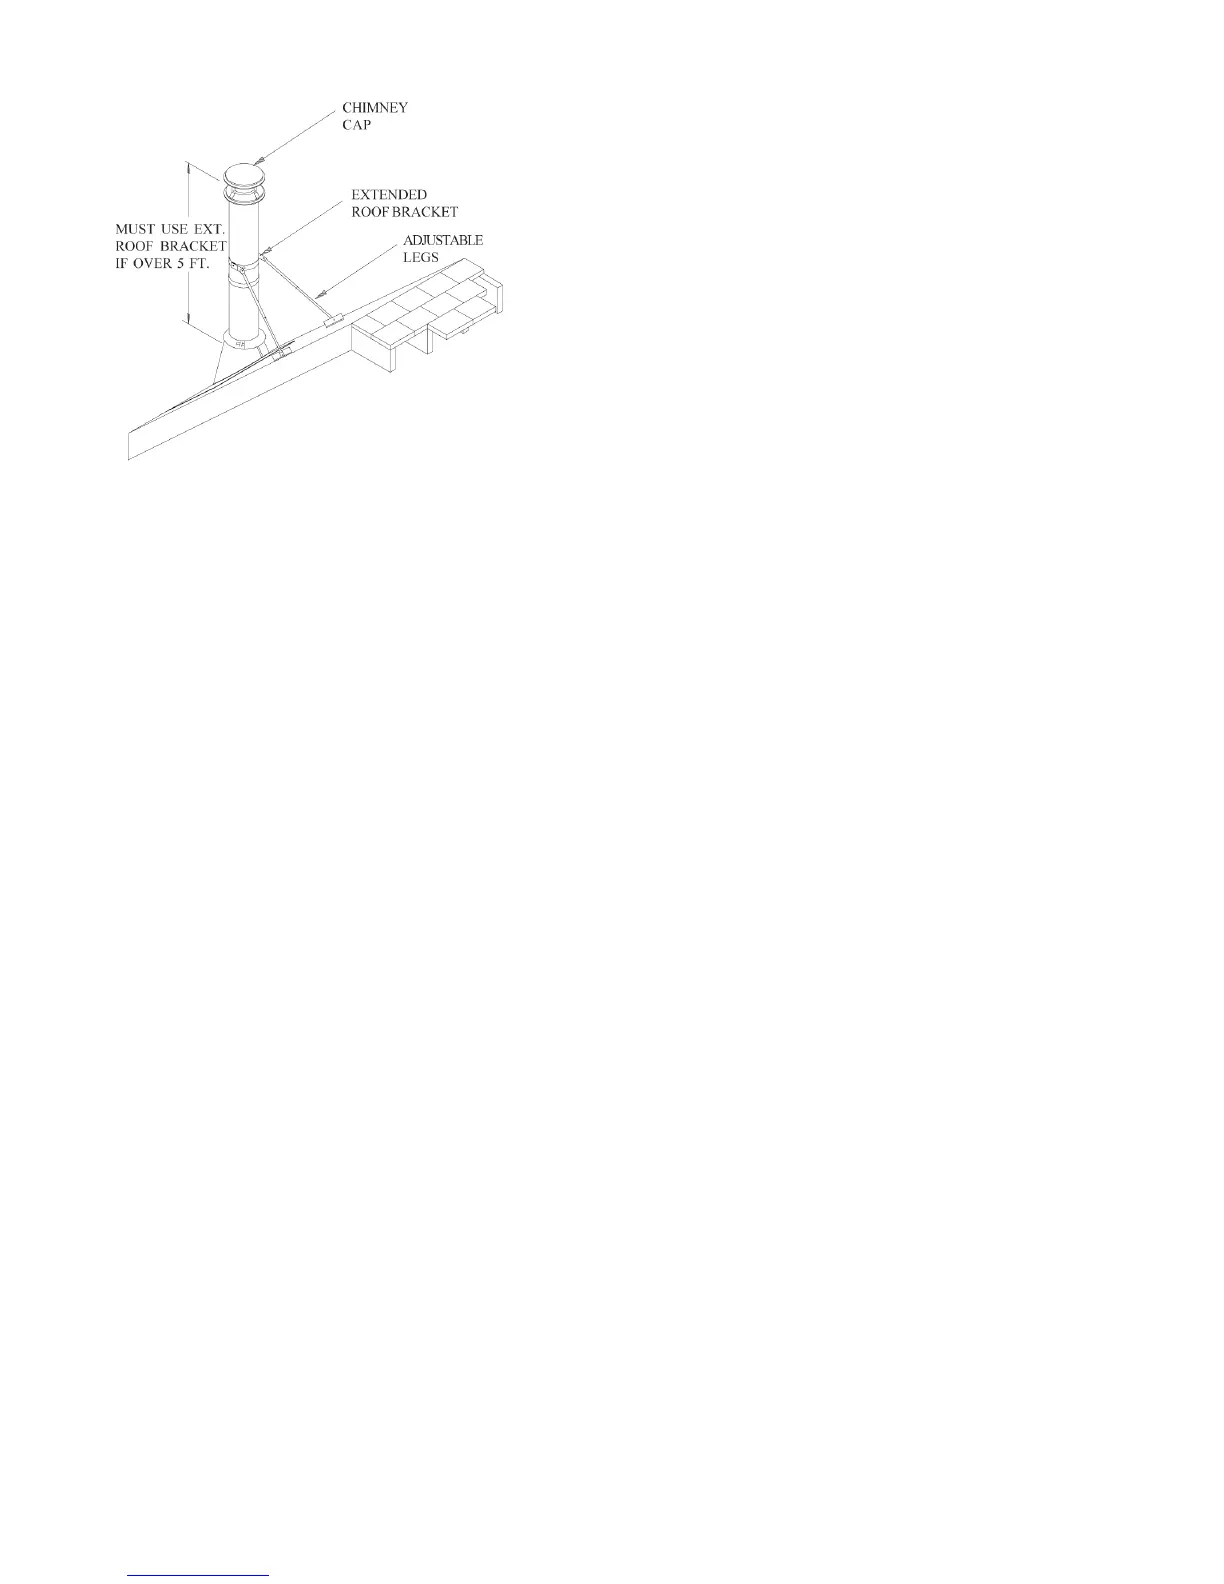
3 – Mount the two roof brackets at the two
locations marked above. Use six 1-inch
roofing nails per bracket and seal the nail heads
with a water proof silicone sealant.
4 – Secure the brace legs to the roof brackets
using the nuts and bolts provided.
5 – Ensure that there is at least 3-inches of
overlap between the two sections of each brace
leg. There is a hole provided in the outer half
of the brace leg. Using the hole provided, drill
a ¼” hole completely through the inner and
outer sections. Use the nut and bolt supplied to
pin both sections of the adjustable brace legs.
6 – With final adjustments and tightening of all
hardware, use three self drilling screws to
further secure the chimney locking band to the
chimney section.