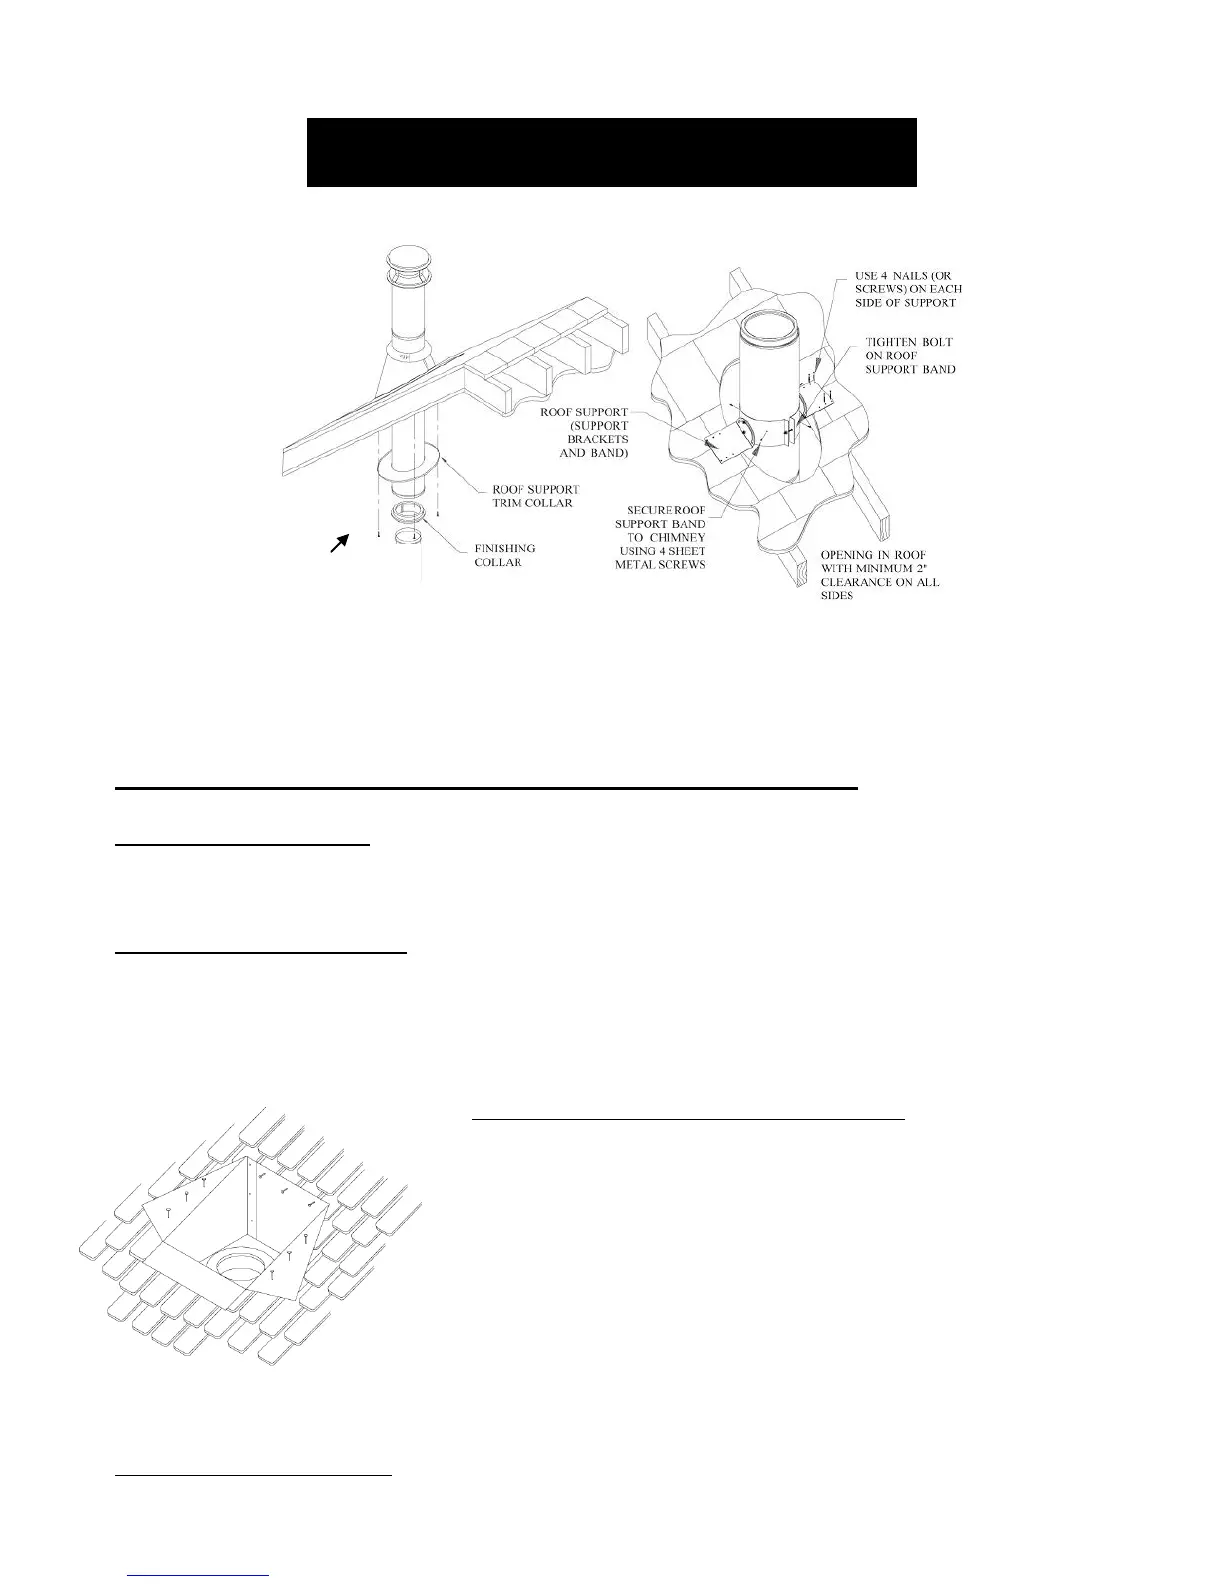
Roof supported installations are popular in A-frame/Chalet type homes. In roof supported installations, there
are typically two scenarios. One utilizes a square or round cathedral ceiling support and the second simply
utilizes a roof support bracket.
Scenario #1 - Cathedral Ceiling Support (Square “Tall Style”)
Step 1- Position appliance: locate appliance in accordance with the appliance manufacturer’s instructions and
clearance specifications. Pay particular attention to the outlet flue collar of the appliance and endeavor to
position it between the rafters and joists above.
Step 2 – Frame rough opening: Cut roof and ceiling openings as in the case of low attic installations. In the
case of cathedral ceilings a hole is only cut through the roof. Please refer to Step 2 on Page 8 for ceiling
openings and Step 5 on Page 10 for roof openings. Also, refer to Table 1 on Page 8 for rough opening
dimensions.
Step 4 – Finish the installation: Following steps 6 thru 8, starting on page 11.
Roof Supported Installation
Step 3 – Cathedral Ceiling support installation:
Level the Ceiling Support into the rough opening and
secure to the framing using a minimum of three 8-
penny nails or three #8 x 1 ½” wood screws per side.
Secure the trim collar using screws supplied with the
collar. The ceiling support must extend 3-inches
below the ceiling. In most cases, the cathedral
ceiling support will extend above the roof opening.
You can either trim the support to be flush with the
roof or slit the corners of the square support and fold
them down flat against the roof. Nail flaps with 1-
inch roofing nails.