Step 3 – Assemble the Chimney: Secure the first chimney section to the fireplace anchor plate with a
minimum of three self drilling screws. Attach the remaining chimney sections above while still maintaining the
required 2 inch air space between combustibles. Use a minimum of four self drilling screws to attach per joint.
Wall support brackets will need to be installed no more than 8 feet apart along the vertical chimney
length. The final chimney height should be determined using the specifications found on Page 3 under the
heading “Termination Above Roof.” Be sure to enclose the chimney if it should pass through occupied areas.
Step 4 – Completing the top termination: Please refer to Step 8 on page 12 for instructions to complete the top
termination. If the chimney is within a chase enclosure, please refer to Page 18, Step 7, Option 2.
Only install the Ventis Class-A Chimney System with factory built,
or zero clearance fireplaces, that approve its’ use. Be sure to read
thoroughly and follow the fireplace manufacturer’s installation
instructions.
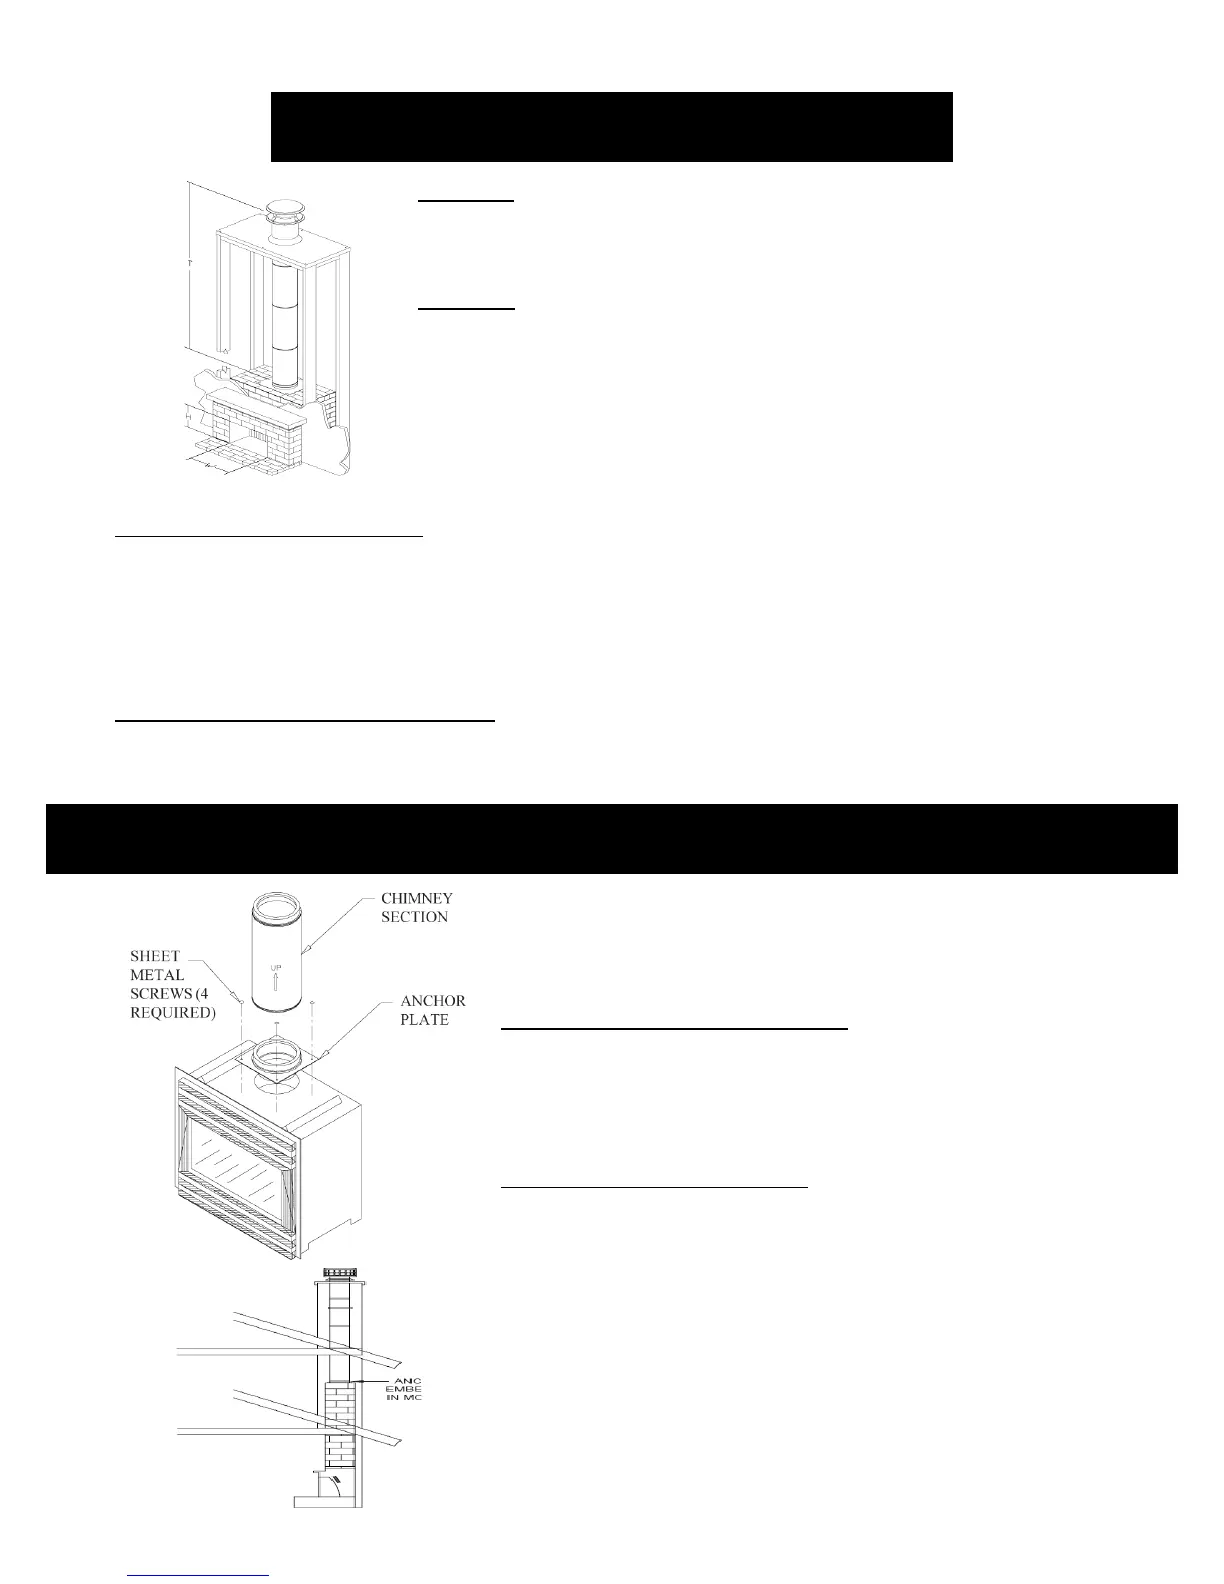
Step 1 – Install fireplace anchor plate. Seal the fireplace anchor
plate to the flue opening of the fireplace with high temperature
adhesive/sealant if permitted by the manufacturer. Secure the
fireplace anchor plate in each corner with four ½” sheet metal
screws. Always maintain a 1 inch air space clearance from the
anchor plate to combustibles.
Step 2 – Assemble the Chimney: Secure the first chimney section
to the fireplace anchor plate with a minimum of four self drilling
screws. Attach the remaining chimney sections above while still
maintaining the required 2 inch air space to combustibles. Use a
minimum of four self drilling screws to attach per joint. Wall
support brackets will need to be installed no more than 8 feet apart
along the vertical chimney length. The final chimney height should be
determined using the specifications found on Page 3 under the heading
“Termination Above Roof.” Be sure to enclose the chimney if it should
pass through occupied areas.
Step 1 – To properly size the chimney for a masonry fireplace,
the cross sectional area of the chimney (ID – inner diameter) is to
be a minimum of 1/12th of the area of the firebox opening.
Step 2 – Install fireplace anchor plate. Seal the fireplace anchor
plate to the masonry flue opening with high temperature
adhesive/sealant. Further secure the fireplace anchor plate in
each corner with four ¼” x 2” tapcon type masonry anchors.
Always maintain a 1 inch air space clearance from the mounting
plate to combustibles. Note: Make sure the mounting plate is
level and anchored to a flat surface. Modify the masonry to
obtain a flat level surface if needed
Masonry Fireplace Installation
Factory Built (Zero Clearance) Fireplace Installation