Step 1- Position appliance: locate appliance in accordance with the appliance manufacturer’s instructions and
clearance specifications. Pay particular attention to the outlet flue collar of the appliance and endeavor to
position it between the rafters and joists above.
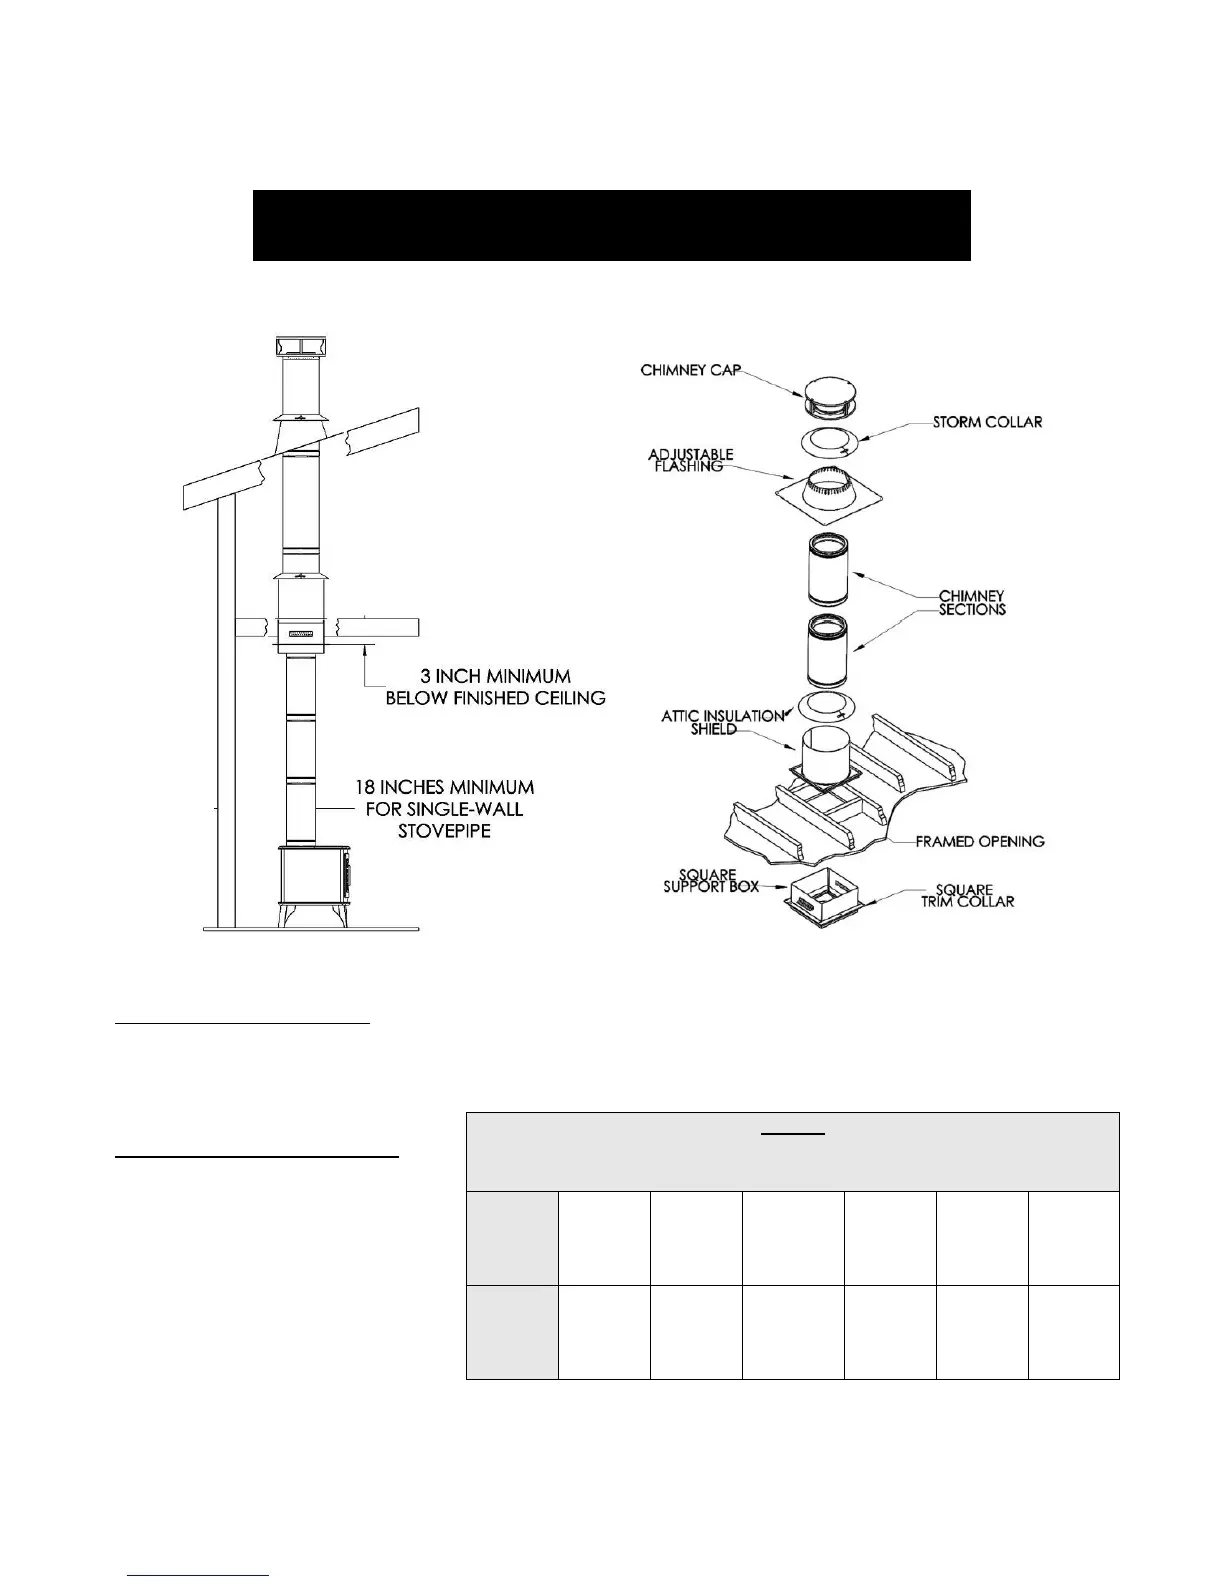
Step 2 Frame ceiling opening:
use a plumb bob from the ceiling to
the center of the appliance outlet flue
collar and mark this point on the
ceiling above. (Refer to table 1
regarding rough framing dimensions
for each chimney diameter). Mark
the ceiling for proper rough opening
and cut a hole for the appropriate
ceiling support. Frame rough
opening.
Table 1
Rough Opening Dimensions for:
Flat Ceiling Support, Cathedral Ceiling Support, Roof Opening, Wall Thimble,
Firestop Assemblies
Chimney
Diameter
(inside)
Ceiling Supported Installation