Instructions for Use EN Olympus AFU-100
22
WB135745-W10
7.3 Pump tube insertion and connection
The tubing sets are supplied in individual, sterile packaging. Check the sterile tubing
packaging for damage and remove the tubing from the packaging.
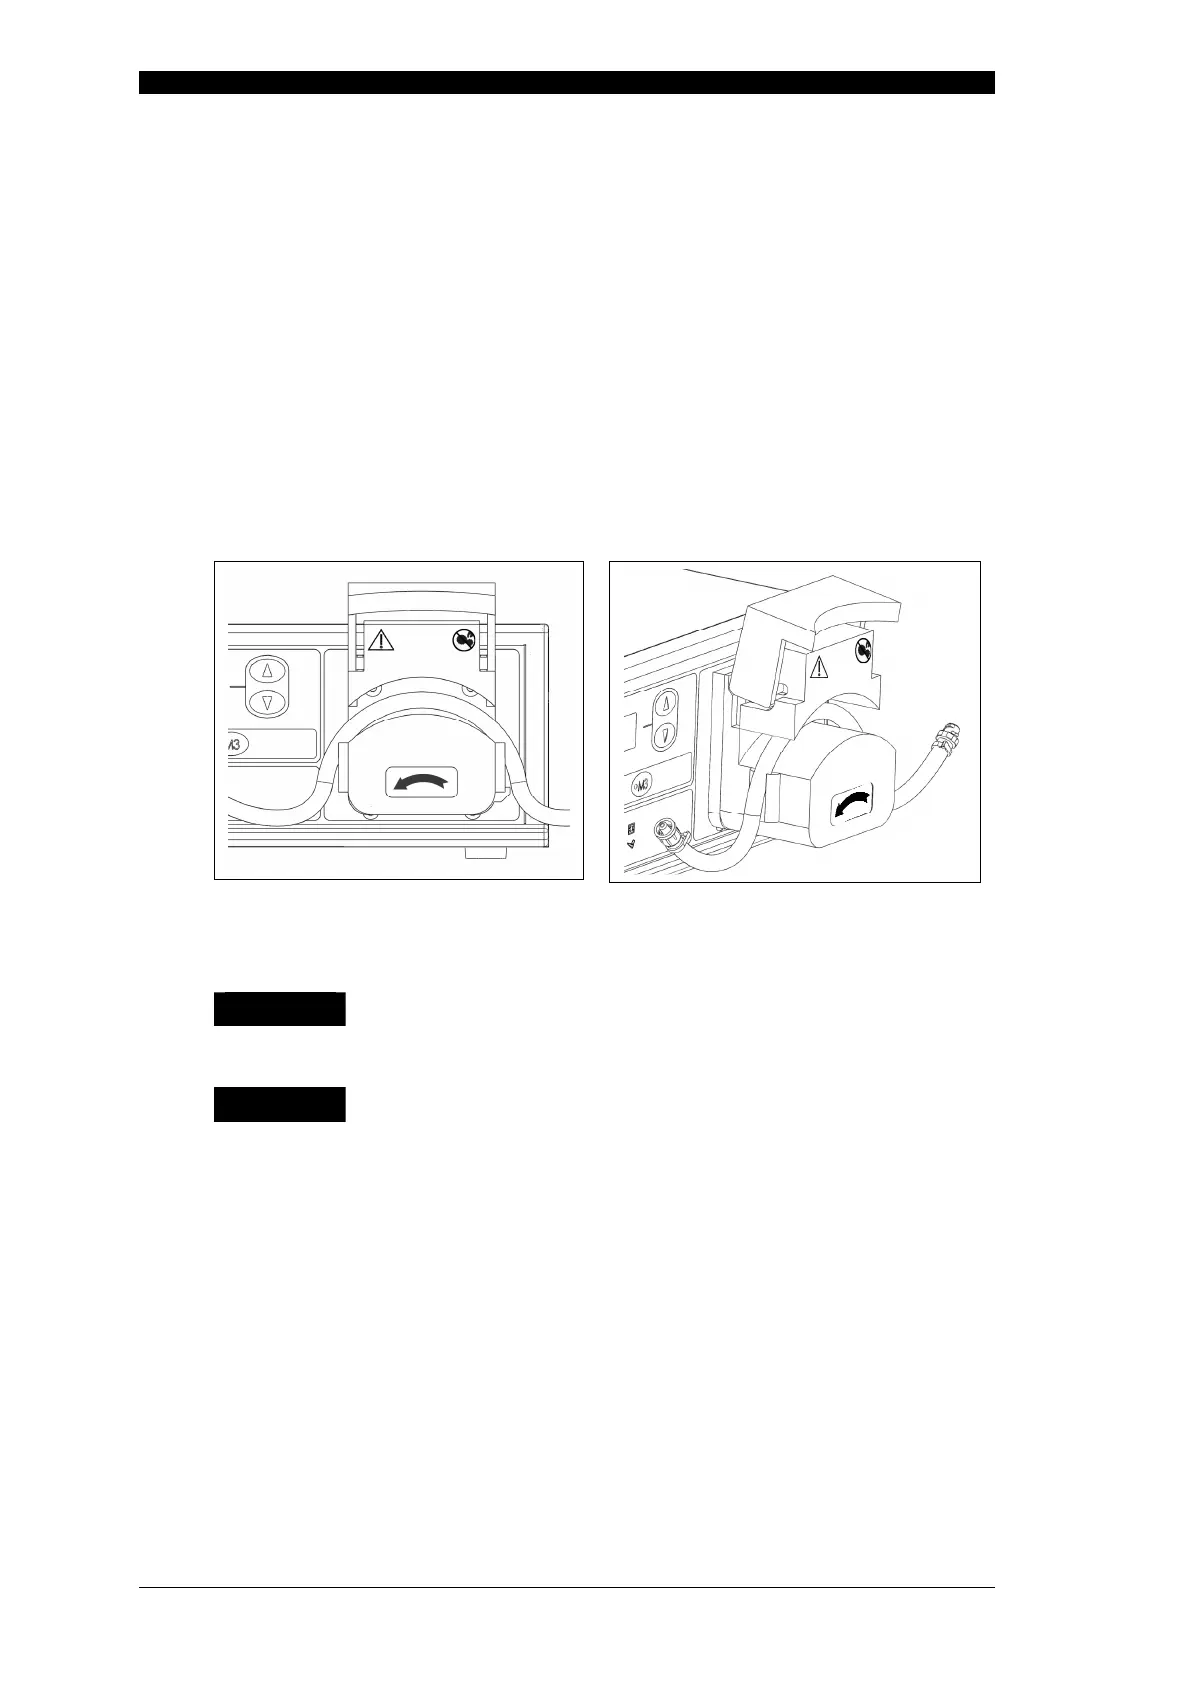
1) Lift the protective cover of the pump head.
2) Slide the pump tube into the open pump head as shown in fig. 7.1 and fig. 7.2. The
pump tube must not be twisted or stretched against the rollers.
3) Ensure the pump tube is located in the centre of the tube clamps and carefully
close the protective cover. Confirm that the pump tube is not crushed in the clamps
or over stretched.
4) Attach the ‘male’ connector of the fluid reservoir tube with the ‘female’ connector of
the pump tube (right side). Attach the ‘female’ connector of the instrument tube
with the ‘male’ connector of the pump tube (left side).
Fig. 7.1: Protective cover in opened Fig. 7.2: Protective cover in opened
position with inserted pump tube position with inserted pump tube
(front view) (side view)
WARNING
Always use compatible and sterile pump tubes (see chapter 11.2,
Technical data) as well as sterile liquids (e.g. isotonic saline solution).
Do not use damaged pump tubes.
CAUTION
Befor use, inspect the sterile pump tube package for tears, inadequate
sealing, or water damage. Do not use pump tubes from damaged sterile
packaging.
Do not use pump tubes after the expiration date displayed on the sterile
package.
The pump tube is a single-use product and must be disposed off after
being used once. Do not reuse or attempt to sterilize it.
Turn off the flow activation before inserting or removing the pump tube.
7.4 Flow selection
Select a flow level in accordance with the type of procedure and instruments to be used.
Refer to fig. 11.1, chapter 11.1 (Pump tube characteristics) for the flow rate of different
pump tubes.