- 33 -
Sample Holders
7 Performing an inspection with different sample types with a
CIX100 system
Before starting an inspection with a sample type other than uncovered membrane,
please make sure that all steps listed in this manual have been followed carefully,
i.e. [Shading Correction] and [White Balance] calibration have been performed for
each observation method.
Here, only the steps in a standard inspection configuration are explained which are
specific when new sample types have been added to the system. For all other
functionality of your CIX100 software, please refer to the CIX ASW software’s help.
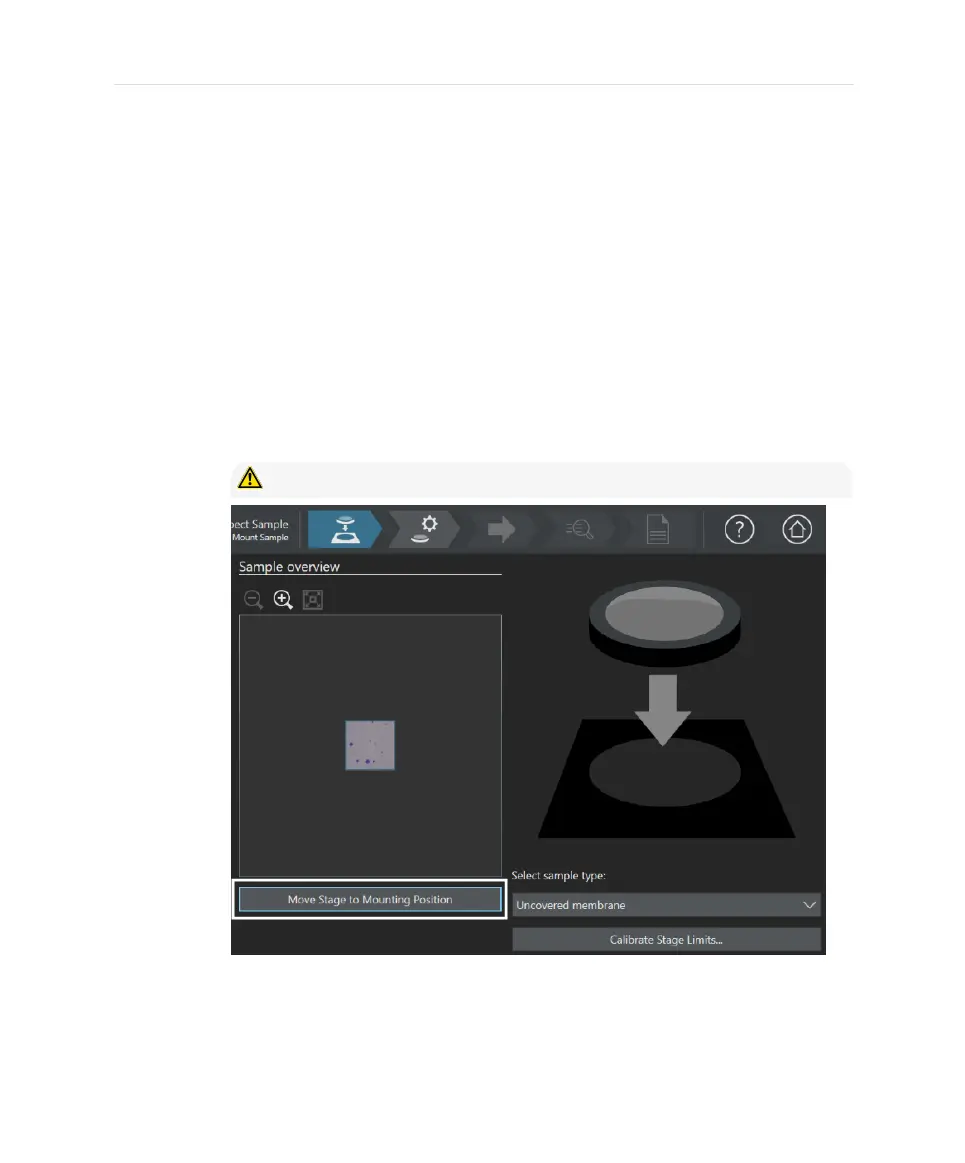
1. Start a sample inspection.
2. If you want to change the sample, select [Move Stage to Mounting Position].
CAUTION - Stage and objectives will be moving!
3. Mount your sample. Be careful to only mount samples suitable for the stage
limit calibration that was calibrated before, i.e. the sample must not hit the
objective during the stage movement back to the initial inspection position.
33