Dateandtimeinformationisrecordedonthecardtogetherwiththeimages.
ThefileNo.isalsoincludedwiththedateandtimeinformation.Besuretoset
thecorrectdateandtimebeforeusingthecamera.
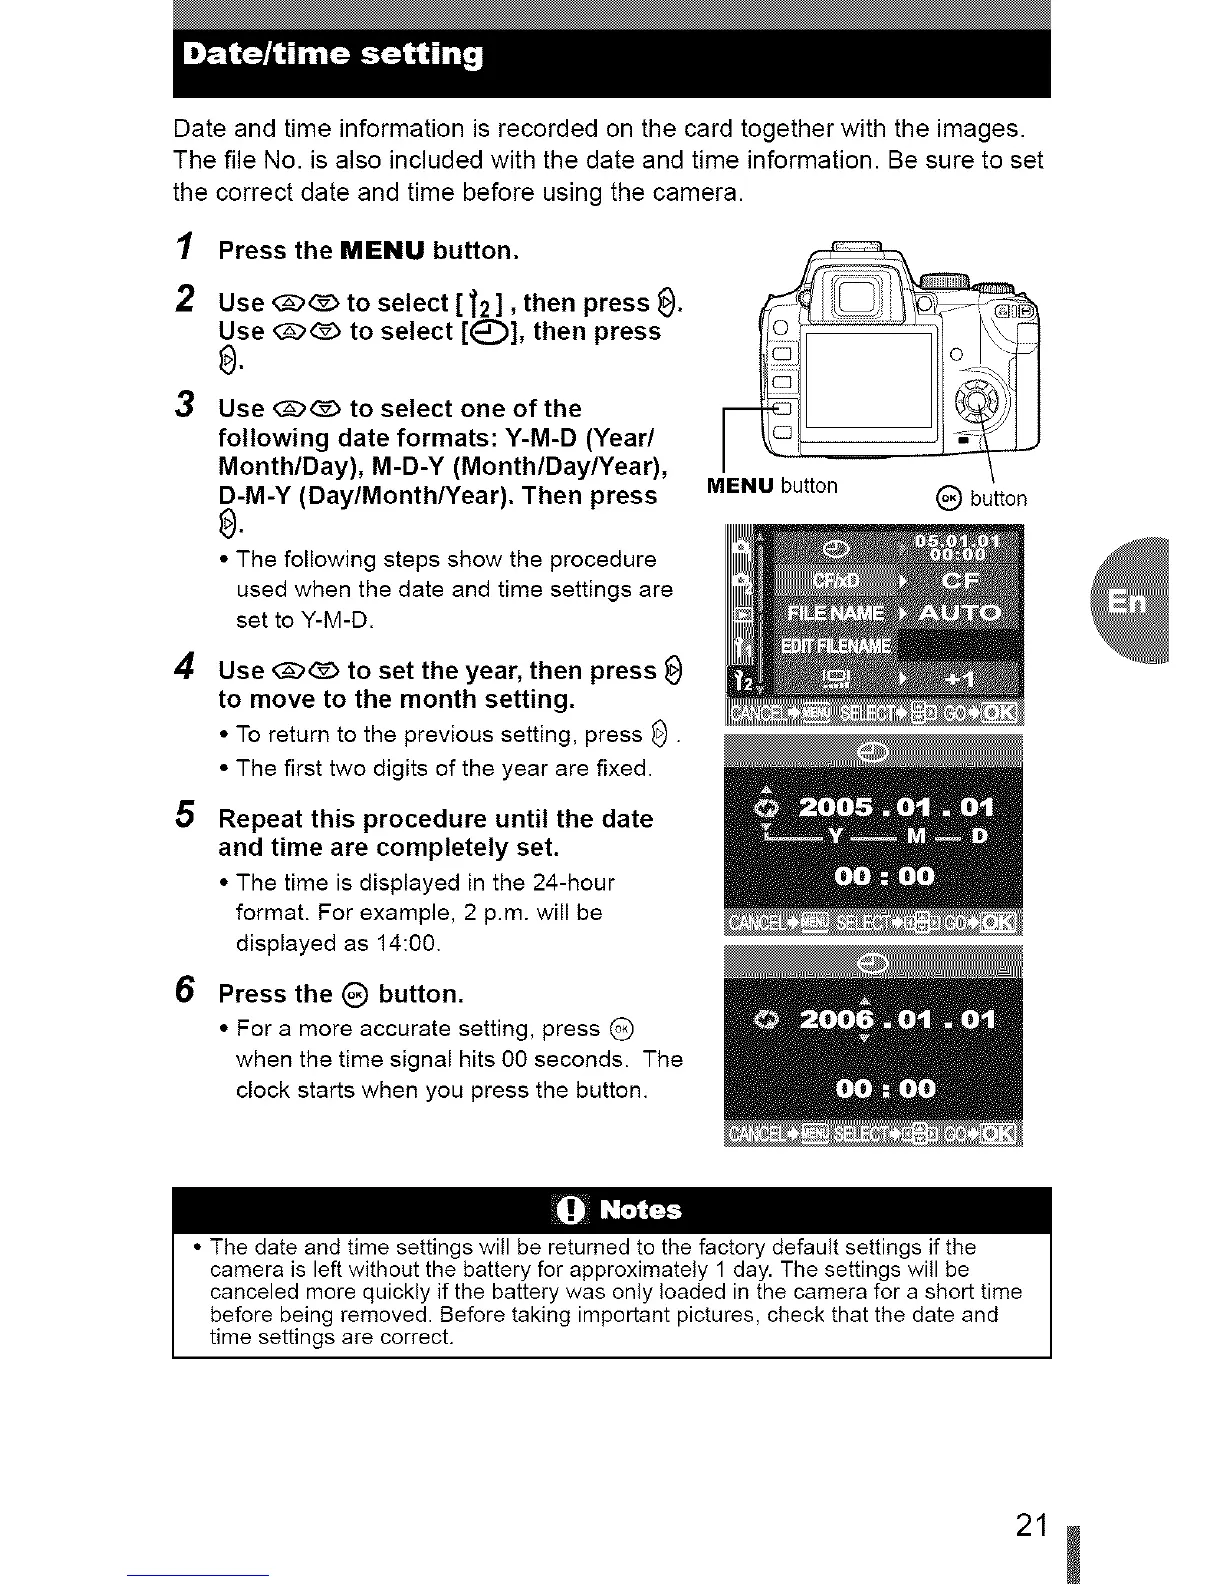
1 Press the MENU button.
2
3
Use @@ to select [ _2 ], then press _).
Use @@ to select [_)], then press
8.
Use @@ to select one of the
following date formats: Y-M-D (Year/
Month/Day), M-D-Y (Month/Day/Year),
D-M-Y (Day/Month/Year). Then press
8.
• The following steps show the procedure
used when the date and time settings are
set to Y-M-D.
MENU button (_) button
4
5
6
Use <3_@ to set the year, then press _)
to move to the month setting.
• To return to the previous setting, press _).
• The first two digits of the year are fixed.
Repeat this procedure until the date
and time are completely set.
• The time is displayed in the 24-hour
format. For example, 2 p.m. will be
displayed as 14:00.
Press the (_) button.
• For a more accurate setting, press (_)
when the time signal hits 00 seconds. The
clock starts when you press the button.
• The date and time settings will be returned to the factory default settings if the
camera is left without the battery for approximately 1 day. The settings will be
canceled more quickly if the battery was only loaded in the camera for a short time
before being removed. Before taking important pictures, check that the date and
time settings are correct.