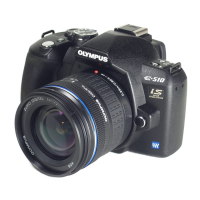
Do you have a question about the Olympus EVOLT E-510 and is the answer not in the manual?
Preparations and settings for the camera, and basic operation from shooting to playback.
Instructions for threading and securing the camera strap.
Steps for charging the lithium ion battery (BLM-1).
Procedure for inserting and securing the battery in the compartment.
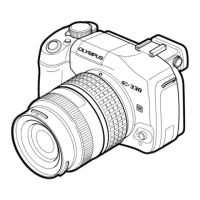
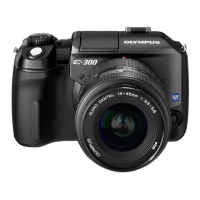
Steps for mounting and removing a lens from the camera body.
Instructions for inserting and removing CompactFlash and xD-Picture cards.
Steps to turn the camera on and off and check the LCD monitor.
How to adjust the viewfinder for clear vision using the diopter adjustment dial.
Procedure to set the camera's date and time for accurate image file naming.
Proper techniques for holding the camera to prevent shake.
How to achieve focus by half-pressing the shutter button.
Steps to fully press the shutter button to take a picture.
How to use the LCD monitor as a viewfinder for shooting.
Procedures for viewing and deleting images.
Explains how to change camera settings using the mode dial for different shooting scenarios.
Details the three methods for adjusting camera functions: control panel, direct buttons, and menu.
Guide on using the LCD monitor as a viewfinder for composition and shooting.
How to achieve sharp focus by correctly using the shutter button's half and full press.
Adjusting automatic exposure to achieve desired brightness in photos.
Adjusting white balance to accurately reproduce colors under different lighting conditions.
Tips for shooting outdoor scenery like forests, lakes, and beaches in daylight.
Guidance on photographing flowers to capture subtle color shades and details.
Techniques for capturing night scenes, including tripod use and manual focus.
Using pre-set scene modes to optimize camera settings for specific shooting situations.
Camera automatically sets aperture and shutter speed for optimal exposure.
User sets aperture; camera automatically sets shutter speed for depth of field control.
User sets shutter speed; camera automatically sets aperture for motion blur control.
User manually sets both aperture and shutter speed for full creative control.
Reduces camera shake for clearer shots in low light or high magnification.
Using focus lock to achieve focus when auto-focus fails or is difficult.
Automatically shoots multiple frames with varying exposure for optimal results.
Explains various flash modes like Auto, Red-eye reduction, and Slow synchronization.
Controls the built-in flash output to a fixed amount of light.
How to raise and use the built-in flash for illumination.
Adjusts the amount of light emitted by the flash for better contrast.
Shoots multiple frames changing flash output amount for each shot.
Using self-timer, sequential shooting, and remote control for capturing images.
Covers AF frame selection and various focus modes like S-AF, C-AF, and MF.
Settings related to image quality, color, and exposure like record mode, metering, and white balance.
Reduces noise generated during long exposures or high ISO shooting.
Selects how colors are reproduced on monitor or printer for file naming.
Viewing individual images and zooming in for close-up inspection.
Viewing two images side-by-side for comparison, useful for bracketing.
Shows multiple images at once or organizes images by date.
Displays detailed image information including histograms and shooting settings.
Automatically displays stored images one after another.
Automatically rotates images to display them in the correct orientation.
Connects the camera to a TV to view recorded images.
Basic image editing functions like black & white, sepia, and resizing.
Copying images between the camera and memory cards.
Protects selected or all images from accidental deletion.
Options for erasing single, selected, or all images from the card.
Restores factory default settings or previously saved custom settings.
Configures the AEL/AFL button for AF or metering operations.
Various settings like AEL metering, EV step, ISO limit, and WB compensation.
Controls whether the built-in flash pops up automatically in low light or scene modes.
Assigns functions to the < button for quick access.
Brightens the monitor during live view for easier subject confirmation.
Changes the function of the control dial for specific shooting modes.
Registers and recalls custom camera settings for quick switching.
Resets the lens focus to infinity when the camera power is turned off.
Customizes the rotational direction of the lens focus ring.
Sets the default cursor position for erase or format screens.
Instantly erases the last taken picture with the erase button.
Selects which file types (RAW, JPEG, or both) to erase for single-frame deletion.
Sets the automatic file naming convention for images.
Allows renaming image files for easier organization.
Displays the recently taken picture on the monitor for a brief check.
Turns off the focus lock confirmation beep sound.
Adjusts the brightness of the LCD monitor for optimal viewing.
Sets the time before the camera enters sleep mode to conserve battery.
Controls the monitor backlight duration after inactivity.
Configures the camera's USB connection mode for computer or printer.
Sets the on-screen display and error message language.
Selects the TV video signal type (NTSC or PAL) for playback.
Sets the duration before a menu disappears after button inactivity.
Sets the time before the camera automatically turns off due to inactivity.
Locks the arrow pad buttons to prevent accidental operations.
Saves printing data with pictures for later printing at a photo lab or printer.
Sets print reservation for individual pictures.
Applies print reservation to all pictures stored on the card.
Clears print reservation data for all or selected pictures.
Prints images directly from the camera to a PictBridge-compatible printer.
Simple printing process for selected pictures directly from the camera.
Customizes print options like print mode, paper size, and borderless printing.
Step-by-step process for using OLYMPUS Master software with the camera.
Overview of the image management and editing software provided with the camera.
Instructions for connecting the camera to a PC via USB cable.
Steps to launch the OLYMPUS Master application.
How to view and transfer images from the camera to the computer.
Safe procedures for unplugging the USB cable from the camera and computer.
Browsing and viewing images within the OLYMPUS Master software.
Steps to add new display languages to the camera via software.
How to transfer images using the camera's USB Mass Storage Class feature.
Common issues and solutions before beginning photography.
Advice on focusing on subjects and handling common shooting challenges.
Techniques for photographing subjects with bright backgrounds.
Troubleshooting tips when photos are over or underexposed.
Addressing issues with bright spots on images, possibly due to stuck pixels.
Tips on increasing picture count, using new cards, and battery life.
How to read the histogram display for exposure confirmation in challenging lighting.
Explains common error messages and their corrective actions.
Information on usable cards and precautions for Microdrive use.
Steps to format a memory card before first use or after computer formatting.
Details on the recommended battery, charger, and charging procedures.
Information on using the charger with different international power outlets.
A comprehensive list of menu functions and their corresponding page references.
A table showing which functions are available in different shooting modes.
Guidance on selecting and using appropriate lenses for the camera.
Information about the lens mount standard used by the camera.
Features of Olympus's interchangeable lenses designed for the Four Thirds system.
Precautions and guidelines for attaching and handling lenses.
Technical specifications for various interchangeable lenses.
Essential safety warnings and precautions for using the product.
General advice on product usage, cleaning, attachments, and environmental factors.
Warnings related to camera handling, temperature, and potential hazards.
Guidelines for safe use, charging, and storage of batteries.
Precautions regarding operating and storing the camera in various environmental conditions.
Notes on monitor behavior and potential visual artifacts.
Specific precautions for handling and using camera lenses.
Includes warranty, copyright, FCC notice, and trademarks.
Limits Olympus's liability concerning product use and content.
Assumes no responsibility for unauthorized use of copyrighted material.
States rights regarding reproduction of manual content and software.
Compliance information for radio and television interference.
Details the terms and conditions of the product warranty and claims process.
Lists registered trademarks and product names related to the camera and software.
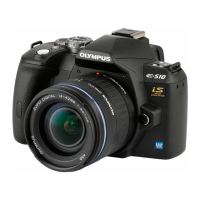
| Camera Type | Digital SLR |
|---|---|
| Sensor Type | Live MOS |
| Sensor Size | 17.3 x 13.0 mm |
| Effective Pixels | 10.0 Megapixels |
| Image Processor | TruePic III |
| Image Stabilization | Sensor-shift image stabilization |
| Shutter Speed | 60 - 1/4000 sec |
| Lens Mount | Four Thirds |
| ISO Sensitivity | ISO 100 - 1600 |
| Autofocus | 3-point TTL Phase Difference Detection |
| Continuous Shooting | 3 fps |
| LCD Screen | 2.5 inch, 230, 000 pixels |
| Viewfinder | Optical, Pentamirror |
| Storage Media | CompactFlash, xD-Picture Card |
| Weight | 460 g (body only) |
| Dimensions | 136 x 92 x 68 mm |