Do you have a question about the Olympus E-M1 and is the answer not in the manual?
Explains symbols used in the manual for cautions, notes, tips, and references.
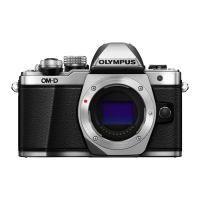
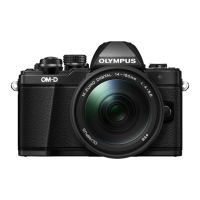
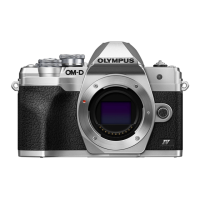
Identifies and labels all external buttons, dials, and connectors on the camera.
Provides step-by-step instructions for charging and loading the camera's battery.
Details the process for correctly inserting and removing memory cards from the camera.
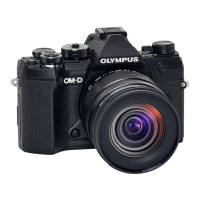
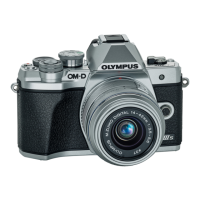
Explains the procedure for mounting and dismounting interchangeable lenses onto the camera body.
Guides users on how to securely connect an external flash unit to the camera's hot shoe.
Instructs on how to turn the camera on and off using the power lever and monitor.
Explains how to set the camera's internal clock for accurate image timestamping.
Describes how to use the mode dial to select various shooting modes like Auto, P, A, S, M, etc.
Explains how to switch between viewfinder and live view shooting modes.
Details the process of composing and capturing still photographs using the viewfinder.
Explains how to record video clips using the camera, including basic operations.
Describes how to access and adjust shooting settings via the on-screen super control panel.
Covers capturing still images using the monitor display for composition and focusing.
Explains how to utilize the touch screen for focusing, shooting, and navigating menus.
Details how to prevent accidental deletion of important photographs from the memory card.
Explains the process for deleting unwanted images from the camera's memory card.
Explains the various information icons and data displayed in the electronic viewfinder.
Details the information icons and data displayed on the camera's monitor during live view shooting.
Describes how to cycle through different information display modes using the INFO button.
Explains how to use shooting modes like P, A, S, M for creative control over exposure.
Explains how to activate and configure the image stabilizer to reduce blur.
Covers selecting and customizing picture modes for different image looks and effects.
Explains the different metering modes for accurately measuring scene brightness.
Details the various autofocus modes available for capturing sharp images.
Provides an overview of navigating and operating the camera's main menu system.
Explains the importance and procedure for formatting memory cards before use.
Covers how to reset camera settings to factory defaults or save custom configurations.
Customizes autofocus and manual focus behavior, including AF modes and MF Assist.
Allows users to assign custom functions to buttons, dials, and the lever.
Configures display options, HDMI output, and PC connection settings.
Adjusts exposure compensation increments, noise reduction, and ISO sensitivity.
Covers JPEG image quality settings, white balance adjustments, and color space.
Manages file naming, erase behavior, print settings, and copyright information.
Configures movie recording modes, effects, volume, and EVF settings.
Provides access to features like pixel mapping, exposure shift, and touch screen settings.
Details sending and receiving images wirelessly via OLYMPUS PENPAL.
Explains settings for external electronic viewfinders, including brightness and auto switching.
Explains how to create print orders for DPOF-compatible printers.
Guides on printing images directly from the camera to a PictBridge printer.
Details how to choose specific images and print data settings for printing.
Provides instructions for installing the necessary Olympus software on a computer.
Explains how to transfer images directly to a computer using USB Mass Storage Class.
Guides on connecting the camera to a smartphone via Wi-Fi for image transfer and remote operation.
Provides information on using, charging, and handling the camera's lithium-ion battery.
Lists compatible memory card types and explains the SD card write protect switch.
Details file sizes and storage capacity for different image quality and compression settings.
Lists specifications and features of compatible M.ZUIKO DIGITAL lenses.
Provides detailed technical specifications for various Olympus lenses.
Explains how to attach and use the power battery holder for extended camera operation.
Details compatibility and usage of external flash units with the camera system.
Lists key accessories such as lens adapters, remote cables, and microphones.
Offers advice on common shooting issues like focus problems and automatic power off.
Lists common monitor indications, their possible causes, and corrective actions.
Provides guidance on proper camera cleaning techniques and storage procedures.
Explains the pixel mapping feature for checking and adjusting image sensor and processing functions.
Lists functions available within the camera's Shooting Menu tab.
Lists functions available within the camera's Playback Menu tab.
Lists functions available within the camera's Setup Menu tab.
Lists functions available within the camera's Custom Menu tab for personalization.
Details new features and changes introduced in firmware version 2.0.
Details new features and changes introduced in firmware version 3.0.
Details new features and changes introduced in firmware version 4.0.
| Megapixel | 16.3 MP |
|---|---|
| Camera type | SLR Camera Body |
| Sensor type | Live MOS |
| Image stabilizer | Yes |
| Image sensor size | 4/3 \ |
| Image formats supported | JPG, MPO, RAW |
| Supported aspect ratios | 3:2, 3:4, 4:3, 16:9 |
| Maximum image resolution | 4608 x 3456 pixels |
| Still image resolution(s) | 4608 x 3456, 4608 x 3456, 2560 x 1920, 1024 x 768 |
| Optical zoom | - x |
| Focal length range | - mm |
| Minimum aperture number | - |
| Focus | TTL |
| Focus adjustment | Auto/Manual |
| Auto focusing (AF) modes | Continuous Auto Focus, Single Auto Focus, Tracking Auto Focus |
| Auto Focus (AF) points selection | Manual |
| ISO sensitivity | 1600, 25600 |
| Light exposure modes | Aperture priority AE, Auto, Manual, Shutter priority AE |
| Light exposure control | Program AE |
| Fastest camera shutter speed | 1/8000 s |
| Slowest camera shutter speed | 60 s |
| Flash modes | Auto, Fill-in, Red-eye reduction, Slow synchronization |
| Flash sync-speed | 0.003125 s |
| Flash exposure correction | ±3EV (1/2, 1/3, 1 EV step) |
| Video resolutions | 640 x 480, 1280 x 720 pixels |
| Motion JPEG frame rate | 30 fps |
| Video formats supported | AVCHD, AVI, H.264, MOV, MPEG4 |
| Maximum video resolution | 1920 x 1080 pixels |
| Analog signal format system | NTSC, PAL |
| Audio formats supported | PCM |
| Memory slots | 1 |
| Internal memory | - MB |
| Compatible memory cards | SD, SDHC, SDXC |
| Display diagonal | 3 \ |
| Display aspect ratio | 3:2 |
| Display resolution (numeric) | 1040000 pixels |
| Magnification | 1.48 x |
| Viewfinder type | Electronic |
| USB version | 2.0 |
| Power source type | Battery |
| Product color | Black |
| Scene modes | Beach, Candlelight, Children, Documents, Fireworks, Night, Panorama, Portrait, Sports, Sunset, Landscape (scenery) |
| Photo effects | Art, Sepia |
| White balance | Auto, Flash, Fluorescent, Shade, Tungsten, Underwater |
| Self-timer delay | 2, 12 s |
| Camera file system | DCF, DPOF 1.1, Exif 2.2 |
| On Screen Display (OSD) languages | CZE, DAN, DEU, DUT, ENG, ESP, EST, FIN, FRE, GRE, HUN, ITA, LAV, LIT, NOR, POL, POR, RUS, SER, SLK, SLV, SWE, TUR, UKR |
| Battery life (CIPA standard) | 330 shots |
| Depth | 63.1 mm |
|---|---|
| Width | 130.4 mm |
| Height | 93.5 mm |
| Weight | 443 g |
| Weight (including battery) | 497 g |