Do you have a question about the Olympus E-M1 MARK II and is the answer not in the manual?
Lists items included with the camera and initial setup steps.
Instructions for charging and inserting the camera battery for first use.
Steps for inserting SD memory cards into the camera's card slots.
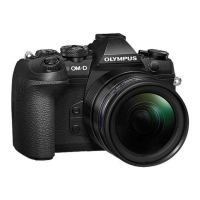
Guide on how to properly attach interchangeable lenses to the camera body.
Steps to power on the camera and check battery status on the monitor.
Procedure for setting the camera's date, time, and date format for image recording.
Explains various information displayed on the monitor during shooting modes.
How to switch between the monitor and viewfinder displays using the eye sensor.
Basic steps for framing and shooting still images using the mode dial.
Using Program AE mode where the camera automatically sets exposure.
Using Aperture Priority mode to control depth of field and let the camera set shutter speed.
Using Shutter Priority mode to control motion blur and let the camera set aperture.
Using Manual mode for full control over aperture and shutter speed.
Techniques for capturing images with long exposure times for night scenes or light trails.
Using iAUTO mode for automatic scene adjustment and live guides.
Applying artistic effects to images directly in the camera.
Saving and recalling personalized camera settings for quick access.
Basic steps and considerations for recording video clips with the camera.
Exploring movie recording features and applying effects during filming.
Adjusting exposure compensation to make images brighter or darker.
Setting ISO sensitivity to manage image brightness in different lighting conditions.
Selecting the appropriate autofocus mode for still photography and movies.
Understanding and selecting different metering modes for accurate exposure.
How to lock exposure settings separately from focus for precise shots.
Techniques for capturing multiple shots rapidly or using a self-timer.
Using electronic shutter to prevent camera shake from button operation.
Capturing images with enhanced detail by using the high-resolution shooting mode.
Combining multiple exposures to create images with a wider dynamic range.
Accessing and adjusting key shooting settings via the LV super control panel.
Mounting and using the external flash unit for improved lighting.
Fine-tuning the flash intensity to prevent over or underexposure.
Selecting picture modes to adjust image appearance like vividness, sharpness, and contrast.
Details on the information displayed when viewing images on the camera.
How to cycle through different information display screens during playback.
Basic operations for viewing still images and movies on the camera.
Navigating through images using index or calendar views.
Viewing still images, including close-up playback and rotation.
Setting up and viewing an automatic slideshow of images on the camera.
Playing back movie files, including handling large files and playback controls.
Preventing accidental deletion of important images by applying protection.
Steps for deleting individual or multiple images from the memory card.
Manipulating images and menus using the camera's touch screen interface.
Understanding how to navigate and operate the camera's main menu system.
Restoring camera settings to factory defaults to resolve issues or start fresh.
Saving and recalling personalized camera settings for quick access.
Selecting picture modes to adjust image appearance like vividness, sharpness, and contrast.
Setting the camera for automatic interval shooting to create time-lapse sequences.
Capturing a series of shots with varying exposure, white balance, or flash settings.
Combining multiple exposures to create images with a wider dynamic range.
Correcting perspective distortion for architectural shots or exaggerating effects.
Activating high-resolution shooting for enhanced image detail by moving the sensor.
Accessing and configuring settings specific to movie recording modes.
Selecting movie resolution, bit rate, and frame rate combinations.
Configuring audio recording settings, including microphone sensitivity and volume limiter.
Modifying still images like cropping, adjusting aspect ratio, or converting to black and white.
Editing movie clips by removing unwanted sections from the beginning or end.
Accessing and modifying basic camera functions like date, language, and display settings.
Preparing memory cards for use by formatting them and deleting all data.
Overview of how to customize camera settings through various custom menu categories.
Detailed settings for autofocus modes, AF scanner, and focus limiter.
Customizing the functions assigned to buttons, dials, and levers for personalized control.
Configuring display options for shooting modes and information screens.
Customizing exposure, ISO, and bulb/time shooting settings.
Adjusting JPEG quality, pixel count, white balance, and color space settings.
Managing file naming conventions, copyright information, and card slot settings.
Options for quick erasing, RAW+JPEG erasure, and priority settings.
Customizing the electronic viewfinder (EVF) display and settings.
Accessing utility functions like pixel mapping, touchscreen settings, and menu recall.
Customizing autofocus and auto-exposure lock functions for different focus modes.
Using focus assist features like magnification and peaking for manual focus.
Switching dial and button functions based on the Fn lever position for personalized control.
Selecting which control panels are displayed during shooting for easier access.
Adjusting shooting parameters directly from the live view screen.
Customizing playback information displays like histograms and highlight/shadow data.
Utilizing the selfie assist menu and touch screen for self-portraits.
Connecting the camera to a TV via HDMI to view images and movies on a larger screen.
Understanding shutter speed limitations and settings when using the flash.
Selecting which memory card slot to use for recording images and movies.
Customizing the information displayed in the electronic viewfinder.
Step-by-step guide to establish a wireless connection between the camera and a smartphone.
Selecting and transferring images from the camera to a connected smartphone.
Controlling camera shooting functions remotely using a smartphone app.
Tagging images with GPS location data by transferring logs from a smartphone.
Configuring different connection methods (Private, One-Time) for smartphone connectivity.
Steps to connect the camera to a computer via USB for data transfer.
Process for transferring images from the camera to a computer using USB.
Information on installing OLYMPUS Viewer 3 and the camera updater software.
Printing images directly from the camera to a PictBridge-compatible printer.
Creating digital print orders to list images for printing at a service or via a DPOF printer.
Important warnings and guidelines for using the camera's battery and charger safely.
Information on compatible memory card types and their usage.
Table detailing record modes, file sizes, and storable picture counts.
Information on compatible lenses and lens-camera combinations.
Details about the optional power battery holder for extended camera operation.
Overview of compatible external flash units and their functions.
Setting up and using external flash units wirelessly for advanced lighting control.
Proper procedures for cleaning camera components and storing the device.
Using Pixel Mapping to check and adjust image pickup device and processing functions.
Information on warranty, repairs, and contacting Olympus for service.
General tips and troubleshooting advice for common shooting issues.
Troubleshooting steps when the camera fails to power on despite battery presence.
Troubleshooting steps when pressing the shutter button does not result in an image.
Guidance on resolving autofocus issues with difficult subjects or lighting.
A guide to monitor indications, possible causes, and corrective actions for errors.
A reference table of menu functions, their defaults, and corresponding page numbers.
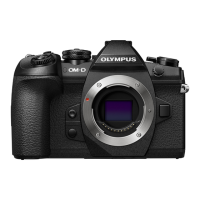
Technical specifications for the camera body, lens mount, and image pickup device.
Technical details regarding memory, recording system, and file formats.
Specifications for the included FL-LM3 external flash unit.
Essential safety instructions covering product usage, cleaning, and environment.
Emphasizes using only specified Olympus batteries and chargers for safety.
Compliance information regarding FCC rules for digital devices and radio frequency energy.
Details of the limited warranty provided by Olympus for products and accessories.
Instructions on how to coordinate product repair service with Olympus.
| Material | Magnesium |
|---|---|
| Product color | Black |
| Optical zoom | - x |
| Lens mount interface | Micro Four Thirds (MFT) |
| Megapixel | 20.4 MP |
| Camera type | MILC Body |
| Sensor type | Live MOS |
| Image stabilizer | Yes |
| Total megapixels | 21.8 MP |
| Image sensor size | 4/3 \ |
| Image formats supported | JPG, RAW |
| Supported aspect ratios | 1:1, 3:2, 3:4, 4:3, 16:9 |
| Maximum image resolution | 5184 x 3888 pixels |
| Image sensor size (W x H) | 17.3 x 13 mm |
| Image stabilizer location | Body |
| Still image resolution(s) | 8160 x 6120, 5760 x 4320, 10368 x 7776 |
| Viewfinder type | Electronic |
| Scene modes | Portrait |
| Image editing | Resizing, Trimming |
| Photo effects | Black&White, Sepia |
| White balance | Auto, Flash, Fluorescent, Shade, Sunny, Tungsten, Underwater |
| Shooting modes | Aperture priority, Auto, Manual, Program, Shutter priority |
| GPS (satellite) | No |
| Image processor | TruePic VIII |
| Self-timer delay | 2, 12 s |
| Languages support | Multi |
| Camera file system | DCF, Exif 2.3, RAW |
| Diopter adjustment (D-D) | -4 - 2 |
| Field of view | 100 % |
| Display diagonal | 3 \ |
| Display aspect ratio | 3:2 |
| Display resolution (numeric) | 1037000 pixels |
| Focus adjustment | Auto/Manual |
| Auto Focus (AF) points | 800 |
| Auto focusing (AF) modes | Continuous Auto Focus, Single Auto Focus, Tracking Auto Focus |
| Normal focusing range (tele) | - m |
| Light metering | Centre-weighted, Spot |
| ISO sensitivity | 200, 25600, Auto |
| Light exposure modes | Aperture priority AE, Auto, Manual, Shutter priority AE |
| ISO sensitivity (max) | 25600 |
| ISO sensitivity (min) | 200 |
| Light exposure control | Program AE |
| Light exposure correction | ± 5EV (1/2EV; 1/3EV step) |
| Fastest camera shutter speed | 1/8000 s |
| Slowest camera shutter speed | 60 s |
| Flash modes | Auto, Fill-in, Flash off, Manual, Red-eye reduction, Slow synchronization |
| Flash guide number | 12.9 m |
| Flash exposure correction | ±3EV (1/2, 1/3, 1 EV step) |
| Battery life (CIPA standard) | 440 shots |
| Video resolutions | 640 x 480, 1280 x 720, 1920 x 1080, 3840 x 2160, 4096 x 2160 pixels |
| Motion JPEG frame rate | 60 fps |
| Video formats supported | AVI, H.264, M-JPEG, MOV, MPEG4 |
| Maximum video resolution | 4096 x 2160 pixels |
| Resolution at capture speed | 640x480@30fps, 1280x720@30fps, 1920x1080@24fps, 1920x1080@25fps, 1920x1080@30fps, 1920x1080@50fps, 1920x1080@60fps, 3840x2160@24fps, 3840x2160@25fps, 3840x2160@30fps, 4096x2160@24fps |
| Audio system | stereo |
| Audio formats supported | PCM |
| Compatible memory cards | SD, SDHC, SDXC |
| PictBridge | - |
| USB version | 3.2 Gen 1 (3.1 Gen 1) |
| Headphone outputs | 1 |
| HDMI connector type | Micro |
| Operating temperature (T-T) | -10 - 40 °C |
| Storage relative humidity (H-H) | 10 - 90 % |
| Operating relative humidity (H-H) | 30 - 90 % |
| Cables included | USB |
| Bundled software | Olympus Viewer |
| Depth | 68.9 mm |
|---|---|
| Width | 134.1 mm |
| Height | 90.9 mm |
| Weight | 498 g |
| Weight (including battery) | 574 g |



 Loading...