EasyManua.ls Logo

Olympus U-LH100HGAPO - User Manual

Olympus U-LH100HGAPO
52 pages
Print Icon
To Next Page IconTo Next Page
Loading...
INSTRUCTIONS
A X 7 6 2 5
BX-URA2
BX-RFA
U-LH100HGAPO
U-LH100HG
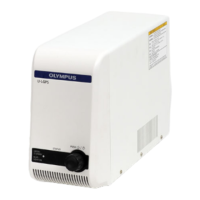
Power Supply Unit
U-25ND6-2
U-25ND25-2
U-25ND50-2
U-RSL6
U-RSL6EM
BX-RFSS
U-EXBABG
U-EXBAUB
U-EXBAUG
REFLECTED
FLUORESCENCE
SYSTEM
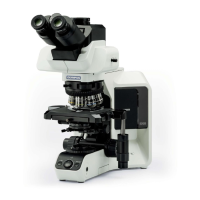
This instruction manual is for the Olympus Reflected Fluorescence System. To ensure the safety,
obtain optimum performance and to familiarize yourself fully with the use of this system, we recom-
mend that you study this manual thoroughly before operating the microscope. Retain this instruc-
tion manual in an easily accessible place near the work desk for future reference.
This publication is printed on 100% recycled paper

Table of Contents

Other manuals for Olympus U-LH100HGAPO

Questions and Answers

  • O
    osharpSep 23, 2025
    Why does the Olympus U-LH100HGAPO field contain dark, spot-like areas?
    • B
      Barbara MillerSep 23, 2025
      If the field of your Olympus Microscope contains dark, spot-like areas, it is likely due to dirt or dust on the burner or on the burner side of the collector lens. Clean these components to resolve the issue.
  • P
    Patricia WrightAug 23, 2025
    Why is the field of view on my Olympus Microscope obscured?
    • J
      jessecruzAug 23, 2025
      If the field of view in your Olympus Microscope is obscured or not evenly illuminated, several factors could be the cause. First, ensure that the objective is correctly engaged in the light path and that the revolving nosepiece clicks correctly into place. Second, verify that the fluorescence mirror unit in use matches the specimen. Third, fully enlarge the field iris diaphragm. Fourth, make sure that the ND slider clicks properly into place. Finally, the mercury burner might not be centered, or the focusing could be defective; in this case, center the mercury burner or perform a focusing adjustment.
  • M
    Michael PowersAug 25, 2025
    Why is the mercury burner on my Olympus U-LH100HGAPO Microscope flickering?
    • P
      Philip RobertsonAug 25, 2025
      If the mercury burner in your Olympus Microscope is flickering or appears dark, it could be due to several reasons. If it is soon after ignition, allow it to run for at least 10 minutes. If the burner life has expired, and the hour counter indicates 200 hours (USH102D) or 300 hours (HBO103W/2), replace it. Also, the burner might be deviated from the optical axis, so you should center the mercury burner.
  • M
    Mikayla MaddenAug 27, 2025
    How to fix a dark field of view on an Olympus Microscope?
    • J
      Jamie Mitchell MDAug 27, 2025
      If the bulb lights up but the field of view remains dark on your Olympus Microscope, ensure that the shutter is released. Also, check if the ND filter is engaged in the light path and disengage it if necessary. Verify that the fluorescence mirror unit is correctly engaged in the light path and that the aperture and field iris diaphragms are fully enlarged until they circumscribe the field of view. Finally, confirm that the fluorescence mirror unit in use matches the specimen.
  • L
    Laura EllisAug 27, 2025
    What to do if the Olympus U-LH100HGAPO Microscope turns on but the mercury burner won't light?
    • R
      Ronald HernandezAug 27, 2025
      If the main switch of your Olympus Microscope turns the system on, but the mercury burner does not light, check that the connectors are firmly connected. Ensure the mercury burner is attached. Verify that the safety device in the lamp housing is correctly set up. If auto ignition is malfunctioning, set the main switch of the power supply unit to “ ” (OFF) then “ I ” (ON) again; repeat if necessary.
  • V
    Vanessa RamosSep 17, 2025
    Why is the image on my Olympus U-LH100HGAPO Microscope low quality, not sharp, or poor in contrast?
    • O
      ogriffinSep 17, 2025
      If the image from your Olympus Microscope is low quality, not sharp, or poor in contrast, the following steps may help: Clean the objective or filter thoroughly to remove any dirt or dust. Fully enlarge the aperture iris diaphragm and enlarge the field iris diaphragm until it circumscribes the field of view. Ensure that the fluorescence mirror unit matches the specimen being viewed.
  • M
    Melissa LambertSep 14, 2025
    Why is the Olympus U-LH100HGAPO burner on, but the light is dark or not visible from the eyepiece?
    • M
      Mark JordanSep 14, 2025
      If the burner is ON but the light cannot be seen from the eyepiece or is dark, check the following: First, open the shutter. Second, remove the ND filter if it is engaged in the light path. Third, ensure the fluorescence mirror unit is correctly engaged in the light path. Fourth, fully enlarge the aperture iris diaphragm and enlarge the field iris diaphragm until it circumscribes the field of view. Finally, make sure the fluorescence mirror unit matches the specimen.
  • V
    valerievalenzuelaSep 15, 2025
    How to fix an obscured or unevenly illuminated field of view on an Olympus U-LH100HGAPO?
    • M
      Martin MartinSep 16, 2025
      If the field of view of your Olympus Microscope is obscured or not evenly illuminated, consider these potential causes: Ensure the objective is correctly engaged in the light path by making sure the revolving nosepiece clicks properly into place. Verify that the fluorescence mirror unit is correctly engaged in the light path. Fully enlarge the field iris diaphragm. Confirm that the ND slider is stopped at the click position. Center the mercury burner or perform a focusing adjustment.
  • L
    Lindsay ScottSep 6, 2025
    What to do if the field of view on my Olympus Microscope is obscured?
    • J
      Joseph TranSep 6, 2025
      If your Olympus Microscope's field of view is obscured, ensure the objective and fluorescence mirror unit are correctly engaged in the light path. The revolving nosepiece and ND slider should click into place properly. Also, check that the field iris diaphragm is not set too small; center the aperture iris diaphragm and field iris diaphragm, then fully enlarge the field iris diaphragm. Finally, ensure the mercury burner is properly centered.
  • A
    Annette GonzalesSep 3, 2025
    Why won't the turret rotate on my Olympus U-LH100HGAPO Microscope?
    • C
      Christine EvansSep 3, 2025
      If the turret on your Olympus Microscope will not rotate, or stops in the middle of movement, it may be because the fluorescence mirror unit is slipping out of the turret. Remove the turret and place the fluorescence mirror unit in the correct position securely.

Summary

IMPORTANT

General Safety Precautions

Essential safety guidelines for operating the system and handling its components.

I. REFLECTED FLUORESCENCE OBSERVATION

1 NOMENCLATURE

Identification and labeling of the system's key parts.

2 REFLECTED FLUORESCENCE OBSERVATION PROCEDURE

Step-by-step instructions for conducting reflected fluorescence observations.

3 USING THE CONTROLS

Guide to operating the various controls for optimal system performance.

I. REFLECTED FLUORESCENCE OBSERVATION

4 SIMULTANEOUS FLUORESCENCE OBSERVATIONS

Procedures for combining fluorescence observation with other microscopy techniques.

5 TROUBLESHOOTING GUIDE

Solutions for common problems encountered during system operation.

6 SPECTRAL CHARACTERISTICS OF FILTERS

Graphs and data showing the spectral properties of system filters.

II. REFLECTED OBSERVATIONS (BX-URA2 Only)

1 CONFIGURATION OF REFLECTED OBSERVATION SYSTEM

Overview of system setup for reflected observations on BX-URA2.

2 ASSEMBLY

Instructions for assembling the reflected observation system components.

SAFETY PRECAUTIONS

Burner and Lamp Housing Safety

Warnings regarding the hot mercury burner and lamp housing during and after operation.

Power Supply Unit Safety

Precautions for handling the power supply unit, including voltage and grounding.

Safety Symbols

Warning Indications

1 Getting Ready

2 Maintenance and Storage

3 Caution

3 USING THE CONTROLS

1 General Precautions for Observation

General guidelines for observation, including power supply and illumination.

2 Selecting the Fluorescence Mirror Unit

Guidance on selecting the appropriate fluorescence mirror unit based on fluorochrome characteristics.

3 USING THE CONTROLS

3 Objectives for Various Observation Modes

Table detailing objective compatibility for different observation modes.

Dichroic Mirror and Filter Configurations

Details on mirror and filter combinations for various excitation methods.

3 USING THE CONTROLS

Exclusively for Fluorescent Proteins

Filter configurations specifically for fluorescent protein applications.

3 USING THE CONTROLS

4 Turning the Power Supply Unit On

Procedure for powering on the system's power supply unit.

3 USING THE CONTROLS

5 Centering the Field Iris Diaphragm

Steps for aligning the field iris diaphragm for optimal illumination.

3 USING THE CONTROLS

6 Centering the Aperture Iris Diaphragm

Steps for aligning the aperture iris diaphragm for optimal contrast.

3 USING THE CONTROLS

7 Centering the Mercury Burner

Procedure for centering the mercury burner for consistent illumination.

3 USING THE CONTROLS

8 Mounting the ND Filters

Instructions on how to mount Neutral Density (ND) filters.

4 SIMULTANEOUS FLUORESCENCE OBSERVATIONS

1 Simultaneous Reflected Fluorescence and Phase Contrast Observations

Procedure for combined reflected fluorescence and phase contrast observation.

5 TROUBLESHOOTING GUIDE

1. Optical System

Troubleshooting common issues related to the optical components of the system.

2. Electrical System

Troubleshooting common issues related to the electrical components of the system.

8 OPTIONAL MODULES

1 6-Position Filter Slider U-RSL6

Description and mounting procedure for the 6-position filter slider.

2 6-Position Barrier Filter Slider U-RSL6 EM

Description and mounting procedure for the 6-position barrier filter slider.

II. REFLECTED OBSERVATIONS (BX-URA2 Only)

3 FIELD IRIS AND APERTURE IRIS DIAPHRAGM ADJUSTMENTS

Adjusting field and aperture diaphragms for reflected observation.

4 OBSERVATIONS

Different types of observations for the reflected system.

5 OPTICAL CHARACTERISTICS UIS2 (UIS) Series for Reflected Light Observation

Optical properties of UIS2/UIS objectives for reflected light.

6 TROUBLESHOOTING GUIDE

Troubleshooting common issues with the reflected observation system.

9 ASSEMBLY

9-1 Assembly Diagram

Visual guide showing the sequence of assembly for microscope modules.

9-2 Detailed Assembly Procedures

Step-by-step instructions for assembling the various system components.

3 Attaching the Mercury Burner

PROPER SELECTION OF THE POWER SUPPLY CORD

Olympus U-LH100HGAPO Specifications

General IconGeneral
BrandOlympus
ModelU-LH100HGAPO
CategoryMicroscope
LanguageEnglish

Related product manuals