3
INPUT SELECTIONINPUT SELECTION
INPUT SELECTIONINPUT SELECTION
INPUT SELECTION
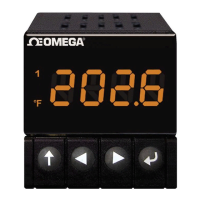
To change the input type, remove the instrument from its housing. Grasp
the front bezel sides and pull forward to release it from the housing lock.
Locate the dip switch on the right pcb. Determine the input type desired
and change the dip switch setting as shown to the right.
NOTE : NOTE :
NOTE : NOTE :
NOTE : Factory default is set for thermocouple inputs.
After changing input selection with the DIP switches, be sure to change
the InP menu item (page 9) in the Secure Menu.
NOTE:NOTE:
NOTE:NOTE:
NOTE: InP menu item factory default is set for type "J" thermocouple,
Iron/Constantan
Scaling for thermocouple and RTD inputs is fixed for each range type.
See page 8 for scale ends.
Scaling for current and voltage inputs is field adjustable by using SCAL and SCAH in the Secure menu. Program
SCAL to the low end value of your transmitter. Program SCAH to the high end value of your transmitter. If the
span of your transmitter is less than 100 units (referred to as 'counts' in these instructions), multiply the
transmitter span by 10 and change the decimal point position in menu item dP.
For example, if you have a differential pressure transmitter with a range of -0.25 to +0.25 inches of water. SCAL
would be programmed to -250, SCAH to +250, and dP to 0.000.
VERIFY MODEL NUMBER ON THE INSTRUMENT TO DETERMINE OUTPUT TYPEVERIFY MODEL NUMBER ON THE INSTRUMENT TO DETERMINE OUTPUT TYPE
VERIFY MODEL NUMBER ON THE INSTRUMENT TO DETERMINE OUTPUT TYPEVERIFY MODEL NUMBER ON THE INSTRUMENT TO DETERMINE OUTPUT TYPE
VERIFY MODEL NUMBER ON THE INSTRUMENT TO DETERMINE OUTPUT TYPE
PRE-SET FROM FACTORY.PRE-SET FROM FACTORY.
PRE-SET FROM FACTORY.PRE-SET FROM FACTORY.
PRE-SET FROM FACTORY.
1
2 3 4
DIP SWITCH LOCATION
THERMOCOUPLE INPUTS
RTD INPUTS
CURRENT INPUT
VOLTAGE INPUT
OUTPUT OUTPUT
OUTPUT OUTPUT
OUTPUT
TYPE JUMPER SELECTIONTYPE JUMPER SELECTION
TYPE JUMPER SELECTIONTYPE JUMPER SELECTION
TYPE JUMPER SELECTION
Instr uments with
SSRSSR
SSRSSR
SSR or
MECHANICAL RELA MECHANICAL RELA
MECHANICAL RELA MECHANICAL RELA
MECHANICAL RELA
YY
YY
Y type outputs can be changed to and from a
5 5
5 5
5
Vdc Vdc
Vdc Vdc
Vdc output
in the field.
CACA
CACA
CA
UTIONUTION
UTIONUTION
UTION:
DamaDama
DamaDama
Dama
gg
gg
g
e to the instrument mae to the instrument ma
e to the instrument mae to the instrument ma
e to the instrument ma
y result fry result fr
y result fry result fr
y result fr
om an incorrectlom an incorrectl
om an incorrectlom an incorrectl
om an incorrectl
y installed jumpery installed jumper
y installed jumpery installed jumper
y installed jumper
strip.strip.
strip.strip.
strip.
Follo Follo
Follo Follo
Follo
w the instructions carefullw the instructions carefull
w the instructions carefullw the instructions carefull
w the instructions carefull
yy
yy
y
..
..
.
1. Remove the instr ument from its housing. Gr asp the front bez el sides and pull forw ard to release it
from the housing lock.
2. Locate the desired logic jumper str ip on the left pr inted circuit board. The
OUTPUT AOUTPUT A
OUTPUT AOUTPUT A
OUTPUT A jumper str ip
is always located near the top edge.

 Loading...