Do you have a question about the Omega CN4000 Series and is the answer not in the manual?
Lists available controlling output types and their codes.
Lists available alarming output types and their codes.
Details the low voltage power supply option.
Covers input types, ranges, accuracy, and resolution for thermocouples and RTDs.
Details control methods, output types, and alarm types.
Covers supply voltage, power consumption, operating environments, and EMC.
Lists primary parameters like HIAL, LoAL, HdAL, LdAL and their settings.
Explains the 'Loc' parameter for locking settings and access.
Describes AHYS parameter for preventing alarm chattering.
Details how alarm conditions map to output signals.
Explains control modes like ON/OFF and AI PID.
Notes 'Act' parameter has no function on this model.
Defines proportion band, integral time, and derivative time for PID control.
Details control period settings and hysteresis for ON-OFF control.
Details 'InP' for input types and 'dPt' for resolution.
Explains Scb parameter for compensating sensor errors.
Details FILt parameter for noise filtering and response speed.
Describes selection of power frequency and temperature scale.
Defines the lower and upper limits for Set Value (SV).
Describes 'orAL' symbol indicating input setting or wiring issues.
Explains symbols for high, low, and deviation alarms.
Describes symbols indicating software errors.
Provides wiring diagram for 1/4 DIN and 1/8 DIN instruments.
Provides wiring diagram for 1/16 DIN instruments.
Explains display windows (PV, SV) and control key operations.
Explains the meaning of LED indicators and basic display status.
Details how alarms are displayed and what they signify.
Guides users on how to adjust the setpoint using keys.
Explains how to access and modify parameters.
Details the AI control method and the auto-tuning process.
Provides important considerations and notes for auto-tuning.
Outlines warranty period, conditions, and limitations of liability.
Provides instructions and required information for warranty and non-warranty returns.
The OMEGA CN4000 Series Temperature Controllers are advanced instruments designed for precise temperature management in various industrial and laboratory applications. These controllers offer a comprehensive set of features for accurate measurement, control, and alarming, ensuring stable and reliable operation.
The primary function of the CN4000 series is to regulate temperature by controlling heating or cooling elements based on a measured process value (PV) and a user-defined setpoint (SV). They support a wide range of thermocouple and RTD input types, making them versatile for different temperature sensing requirements. The controllers can operate in either ON/OFF control mode or advanced AI PID control mode with auto-tuning capabilities.
In ON/OFF control, the output is simply switched on or off when the process value crosses the setpoint, with an adjustable hysteresis to prevent rapid cycling. This mode is suitable for applications where precise control is not critical or where the system has a large thermal mass.
For more demanding applications, the AI PID control mode offers superior performance. PID (Proportional-Integral-Derivative) control continuously calculates the necessary output based on the error between the PV and SV, the accumulated error over time, and the rate of change of the error. This results in much smoother and more accurate temperature regulation, minimizing overshoot and undershoot. The auto-tuning (AT) feature simplifies setup by automatically determining the optimal PID parameters for a specific process, saving users from manual calibration.
Beyond basic control, the CN4000 series includes comprehensive alarming capabilities. Users can configure various alarm types, including high limit, low limit, high deviation, and low deviation alarms. These alarms provide critical alerts when the process temperature exceeds or falls below predefined thresholds, ensuring process safety and preventing damage to equipment or materials. The alarm outputs can be assigned to specific relays or SSR drivers, allowing for flexible integration into existing control systems.
The controllers also feature a parameter lock function, which allows users to restrict access to certain settings, preventing unauthorized modifications and ensuring consistent operation. This is particularly useful in environments where multiple operators may interact with the device.
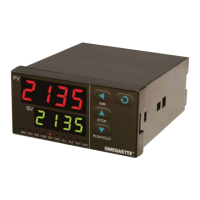
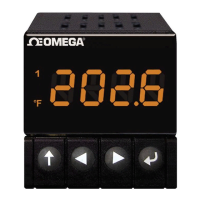
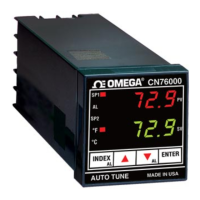
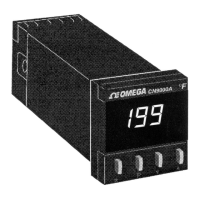
The CN4000 controllers are designed for user-friendly operation with a clear dual-display interface. The upper display window shows the current process value (PV) or parameter codes, while the lower display window shows the setpoint (SV), parameter values, or alarm messages. This dual display provides immediate feedback on the process status and simplifies parameter adjustment.
Setting the setpoint (SV) is straightforward. In the basic display status, if the parameter lock is disengaged, users can adjust the SV using dedicated increase, decrease, and shift keys. The shift key allows for modification of specific digits, while holding down the increase or decrease keys accelerates the adjustment process. The SV range is constrained by user-defined low and upper limits (SPL and SPH), preventing settings outside safe operating parameters.
Accessing and modifying system parameters is done through a dedicated setup key. Holding this key for a few seconds enters the parameter table, where users can navigate through various settings using the shift key and adjust values with the increase/decrease keys. The parameter lock feature (Loc) provides different levels of access, from allowing full modification to restricting changes to only specific parameters.
The auto-tuning function is a key usage feature for optimizing control performance. When AI PID control is selected, users can initiate auto-tuning from the basic display status. The controller will then execute a series of ON/OFF actions to analyze the process dynamics and automatically calculate the best PID parameters. This process typically involves 2-3 cycles of ON/OFF action and can take from seconds to hours depending on the system. Users can monitor the auto-tuning status and cancel it if necessary.
The controllers also provide visual indicators (LEDs) for various operational states, including manual mode, program mode, alarm status, and output activation (OP1 and AL1). These LEDs offer quick visual cues about the controller's current activity and any active alarms.
While the manual does not explicitly detail maintenance procedures, several design aspects and features contribute to the overall maintainability and reliability of the CN4000 series.
The robust construction and adherence to electromagnetic compatibility (EMC) standards (IEC61000-4-4 and IEC61000-4-5) suggest a design intended for stable operation in industrial environments, minimizing the risk of malfunctions due to electrical interference. This reduces the need for frequent troubleshooting related to environmental factors.
The self-learning function, particularly in AI PID control mode, acts as a continuous maintenance feature. Even if the initial auto-tuning results are not perfect, the controller can continue to learn and refine its control parameters over time during operation. This adaptive capability ensures that the control performance remains optimal as process conditions may subtly change, reducing the need for periodic re-tuning.
Error codes and alarm messages displayed on the lower window, such as "orAL" for input signal issues (disconnected wiring, incorrect specification), "HIAL" for high limit alarm, or "EErr" for IC software errors, serve as diagnostic tools. These clear indicators help operators quickly identify the nature of a problem, facilitating efficient troubleshooting and repair. For instance, "orAL" immediately points to an input-related issue, guiding maintenance personnel to check wiring or sensor specifications.
The modular design, implied by the various output and alarm options, suggests that components can be configured or potentially replaced, although specific details on field-replaceable units are not provided. The wiring diagrams are clear and essential for correct installation and for diagnosing connection issues during maintenance. Proper wiring, especially for thermocouples where compensation wires are critical, is emphasized to prevent measurement errors, which is a key aspect of preventive maintenance.
The parameter lock (Loc) feature, by preventing unauthorized changes, helps maintain the integrity of the controller's settings, reducing the likelihood of operational issues arising from incorrect configurations. This contributes to stable long-term performance and minimizes the need for corrective adjustments.
Overall, the CN4000 series is designed for reliable and accurate temperature control with features that support both operational efficiency and ease of troubleshooting, contributing to its maintainability in diverse applications.
| Control Mode | PID, On/Off |
|---|---|
| Alarm Outputs | Up to 2 |
| Display | Dual 4-digit LED |
| Accuracy | ±0.25% of span |
| Operating Temperature | 0 to 50°C (32 to 122°F) |
| Input Type | Thermocouple, RTD, Process (mA/V) |
| Output Type | Relay, SSR |
| Communication | RS485 |
| Power Supply | 100-240 VAC, 50/60 Hz |
| Panel Cutout | 1/16 DIN |