Do you have a question about the OMP Hobby M2 Explore and is the answer not in the manual?
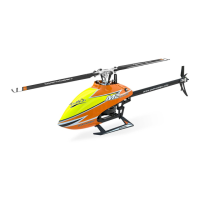
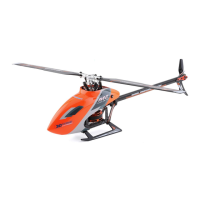
Thank you for buying OMPHOBBY Products. The M2EXP Helicopter is designed as an easy to use,full featured Helicopter R/C model.
Explains the meaning of warning, caution, and forbidden labels used in the manual.
Emphasizes R/C helicopters are not toys and highlights risks of improper use.
Advises flying in safe areas, away from people, and considering pilot responsibility.
Guidelines for choosing flying fields and avoiding hazards like moisture and heat.
Recommends seeking assistance from experienced pilots for assembly and first flights.
Ensures safe operation within ability and awareness of rotating blades and environmental conditions.
Prohibits unauthorized modifications and emphasizes using the product for its intended purpose.
Lists essential tools needed for assembling the helicopter model.
Provides instructions on using threadlock, lubricants, and adhesives for secure assembly.
Details the helicopter's dimensions, rotor diameters, weight, and blade length.
Highlights advanced features like brushless motors, carbon fiber construction, and unique component designs.
Identifies bearings, bushings, and thrust bearings for the main rotor holder assembly.
Details the process of assembling the main rotor holder with bearings and thrust bearings.
Attaches the motor mount, spindle retaining ring, and socket screws.
Installs the main shaft, bearings, and concentricity retention column.
Attaches canopy supports and rear reinforcing plates to the frame.
Connects frame upper side panels, widening mounts, and lower panels.
Installs the upper frame side panel and the flight controller mounting plate.
Secures frame components using various hexagon socket head tapping screws.
Assembles the main pitch control arm with bearings, washers, and copper sets.
Connects the swash plate to the main pitch control arm and other components.
Attaches the landing skid mount to the helicopter frame.
Secures the landing skids to the landing skid mount using screws.
Installs the tail motor and its reinforced mounting plate.
Secures the vertical wing to the tail boom assembly.
Attaches servo arms and linkage balls to the servos.
Mounts the servos onto the helicopter frame using screws and nuts.
Connects the linkage rods (CH1, CH2, CH3) to the respective servos.
Installs the flight controller and receiver using double-sided damping tape.
Attaches the main blades to the main rotor hub using screws and nuts.
Secures the tail blades to the tail rotor hub.
Prepares the battery mount and applies hook and loop tape.
Installs the battery into the compartment and secures it with the latch.
Attaches the canopy protector rubber ring.
Fits the main canopy onto the helicopter frame.
Shows how to connect channels CH1, CH2, and CH3 to the receiver.
Lists spare parts for rotor housing, frame components, and landing gear sets.
Details spare parts for control linkages, tail booms, and vertical wings.
Lists spare motor sets, main blades in various colors, and bearing groups.
Includes spare kits for screws, swash plates, flight controls, and receivers.
Lists spare parts for shafts, motor mounts, and servo linkage rods.
Details spare parts for suspension, batteries, and other miscellaneous components.
Lists spare parts for flight control damping, satellite receivers, and transmitter accessories.
Includes spare parts for servo gears, ESCs, and specialized connection cables.
Provides specifications for model, dimensions, frequency, power, and weight.
Describes working voltage, remote distance, charging, and interface options.
| Brand | OMP Hobby |
|---|---|
| Model | M2 Explore |
| Category | Toy |
| Type | RC Helicopter |
| Skill Level | Intermediate |
| Tail Rotor Diameter | 71 mm |
| Height | 135 mm |
| Motor Type | Brushless |
| Servo | Digital |
| Assembly Required | No |
| Battery | 3S 11.1V 650mAh LiPo |
| Charging Time | 60 minutes |
| Transmitter | Not included |
| Gyro System | 3-axis |
| Main Motor | Brushless Outrunner |
| Tail Motor | Brushless |
| Servos | 3 x Cyclic, 1 x Tail |
| Material | Carbon Fiber, Plastic |
| Flight Controller | OmpHobby |