A-87E3X-NA
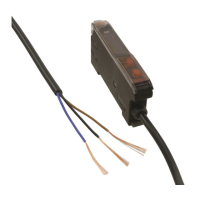
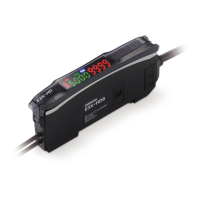
E3X-NA
Fiber Units
Installation
Tightening Force
The tightening force applied to the Fiber Unit should be as fol-
lows:
Screw-mounting Model Cylindrical Model
Use a proper-sized wrench.
Fiber Connection and Disconnection
The E3X Amplifier Unit has a lock button. Connect or discon-
nect the fibers to or from the E3X Amplifier Unit using the fol-
lowing procedures:
1. Connection
Open the protective cover, insert the fibers according to the fi-
ber insertion marks on the side of the Amplifier Unit, and lower
the lock button.
2. Disconnection
Remove the protective cover and raise the lock button to pull
out the fiber.
Note:To maintain the fiber properties, confirm that the lock is
released before removing the fiber.
3. Precautions for Fiber Connection/Disconnection
Be sure to lock or unlock the lock button within an ambient
temperature range between -10°C and 40°C.
Cutting Fiber
• Insert a fiber into the Fiber Cutter and determine the length
of the fiber to be cut.
• Press down the Fiber Cutter in a single stroke to cut the fi-
ber.
• The cutting holes cannot be used twice. If the same hole is
used twice, the cutting face of the fiber will be rough and the
sensing distance will be reduced. Always use an unused
hole.
• Cut a thin fiber as follows:
Fiber Units Clamping torque
M3/M4 screw 0.78 Nm max.
M6 screw/6 mm dia. column 0.98 Nm max.
1.5 mm dia. column 0.2 Nm max.
2 mm dia./3 mm dia. column 0.29 Nm max.
E32-T12F 5 mm dia. Teflon model
0.78 Nm max.
E32-D12F 6 mm dia. Teflon model
E32-T16 0.49 Nm max.
E32-R21 0.59 Nm max.
E32-M21
0.49 Nm max. for up to 5 mm from
front end, 0.78 Nm max. for more
than 5 mm from front end
E32-L25A 0.78 Nm max.
E32-T16P
E32-T16PR
E32-T24S
E32-L24L
E32-L25L
E32-T16J
E32-T16JR
0.29 Nm max.
E32-T16W
E32-T16WR
0.3 Nm max.
Toothed washers
Spring mounting clip
Nuts
(attachment)
Retaining screw
(flat head or
sunken head)
Lock Button
Fiber
Fiber insertion mark
10.7mm
Insertion position
A
An attachment is
temporarily fitted
to a thin fiber be-
fore shipment.
B
Secure the attach-
ment after adjust-
ing the position of
it in the direction
indicated by the
arrow.
C
Insert the fiber to
be cut into the
E39-F4.
D
Finished state
(proper cutting
state)
Note: Insert the fiber in the direction indicated by
the arrow.
Locked
Unlocked
Protective cover
Thin fiber
attachment
(E39-F9)
Temporarily
fitted
E39-F4
fiber cutter
Two holes for thin fiber
Three holes
for standard
fiber (2.2-mm dia.)
Approx. 0.5 mm
Insertion direction

 Loading...