Simplicity on the Worksite Solutions Guide for FAQs: E5CC/E5EC
Using PID Control
3-4
Using PID Control
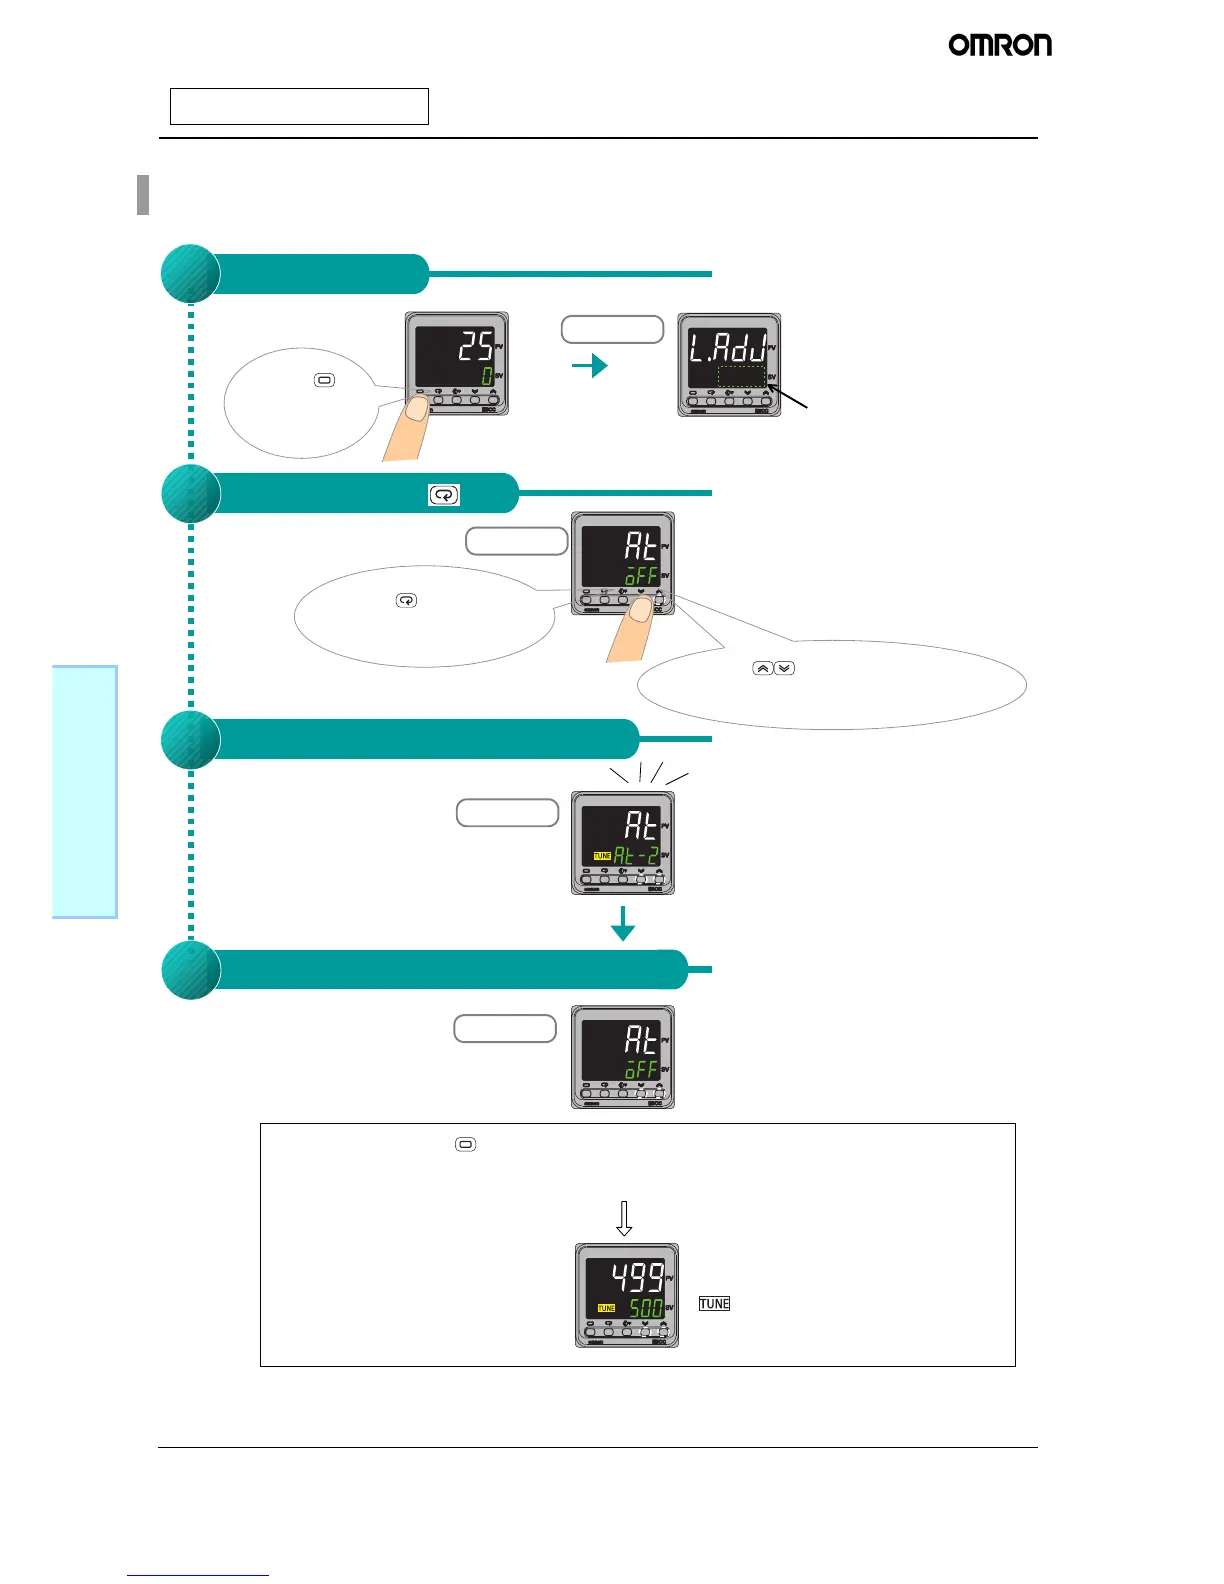
Executing Autotuning
When the indicator goes out, autotuning is finished.
Press the
(Level) Key for
less than 1
second.
Operating Display
←at-2 (AT-2): 100% autotuning executed.
Change the parameter with the Key .
2
Autotuning will start at
at-2
3
4
Adjustment Level
←
l.adj
(L.ADJ) will be displayed
to show that the Adjustment
Level has been entered.
The four numeric digits that
identify the product code are
displayed.
←
at
(AT): Indicates the Autotuning parameter.
←Default setting is
off
(OFF):
Autotuning stopped.
off
(OFF)
at-2
(At-2)
at-1
(At-1)
: Autotuning stopped (default).
: 100% autotuning executed.
: Refer to page 3-6.
←When the TUNE indicator goes out,
autotuning is finished.
Use the (Up and Down) Keys to
select
at-2
(AT-2) (100% autotuning).
Press the (Mode ) Key
several times to display at
(AT).
Adjustment Level
Adjustment Level
Adjustment Level
Turn ON the power supply.
1
←The TUNE indicator will light during
autotuning.
(When finished, press the (Level) Key to return to the operation display.)
← flashing: Autotuning is being executed.
*You can return to the Operation Level during autotuning execution.
Operating Display
← After Returning to Operation Level
Simplicity on the Worksite Solutions Guide for FAQs: E5CC/E5EC