OPEN
CIRCUIT
TEST
The most likely place to check for an open circuit is at
the commutator riser bars. Inspect for loose connec-
tions on the points where the conductors are joined to
the commutator bars.
STARTER ASSEMBLY
Reassembly is the reverse of disassembly. When
reassembling, wipe off any dirty parts with a clean
cloth or blow clean using filtered compressed air.
Bearings must not be immersed in cleaning
fluid.
These parts
should be cleaned with a brush dipped in clean engine oil.
Apply SAE 10W-30 oil on the armature shaft, spline
and bearings.
AMMETER
SWITCH
0
7.;
CRANKING
MOTOR
BATTERY!
VOLTMETER
-12 V. I
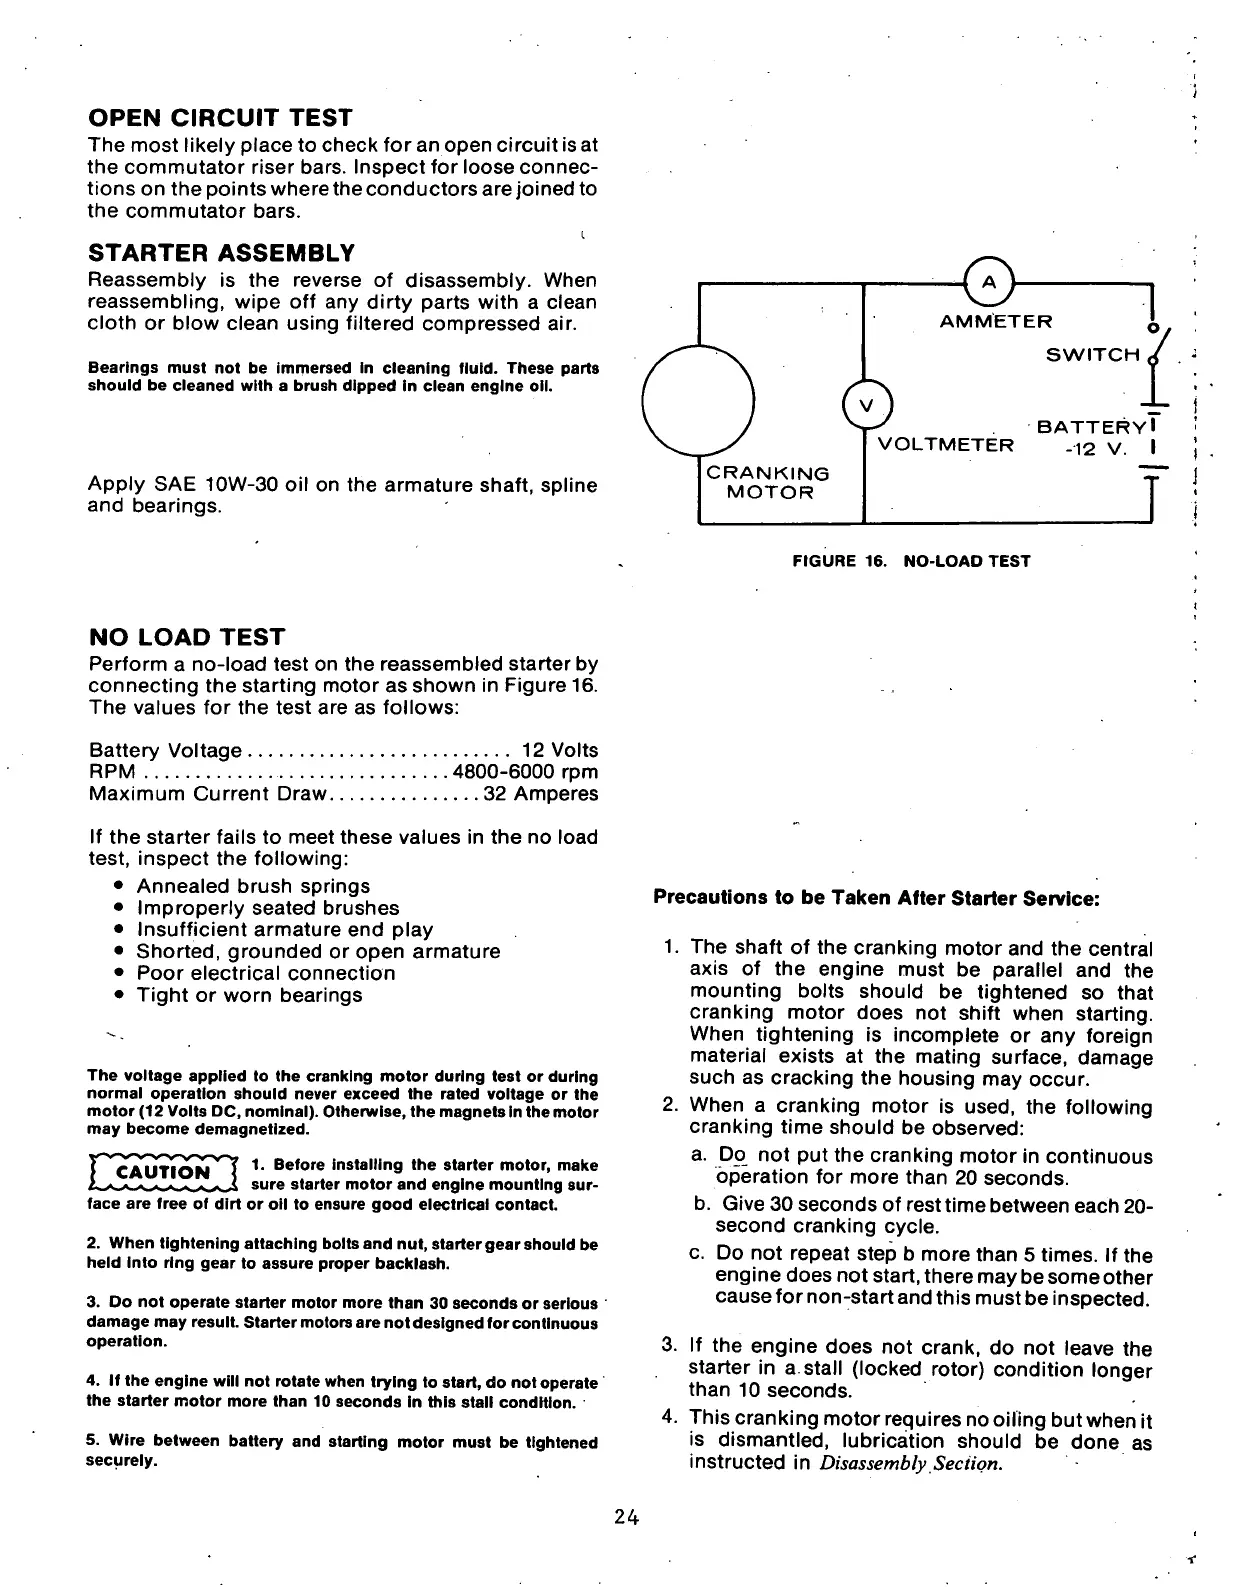
NO
LOAD
TEST
Perform a no-load test on the reassembled starter by
connecting the starting motor as shown in Figure 16.
The values for the test are as follows:
FIGURE 16. NO-LOAD TEST
Battery Voltage 12 Volts
RPM 4800-6000 rpm
Maximum Current Draw 32 Amperes
If the starter fails to meet these values in the no load
test, inspect the following:
• Annealed brush springs
• Improperly seated brushes
• Insufficient armature end play
• Shorted, grounded or open armature
• Poor electrical connection
• Tight or worn bearings
The voltage applied to the cranking motor during test or during
normal operation should never exceed the rated voltage or the
motor (12 Volts DC, nominal). Otherwise, the magnets
in
the motor
may become demagnetized.
CAUTION
>
T
1
'
Be,ore
'
ns,all
'
n
g the starter motor, make
sure starter motor and engine mounting sur-
face are free of dirt or oil to ensure good electrical contact.
2.
When tightening attaching bolts and nut, starter gear should be
held into ring gear to assure proper backlash.
3. Do not operate starter motor more than 30 seconds or serious
damage may result. Starter motors are not designed for continuous
operation.
4.
If the engine will not rotate when trying to start, do not operate
the starter motor more than 10 seconds in this stall condition.
5. Wire between battery and starting motor must be tightened
securely.
Precautions to be Taken After Starter Service:
1.
The shaft of the cranking motor and the central
axis of the engine must be parallel and the
mounting bolts should be tightened so that
cranking motor does not shift when starting.
When tightening is incomplete or any foreign
material exists at the mating surface, damage
such as cracking the housing may occur.
2.
When a cranking motor is used, the following
cranking time should be observed:
a. Do not put the cranking motor in continuous
operation for more than 20 seconds.
b. Give 30 seconds of rest time between each 20-
second cranking cycle.
c. Do not repeat step b more than 5 times. If the
engine does not start, there may be some other
cause for non-start and this must be inspected.
3. If the engine does not crank, do not leave the
starter in a stall (locked rotor) condition longer
than 10 seconds.
4. This cranking motor requires no oiling but when it
is dismantled, lubrication should be done as
instructed in
Disassembly
Section.
24
 Loading...
