EXHAUST
SYSTEM
The
condition
of
the exhaust
system
is
critical
on
RV
generator sets because
of
the possibility
of
exhaust
gases entering the vehicle.
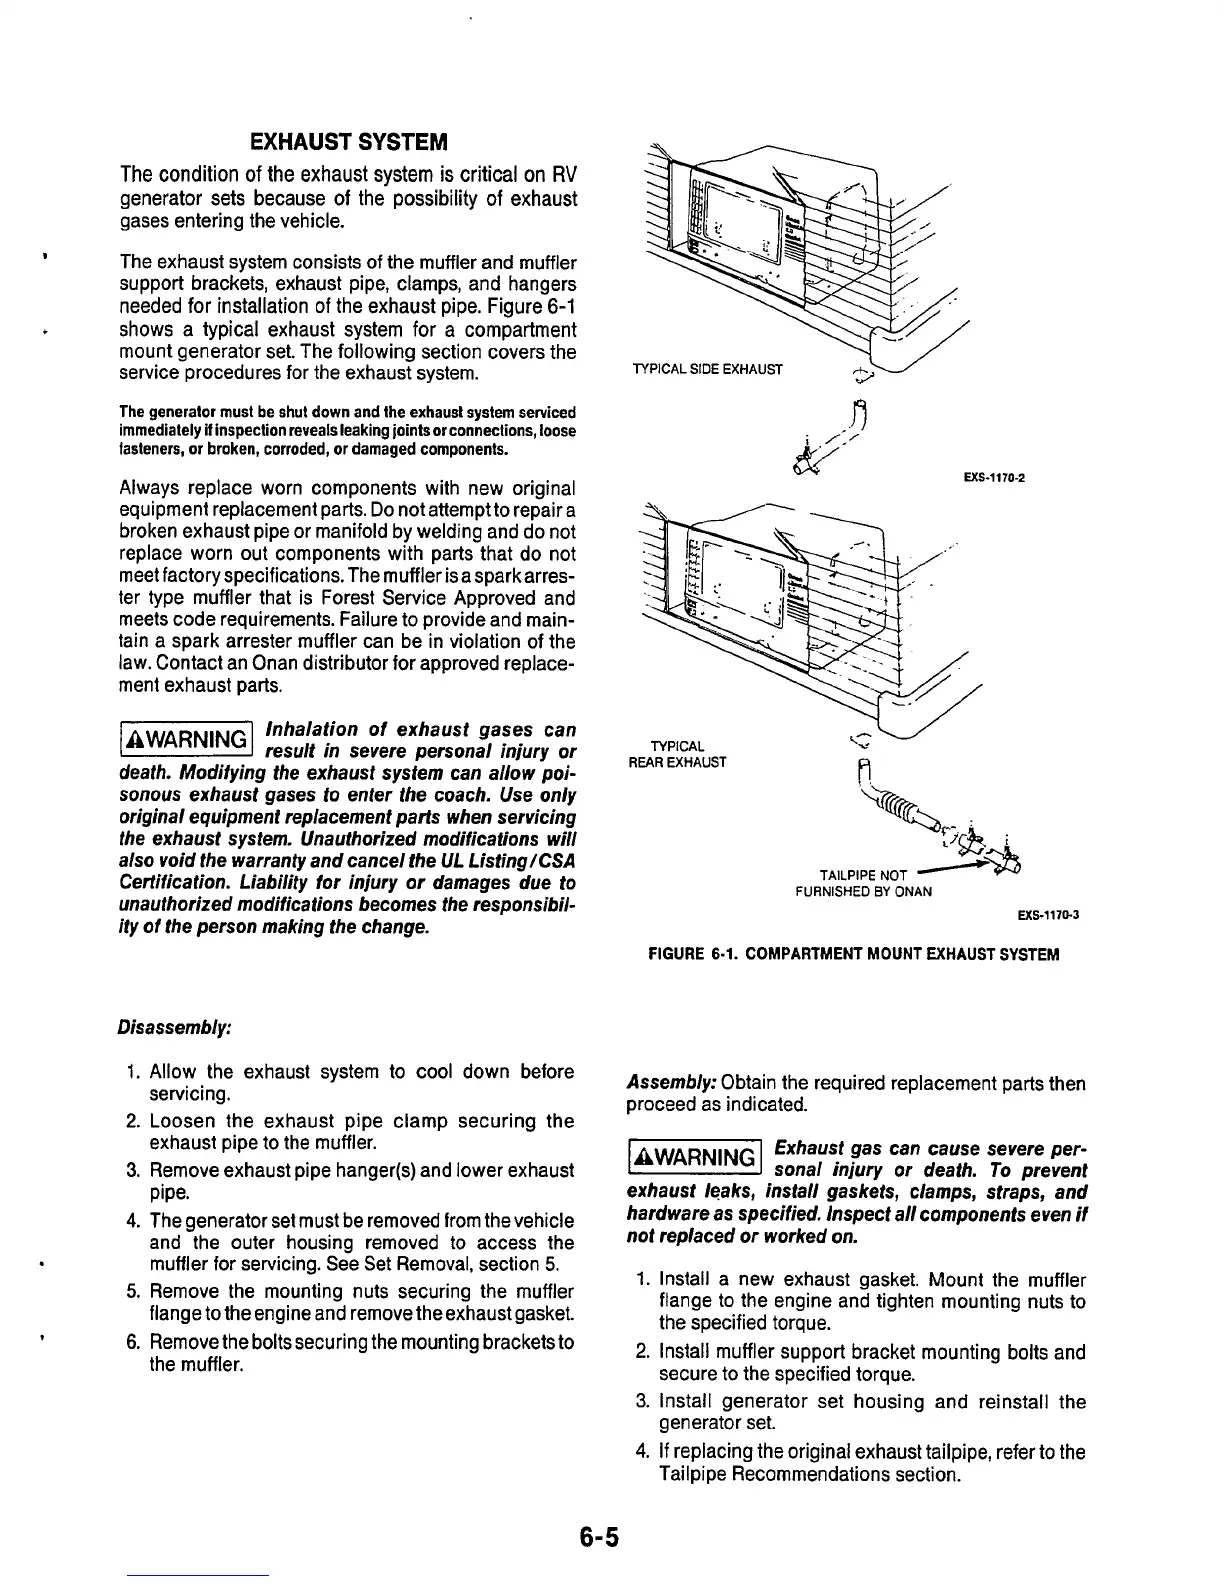
The exhaust system consists
of
the muffler and muffler
support brackets, exhaust pipe, clamps, and hangers
needed for installation
of
the exhaust pipe. Figure
6-1
shows a typical exhaust system for a compartment
mount generator set. The following section covers the
service procedures for the exhaust system.
The generator must be shut down and the exhaust system serviced
immediately
if
inspection reveals leaking joints
or
connections, loose
fasteners,
or
broken, corroded,
or
damaged components.
Always replace worn components with new original
equipment replacement parts.
Do
not attempt
to
repair a
broken exhaust pipe or manifold by welding and do not
replace worn out components with parts that
do
not
meet factory specifications. The muffler isa sparkarres-
ter type muffler that is Forest Service Approved and
meets code requirements. Failure
to
provide and main-
tain a spark arrester muffler can be in violation of the
law. Contact an Onan distributor for approved replace-
ment exhaust parts.
rn
Inhalation
of
exhaust gases can
llEEE4
result in severe personal injury
or
death. Modifying the exhaust system can allow poi-
sonous exhaust gases to enter the coach. Use only
original equipment replacement parts when servicing
fhe exhaust system. Unauthorized modifications will
also void the warranty and cancel the UL ListingKSA
Certification. Liability
for
injury
or
damages due to
unauthorized modifications becomes the responsibil-
ity
of
the person making the change.
3-
TYPICAL SIDE EXHAUST
K:
W
TYPICAL
A
REAR
EXHAUST
TAILPIPE NOT
FURNISHED
BY
ONAN
WS-1170-3
FIGURE
6-1.
COMPARTMENT MOUNT EXHAUST SYSTEM
Disassembly:
1.
2.
3.
4.
5.
6.
Allow the exhaust system
to
cool down before
servicing.
Loosen the exhaust pipe clamp securing the
exhaust pipe to the muffler.
Remove exhaust pipe hanger(s) and lower exhaust
pipe.
The generator set must be removed from the vehicle
and the outer housing removed
to
access the
muffler for servicing. See Set Removal, section
5.
Remove the mounting nuts securing the muffler
flange
to
the engine and remove theexhaust gasket.
Remove the
bolts
securing the mounting brackets to
the muffler.
Assembly:
Obtain the required replacement parts then
proceed as indicated.
Exhaust gas can cause severe per-
-
sonal injury
or
death.
To
prevent
exhaust leaks, install gaskets, clamps, straps, and
hardware as specified. Inspect all components even
if
not replaced or worked on.
1.
Install a new exhaust gasket. Mount the muffler
flange
to
the engine and tighten mounting nuts to
the specified torque.
2.
Install muffler support bracket mounting bolts and
secure
to
the specified torque.
3.
Install generator set housing and reinstall the
generator set.
4.
If
replacing the original exhaust tailpipe, refer to the
Tailpipe Recommendations section.
6-5

 Loading...
