Stems
and
Guides:Always check stems and guides for
wear as shown in Figure
9-6.
Use a hole gauge to
measure the valve guide. When clearance with stem
exceeds original clearance by
0.002
inch
(0.05
mm),
replace the valve or cylinder head, which includes the
valve guide, or both.
Springs:
Check valve springs for cracks, worn ends,
and distortion. If spring ends are worn, check valve
retainer for wear. Check for spring distortion by placing
spring on aflat surface nextto a square. Measure height
of spring and rotate it against a square to measure
distortion, see Figure
9-7.
Replace any valve spring that
is weak, cracked, worn, or distorted.
\'
VI-1039
FIGURE 9-7. VALVE SPRING CHECKS
Reconditioning
Valves
and
Valve Seats
Valves should not be hand lapped because the sharp
contact made between thevalve face and valveseat will
be destoryed. Valve faces must be finished in a machine
at
44.5
to
45
degrees. Each valve must have a minimum
of 1/16inch
(1.6mm)margin,Figure9-8.Ifthevalvehas
less margin than this
it
will heat up during the compres-
sion stroke and pre-ignite the mixture, causing
loss
of
power and economy. This valve
is
also susceptible to
warping and breakage.
Not
all valves can be reconditioned.
A
badly warped
valve must be replaced because the excessive grinding
required to make
it
seat correctly removes the margin.
To
make a valve gas-tight, every trace of pitting must be
removed from the valve face and seat. Deeply pitted
or
cut valves must be replaced.
6
INCH
(1.6
rnm)
MINIMUM
REFER TO SPECIFICATIONS FOR
CORRECT DIAMETER
II
44.50
-
450
vT.1040
CHECK
FOR
BENT STEM
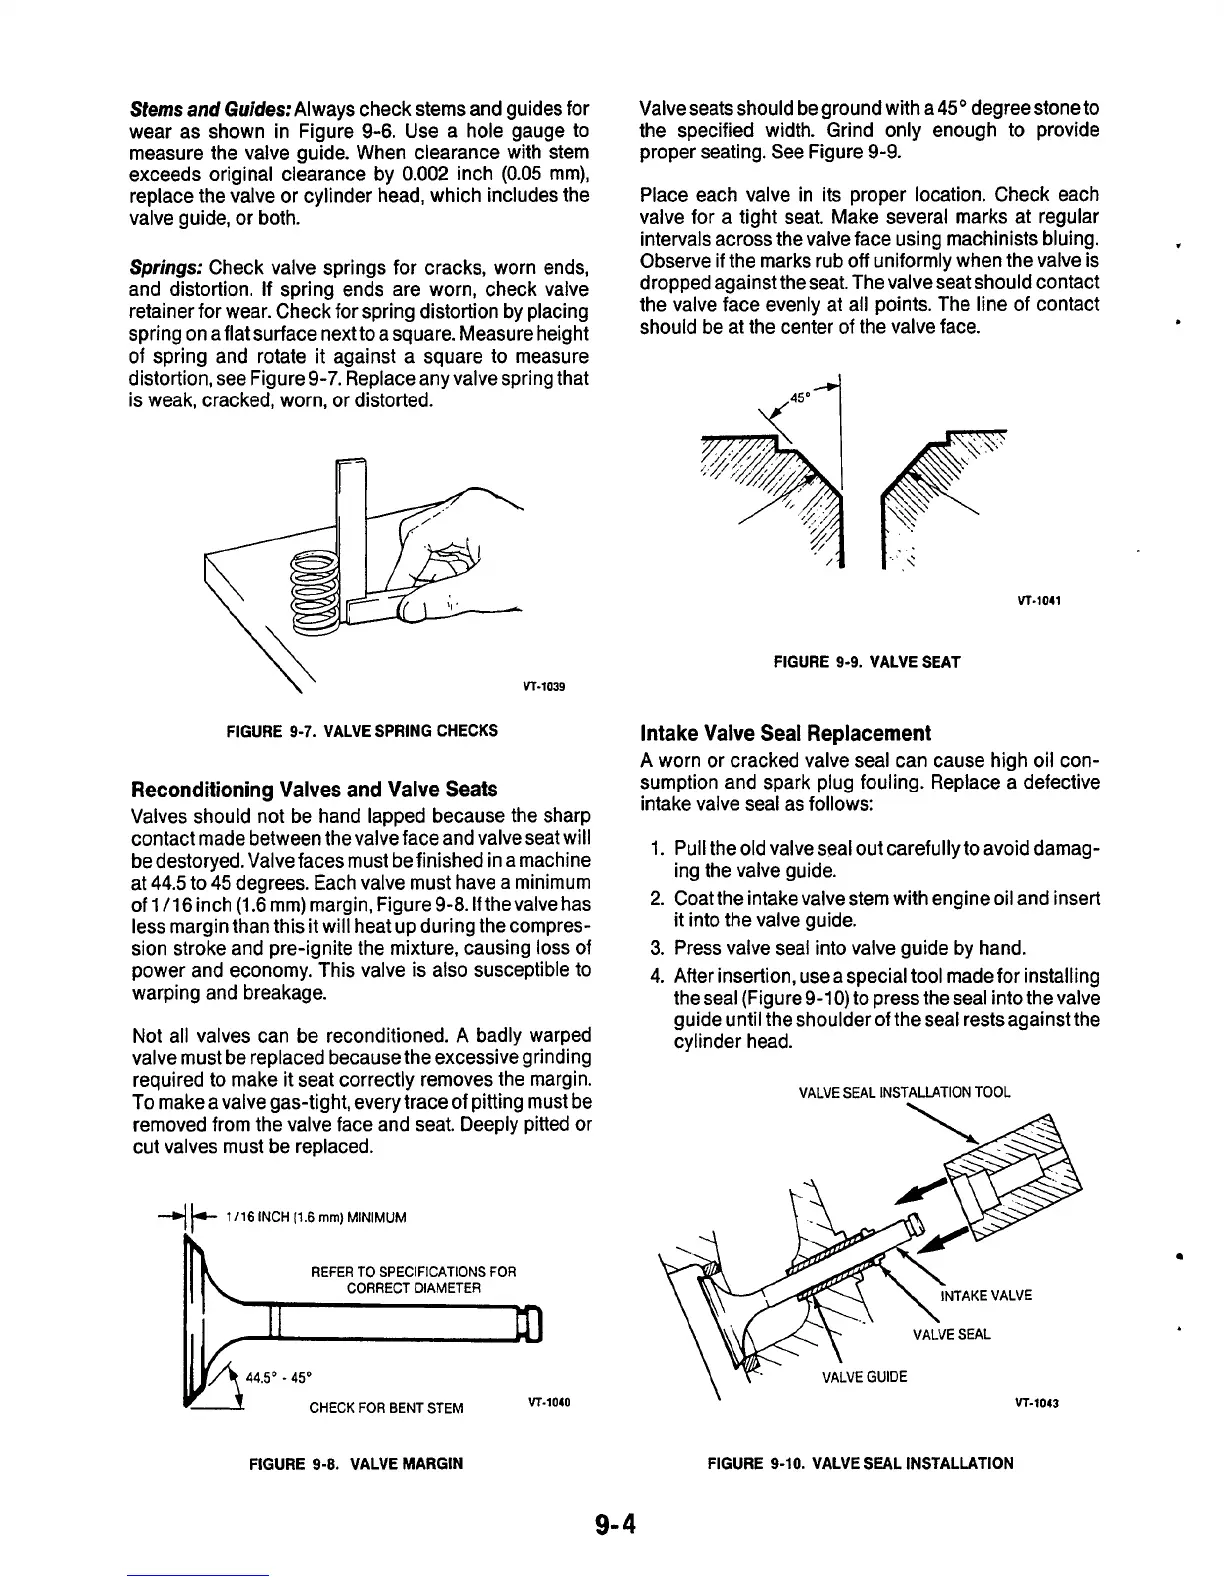
Valve seats should be ground with a
45'
degree stone to
the specified width. Grind only enough to provide
proper seating. See Figure
9-9.
Place each valve in its proper location. Check each
valve for a tight seat. Make several marks at regular
intervals across the valve face using machinists bluing.
Observe if the marks rub
off
uniformly when the valve is
dropped against the seat. The valve seat should contact
the valve face evenly at all points. The line of contact
should be at the center of the valve face.
VI-1041
FIGURE
9-9.
VALVE SEAT
Intake Valve Seal Replacement
A
worn or cracked valve seal can cause high oil con-
sumption and spark plug fouling. Replace a defective
intake valve seal as follows:
1.
Pull the old valve seal out carefully to avoid damag-
2.
Coat the intake valve stem with engine oil and insert
3.
Press valve seal into valve guide by hand.
4.
After insertion, usea special tool made for installing
the seal (Figure
9-1
0)
to press the seal into the valve
guide until the shoulder of the seal restsagainst the
cylinder head.
ing the valve guide.
it
into the valve guide.
VALVE
SEAL
INSTALLATION TOOL
\
VALVE SEAL
e'lL"E-GulDE
VT-1043
\
FIGURE
9-8.
VALVE MARGIN
FIGURE
9-10.
VALVE SEAL INSTALLATION
9-
4

 Loading...
