15
OneScreen
TL6
All your collaboration tools are right here
6. Setting Up Your Unit!
6.1 OneScreen Touchscreen
OneScreen
Hubware and Touchscreen come with perpetual licenses of OneScreen Write & EShare and the
rst-year subscriptions of OneScreen Hype, OneScreen Attend and OneScreen Central. If you are not using an
OPS PC, you will have to install these softwares on your external PC. Please contact us for the digital copy of the
software and licenses. To connect an external PC to the Touch Screen please follow the steps mentioned below.
6.2
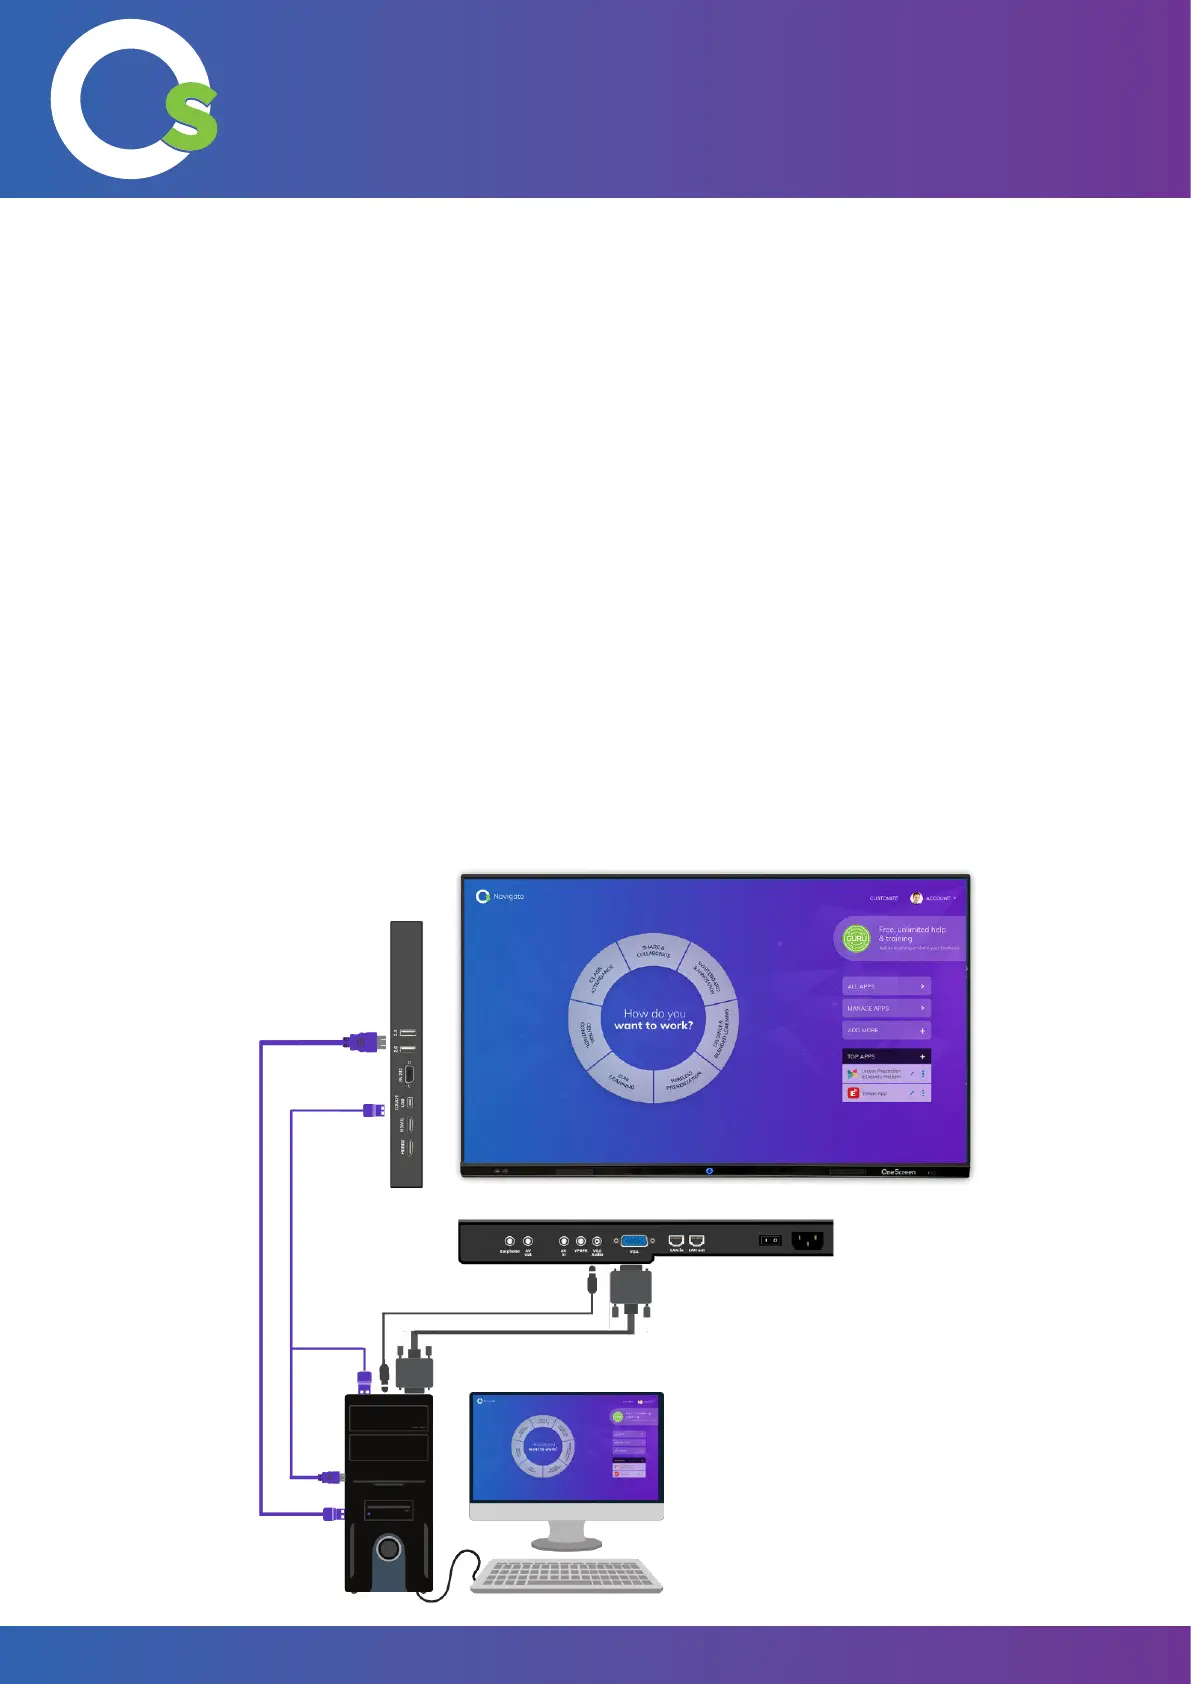
Connecting an External PC
To
connect an external PC, please use the HDMI or VGA cable and the USB touch cable (as shown in What’s
Included section).
Connect one end of the HDMI or VGA cable to your laptop and the other end to one of the corresponding ports on
OneScreen Touchscreen. If you are connecting the VGA cable, please also use the 3.5 mm audio cable to transfer
audio.
Connect the standard USB end of the USB Touch Cable to your laptop and the other end to the port on OneScreen
Touchscreen. The USB Touch Cable will be connected to the USB Touch Port at the left side of the screen for both
connections.