EasyManua.ls Logo

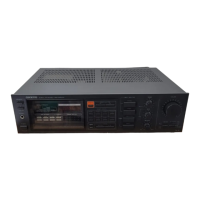
Onkyo TX-26 - Front Panel Controls and Indicators; Power Switch; Tuning Switches and Selector; Preset Tuning Keys

Onkyo TX-26
8 pages
To Next Page IconTo Next Page
To Previous Page IconTo Previous Page
Loading...
=|
|
Front
Panel
Facilities
rn!
@
The
front
panel
design
for
the
TX-36
and
TX-26
differs
slightly
according
to
the
areas
for
which
each
unit
was
manufactured.
For
example,
some
units
have
silver
panels
and
others
are
black.
@
The
features
and
specifications
for
the
TX-36
and
T
X-26
are
slightly
different.
Read
this
manual
carefully
to
operate
the
model
you
have
purchased
correctly.
19
18
5
10)
16
pos
spoof
ute
Aweuie
a
esas
--
-PRISET
STATION»
°
co)
ices
|co
=
-
-
-
a
oo
Db
te
FOTN
TIDY
Svyrios
SE
STATIS
BD
Bravws
F
co
o
[3]
4
5
(6)
7/8)
|}
12)
(13)
(14)
15
Power
Switch
(POWER)
Press
once
to
turn
power
on
and
again
to
turn
power
off.
APR
Indicator
Note:
The
DX/LOCAL
indicator
is
only
on
the
TX-36,
Auto/Manual
Indicator
Preset
Tuning
Indicators
(PRESET
STATION)
Auto/Manual
Tuning
Switches
(TUNING)
AUTO:
Press
to
perform
automatic
tuning.
MANUAL:
Press
to
perform
manual
tuning.
Tuning
Selector
(TUNING)
Press
the
UP
selector
to
raise
the
reception
frequency
and
the
DOWN
selector
to
lower
the
reception
frequency.
Using
the
Tuning
Selector
(Manual
Mode)
First,
press
the
MANUAL
tuning
switch[5)
to
use
the
manual
tuning
mode.
Now,
when
either
side
of
the
tuning
selector
is
held
down,
the
tuned
frequency
will
increase
or
decrease
continuously.
To
tune
ina
station,
press
either
the
UP
or
DOWN
tuning
selector
until
you
are
near
the
frequency
of
the
desired
station.
Then,
after
releasing
the
tuning
selector,
press
again
to
change
the
frequency
in
single
steps
until
the
desired
station
is
precisely
tuned.
Pressing
once
changes
the
frequency
by
100kHz
in
the
FM
band
and
by
10kHz
itn
the
AM
band.
Using
the
Tuning
Selector
(Auto
Mode)
Press
the
AUTO
tuning
switch
[5]
to
use
the
auto
tuning
mode.
Then
press
the
UP
or
DOWN
tuning
selector;
there
is
no
need
to
keep
the
selector
depressed
as
in
the
manual
tuning
mode.
The
tuned
frequency
will
continue
to
increase
or
decrease
unti!
a
broadcast
of
sufficient
strength
is
reached.
To
move
on
to
the
next
broadcast,
press
the
UP
or
DOWN
tuning
selector
again.
When
the
upper
or
lower
end
of
the
frequency
range
\s
reached,
the
displayed
frequency
will
begin
moving
in
the
opposite
direction.
For
example,
when
the
DOWN
tuning
selector
is
pressed,
the
frequency
will
decrease
until
the
lowest
frequency
is
reached
and
then
start
increasing
again
toward
the
highest
frequency
even
though
the
DOWN
tuning
selector
is
not
still
being
held
down.
-~¥—_—
Frequency
range
——+|
Lower
limit
Upper
limit
1.
When
the
DOWN
tuning
selector
is
pressed,
the
frequency
will
decrease
until
the
lower
limit
is
reached.
2.
At
this
point,
the
frequency
will
automatically
begin
increasing
for
as
tong
as
the
DOWN
side
of
the
tuning
selector
is
not
held
down,
Scanning
will
not
stop
for
broadcasts
weak
enough
to
be
suppressed
by
the
muting
circuit.
To
receive
a
weak
FM
broadcast,
set
the
FM
mute/mode
switch
[14]
to
the
OFF
(MONO}
position
and
tune
in
the
FM
broadcast
using
the
manual
tuning
mode.
On
the
TX-36,
an
FM
tuning
evel
switch
[15]
permits
the
muting
level
to
be
switched
between
high
and
low.
In
the
high
position,
scanning
during
automatic
tuning
will
only
stop
for
stations
having
a
high
signal
strength.
To
tune
in
weaker
stations
in
the
automatic
tuning
mode,
set
the
tuning
level
switch
to
the
low
position.
For
even
weaker
stations,
set
the
FM
mute/mode
switch
14]
to
the
OFF
(MONO}
position
(in
which
case
even
stereo
broadcasts
will
be
heard
in
mono).
[7]
FM/AM
Preset
Keys
(PRESET
STATION)
Use
these
keys
to
recall
an
FM
or
AM
station
or
to
store
a
station
in
the
memory.
The
preset
indicator
will
light
to
show
which
key
has
been
used.
Refer
to
the
Memory
Function
section
for
details.
[8]
Tape
Monitor
Switches
and
Indicators
These
switches
permit
two
different
tape
decks
to
be
used
for
recording,
playback
and
dubbing.
Press
once
to
turn
on
and
once
again
to
turn
off.
Note
that
dubbing
can
only
be
performed
from
tape
deck
1
to
tape
deck
2.
eo
Input
Selector
Switches
and
Indicators
PHONO:
Press
this
switch
to
listen
to
the
turntable,
TUNER:
Press
this
switch
to
listen
to
an
AM
or
FM
broadcast.
Treble
Control
(TREBLE)
Adjust
to
strengthen
or
weaken
treble
response.
In
the
center
defeat
position,
the
treble
tone
control
circuitry
is
completely
bypassed.
When
the
treble
control
is
turned
all
the
way
to
the
left,
a
high
cut
filter
is
activated.
11;
Bass
Control
(BASS)
Adiust
to
strengthen
or
weaken
bass
response.
In
the
center
defeat
position,
the
bass
tone
control
circuitry
is
completely
bypassed.
12]
Subsonic
Filter
(SUBSONIC)
(only
TX-36)
Pushing
this
button
cuts
off
all
frequencies
below
15Hz.
This
is
used
to
eliminate
motor
rumble
and
other
inaudible
low
frequency
noises.

Related product manuals