EasyManua.ls Logo

OpeMed OT200 User Manual

OpeMed OT200
20 pages
To Next Page IconTo Next Page
Page #1 background imageLoading...
Page #1 background image
January 2017 | Ref 1120 | OT200 Compact Ceiling Hoist User Manual
User Guide:
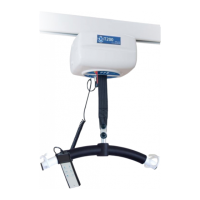
OT200 Compact
Ceiling Hoist
OpeMed (Europe) Ltd
www.opemed.net
+44 (0)1252 758858

Other manuals for OpeMed OT200

Questions and Answers:

OpeMed OT200 Specifications

General IconGeneral
CategoryMedical Equipment
Product TypeOxygen Concentrator
OperationContinuous Flow
Oxygen Purity93% ± 3%
Noise Level≤ 45 dB(A)
Operating Temperature10°C to 40°C

Summary

1 OT200 Compact Ceiling Hoist Manual - Introduction

1.1 About this Manual

Explains the purpose and scope of the user manual for operating and maintaining the OT200/OT400.

1.2 Symbols

Explains symbols used in the manual and their meanings for safe operation.

1.3 Contents of the Package

Lists the items included in the delivered package for the OT200 hoist.

1.4 The OT200 Ceiling Hoist

Describes the OT200/OT400 hoist, its function as a passive transfer device, and compliance.

1.5 Points of Attention

Lists critical safety warnings, usage restrictions, and important operational guidelines for the hoist.

2 Description

2.1 Charging and Life-Span of the Batteries

Details battery charging procedures, factors affecting battery life, and charging times.

2.2 Capacity

Explains how lifting cycles, weight, and battery age affect the hoist's capacity and lifecycle.

2.3 Emergency Cord

Describes how to use the emergency cord to activate the emergency stop and lowering function.

2.4 Emergency Control

Explains the emergency control for lowering a caretaker using spare battery power in critical situations.

2.5 Control Indicator Lights

Explains the meaning of the different indicator lights (green, orange, red) on the hoist.

2.6 Connecting the Hand-Held Control

Instructions for connecting the hand-held control to the hoist cassette.

2.7 Connecting the Powered Hanger Bar

Instructions on how to connect the powered hanger bar to the hoist cassette.

2.8 Hand-Held Control

How to use the hand-held control for operating the hoist and hanger bar functions.

3 Rail System

3.1 XY or H System for Room Coverage

Explains XY/H rail systems for covering room areas and cassette charging.

3.2 Turntable (Optional)

Describes the optional turntable for enabling cassette movement along multiple rails.

3.3 Gate (with X-Y Systems)

Explains the gate system for smooth transitions between fixed and mobile rails in X-Y systems.

3.4 Exchanger or Junction

Details the exchanger/junction as a cost-effective alternative to turntables for track splitting.

4 Hanger Bar

4.1 STANDARD – 2 Point Spreader Bar

Details the standard 2-point spreader bar for use with loop slings.

4.2 OPTIONAL - Manual Cradle

Describes the manual cradle hanger bar, influenced by user movement for positioning.

4.3 OPTIONAL EXTRA - Powered Cradle

Explains the powered cradle for automatic positioning, controlled by hand-held device.

4.4 OT400 Hanger Bar

Notes that the OT400 hanger bar is reinforced for its higher capacity.

5 Slings

5.1 Sling Attachment

Provides guidelines for correctly attaching slings and checking them for wear or damage.

5.1.1 LOOP SLINGS

Instructions for attaching loop slings to the hanger bar hooks securely.

5.1.2 CLIP SLINGS

Instructions for attaching clip slings to the hanger bar attachment points correctly.

6 Using the OT200 Ceiling Hoist

6.1 Lifting From a Chair

Step-by-step guide for safely lifting a caretaker from a chair.

6.2 Lifting From a Bed

Step-by-step guide for safely lifting a caretaker from a bed.

6.3 Moving the Patient

Instructions on how to safely move a lifted patient along the rail system.

6.4 Taking the Patient Out of the OT200 / OT400

Procedures for safely transferring a patient out of the hoist system after lifting.

6.4.1 Step 1a Lifting Towards a Bed

Guide for lowering a lifted patient onto a bed into a lying position.

6.4.2 Lifting Towards a (Wheel) Chair

Instructions for safely lowering a patient into a wheelchair.

6.4.3 Lifting Towards a Toilet

Instructions for safely lowering a patient onto a toilet.

7 Maintaining the OT200 Ceiling Hoist

7.1 Cleaning Instructions

Guidelines for cleaning the hoist cassette, hanger bar, and slings.

7.2 Daily/Weekly Maintenance

Recommended daily and weekly maintenance checks to prevent operational problems.

7.3 Annual Inspection and Maintenance

Details requirements for annual inspection and maintenance by authorized personnel.

7.4 If the OT200 Does Not Function

Troubleshooting steps to diagnose and resolve common issues when the hoist is not working.

7.5 Disposal

Information on how to properly dispose of the hoist and its components.

8 OT200 Specification

8.1 Technical Summary

Provides a summary of the key technical specifications of the OT200 hoist.

9 Warranty statements

10 About OpeMed

10.1 Contact Details

Provides contact information for OpeMed (Europe) Ltd, including address, phone, and email.

11 EG - Statement of Conformity

12 Notes