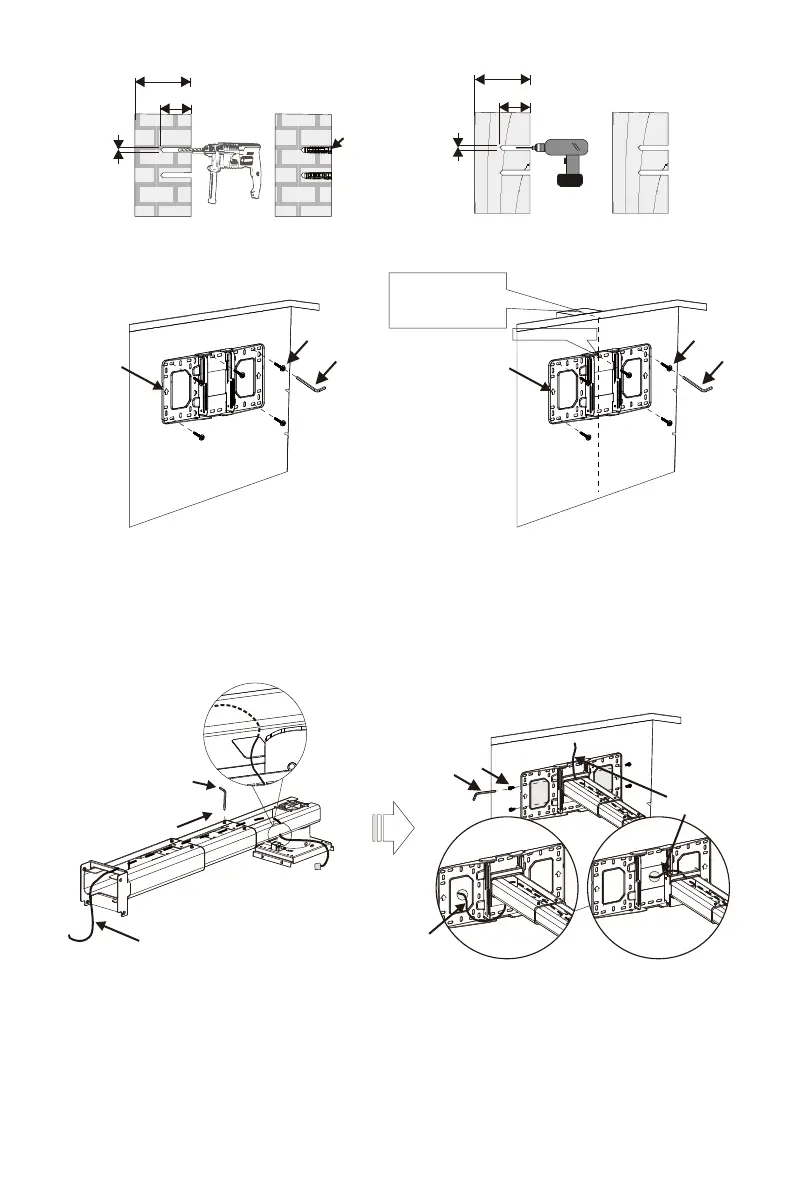
≥55mm
B
≥55mm
Concrete wall mounting
With anchor bolt
Dry-wall mounting
Without anchor bolt
Ø10-11mm
Ø3mm
C
A
C
A
The arrows up
The arrows up
screw centre
When installed on the
wood stud wall, align the
center of the wall mount
plate with the center of
the stud.
Step 2: Attach the projector mount to the wall plate
D
C
F
The cables
The cables
The cables
Loosen the screws with L3 allen wrench,
pull out the support arm around 4'' (100mm)
and make power cable & signal cables go
through the support arm.
The cables can go through the wall plate
by three ways as shown in the pictures. Then,
tighten the screw F after locating the position
of the projector mount period.
3
● Insert Screw F(M6x15) from the fixing kit, tighten with a L5 Allen Key from fixing kit.
● Insert Screw A(M6x55) from the fixing kit, tighten with a L5 Allen Key from fixing kit.
≥100mm
≥114mm
 Loading...