5
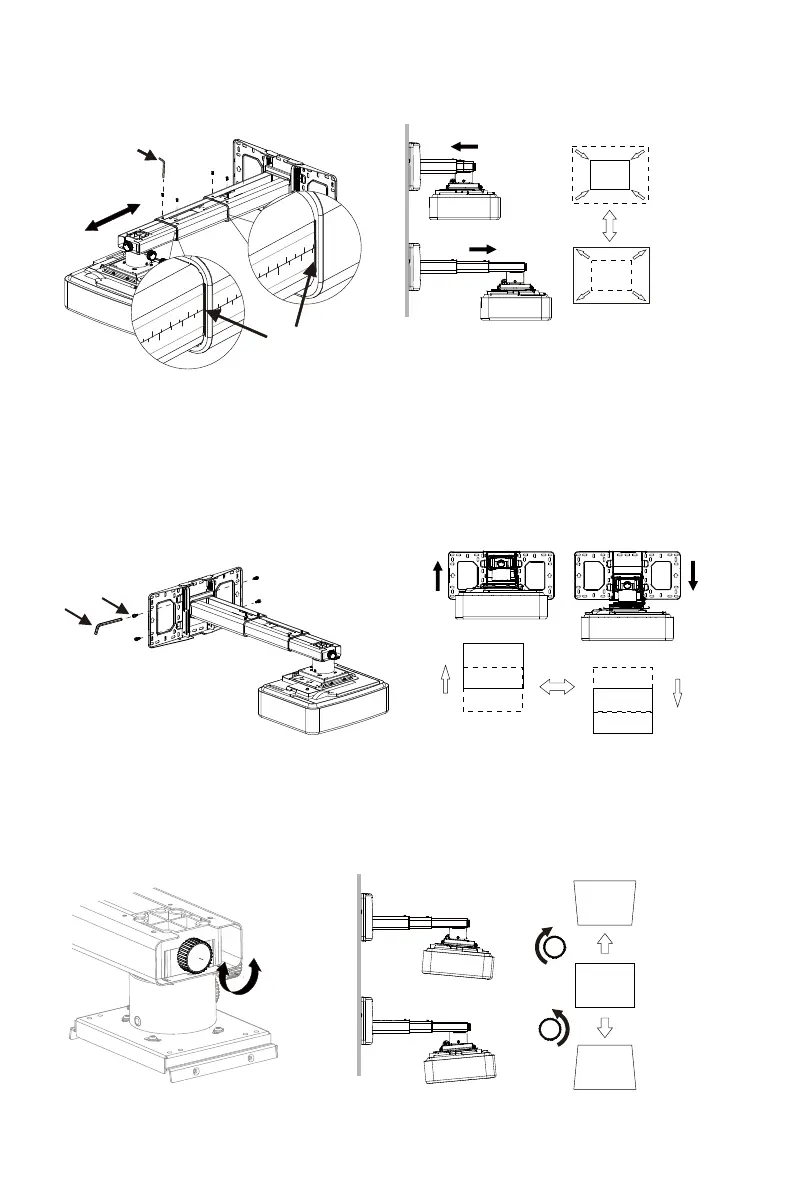
Step 5: Adjusting the image size
To make adjustments to meet your demands, screws must be loosened in a specific
order, as shown in the above Fig① ,Fig②. (When the length of inside arm 555mm do not meet
your demands, then you should loose the screws on the outside arm to adjust the middle arm.
Under this circumstance, the number read on the middle arm is correct).
Step 6: Adjusting the image height
A
B
A
● Loosen the screws slightly to adjust the projector to the required position.
Step 7: Adjusting the vertical tilt
A
B
A
B
Adjustment
Direction
Vertical tilt Knob
Screen
Note:
A
B
F
C
A
B
B
Screen
Adjustment
Direction
to see the distance from
wall to the mounting plate
Check the measuring rule
35
880mm
590mm
23in
①
970mm
38in
②
D
B
A
A
B
Screen Adjustment Direction
 Loading...