11
Introduction
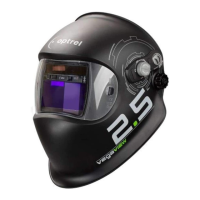
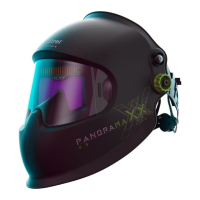
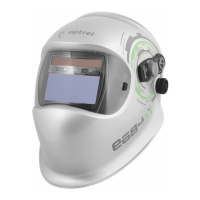
A welding helmet is a type of headgear used when performing certain types of welding to protect the eyes,
face and neck from flash burn, ultraviolet light, sparks, infrared light, and heat. The helmet consists of
several parts (see spare parts list). An automatic welding filter combines a passive UV and a passive IR
filter with an active filter, the luminous transmittance of which varies in the visible region of the spectrum,
depending on the irradiance from the welding arc. The luminous transmittance of the automatic welding
filter has an initial high value (light state). After the welding arc strikes and within a defined switching time,
the luminous transmittance of the filter changes to a low value (dark state).
Depending on the model, the helmet can be combined with a protective helmet and / or with a PAPR
(Powered Air Purifying Respirator) system.
Safety instructions
Please read the operating instructions before using the helmet. Check that the front cover lens is fitted
correctly. If it is not possible to eliminate errors, you must stop using the cartridge.
Precautions & protective restrictions / Risks
During the welding process, heat and radiation are released, which can cause damage to the eyes and
skin. This product offers protection for the eyes and face. When wearing the helmet, your eyes are always
protected against ultraviolet and infrared radiation, regardless of the shade level. To protect the rest of your
body, appropriate protective clothing must also be worn. In some circumstances, particles and substances
released by the welding process can trigger allergic skin reactions in correspondingly predisposed
persons. Materials that come into contact with skin may cause allergic reactions to susceptible persons.
The protective welding helmet must only be used for welding and grinding and not for other applications.
The manufacturer assumes no liability when the welding helmet is used for purposes other than intended or
with disregard for the operating instruct ions. The helmet is suitable for all established welding procedures,
excluding gas and laser welding. Please note the recommended protection level in accordance with EN169
on the cover. Scratched or damaged lenses must be replaced. The helmet does not replace a safety helmet.
Depending on the model, the helmet can be combined with a protective helmet.
The helmet can affect the field of view due to constructive specifications (no view on the side without
turning the head) and may affect a color perception due to the light transmission of the auto darkening
filter. As a result, signal lights or warning indicators may not be seen. Further there is an impact hazard
due to a larger contour (head with helmet on). The helmet also reduces the audio and heat perception.
Sleep mode
The cartridge has an automatic switch-off function, which increases the service life. If the light falls on the
catridge for a period of approx 10 minutes less than 1 Lux, it automatically switches off. To reactivate the
cartridge,it must be briefly exposed to daylight. If the shade cartridge cannot be reactivated or does not
darken when the welding arc is ignited, the batteries must be replaced.
Warranty & liability
The warranty conditions can be found in the instructions of the manufacturer’s national sales organisation.
Contact your authorised specialist retailer for more details. A warranty is only given for material and manufacturing
defects. In the event of damage due to improper use, unauthorised intervention or use not provided for by the
manufacturer, the warranty and liability are void. Liability and warranty are also void if spare parts other than
original spare parts are used.
Expected Lifetime
The welding helmet has no expiration date. The product can be used as long as no visible or invisible
damage or functional problems occur.
How to use (Quick Start Guide)
1. Head band. Adjust the upper adjusting band (p. 4) to the size of your head. Push in the ratchet knob
(p. 4) and turn until the head band fits securely but without pressure.
2. Distance from eyes and helmet angle. By releasing the locking knobs (p. 4-5), the distance between
the cartridge and the eyes can be adjusted. Adjust both sides equally and do not tilt. Then tighten the
locking knobs again. The helmet angle can be adjusted using the rotary knob (p. 5).
3. Automatic/manual operating mode. The sliding switch (p. 6) is used to set the protection level setting
mode. In automatic mode, the protection level is automatically adjusted to the intensity of the light
arc via sensors (standard EN 379:2003). In manual mode, the protection level can be set by turning
the knob (p. 6-7).
4. Shade Level. In "manual" mode, the protection level can be set by the range slider between the range
level SL5 to SL9 and SL9 to SL13. The fine adjustment can be set by turning the potentiometer knob
(p. 6-7). In "automatic" mode, the protection level (SL5 – SL13) corresponds to standard EN 379,
if the potentiometer knob (p. 6-7) is set to position "N". Turn the knob to correct the automatically
set protection level by two protection levels up or down, depending on personal preference.(green
inscription)
5. Grinding mode. Press the Grind button (p. 6) to switch the cartridge to grinding mode. In this mode
the cartridge is deactivated and remains in light mode. The activated grinding mode is indicated by
the red flashing LED (p. 6) inside the helmet. To deactivate grinding mode, press the protection level
knob again.After 10 minutes, the grinding mode is automatically reset.
6. Sensitivity. With the sensitivity button the light sensitivity is adjusted according to the welding arc and
the ambient light. The border of the "Super High" area is the standard sensivity setting. By turning
the knob, these can be customized. In the "Super High" area the maximum light sensitivity can be
achieved.
7. Sensor slider. The sensor slider can be set to two different positions. Depending on the position, the
ambient light detection angle is reduced (p. 7) or increased (p. 7).
8. Delay switch. The opening knob (Delay) (p. 7) allows to select an opening delay from dark to light.
The knob allows infinite adjustment from dark to light between 0.1 to 2.0 s which protects the eyes.
Cleaning and disinfection
The shade cartridge and the front cover lens must be cleaned with a soft cloth at regular intervals. No
strong cleaning agents, solvents, alcohol or cleaning agents containing scouring agent must be used.
Scratched or damaged lenses must be replaced.
Storage
The welding helmet must be stored at room temperature and at low humidity. Storing the helmet in the
original packaging will increase the service life of the batteries.
Replacing the the front cover lens (p. 8-9)
Push in one side clip to release the front cover lens and then remove it. Attach the new front cover lens to
one side clip. Pull the front cover lens round to the second side clip and clip in place. This action requires
some pressure to ensure that the gasket on the front cover lens has the desired effect.
Replacing the batteries (p. 5)
The cartridge has replaceable Lithium button cell batteries, type CR2032. If you are using a welding helmet
with a fresh air connection, you must remove the face seal before replacing the batteries. The batteries
must be replaced when the LED on the cartridge flashes in green.
1. Carefully remove the battery cover
2. Remove the batteries and dispose of them in accordance with the national regulations for special waste
3. Insert CR2032 type batteries, as shown
4. Carefully replace the battery cover
If the shade cartridge does not darken when the welding arc is ignited, please check battery polarity.
To check whether the batteries still have sufficient power, hold the shade cartridge against a bright
lamp. If the green LED flashes, the batteries are empty and must be replaced immediately. If the shade
cartridge does not operate correctly in spite of correct battery replacement, it must be declared unusable
and must be replaced.
Removing/installing the cartridge (p. 8)
1. Pull out the protection level knob
2. Carefully remove the battery cover
3. Unlock the cartridge retention spring as shown
4. Carefully tilt the cartridge out
5. Unlock the satellite as shown
6. Pull the satellite out through the gap in the helmet
7. Rotate the satellite by 90° and push through the hole in the helmet
8. Remove / replace the shade cartridge
The cartridge is installed in the reverse order.
Troubleshooting
Cartridge does not darken
→ Adjust sensitivity → Check the light flow to the sensor
→ Change the sensor slider position → Select manual mode
→ Clean sensors or front cover lens → Replace the batteries
→ Deactivate grinding mode
Protection level too light
→ Select manual mode → Replace front cover lens
→ In automatic mode, adjust rotar y knob by +1 or +2
Protection level too dark
→ Select manual mode → In automatic mode, adjust rotar y knob by -1 or -2
Cartridge flickers
→ Adjust position of the delay knob on welding procedure
→ Replace the batteries
Poor vision
→ Clean the front cover lens or cartridge → Increase the ambient light
→ Adjust the protection level to the welding procedure
Welding helmet slips
→ Adjust/tighten the head band
Specifications
(We reserve the right to make technical changes)
Shade Level auto mode: SL4 (light mode) SL5 < SL13 (dark mode)
manual mode: SL4 (light mode) SL5 < SL13 (dark mode)
UV/IR protection Maximum protection in light and dark modes
Switching time from light to dark 170μs (23°C / 73°F) 110μs (55°C / 131°F)
Switching time from dark to light 0.1 - 2.0s with "Twilight Function"
Dimensions of cartridge 90 x 110 x 7mm / 3.55 x4.33 x 0.28“
Dimensions of field of vision 50 x 100mm / 1.97 x 3.94“
Power supply Solar cells, 2 pcs. LI batteries 3V replaceable (CR2032)
Weight Non PAPR: 500g / 17.637 oz
PAPR: 700g / 24.6918oz
Operating temperature -10°C – 70°C / 14°F – 157°F
Storage temperature -20°C – 80°C / -4°F – 176°F
Classification as per EN379 Optical class = 1 Homogeneity = 1
Light scatter = 1 Angle of vision dependency = 1
Standards CE, EAC; complies with ANSI Z87.1, AS/NZS, CSA Z94.3
Additional markings for PAPR version
(notified body CE1024)
N12941 (TH3 in combination with e3000 or e3000X,
TH2 for versions with hardhat and e3000 or e3000X)
EN 14594 Class 3B
Spare parts (p. 42)
-Helmet without cartridge (SP01) -Repair set 1 (Potentiometer knob, Sensitivity
-Cartridge incl. satellite (SP02) knob, Battery cover) (SP06)
-Front cover lens (SP03) -Head band with fastener (SP07)
-Repair set 2 (SP04) -Sweat band (SP08 / SP09)
-Inner protection lens (SP05)
Declaration of conformity
See internet link adress at 2nd last page.
Legal information
This document complies with the requirements of EU regulation 2016/425 point 1.4 of Annex II.
Notified body
See 2nd last page for detailed information.
English
Tableau des niveaux de protection EN169
Tabella dei livelli di protezione EN169
 Loading...