47
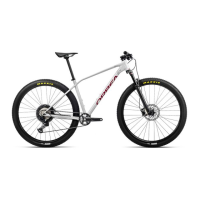
INTERNAL GEAR HUB DRIVETRAIN
Some bicycles are equipped with a type of shifter inside the rear hub.
Nexus 7/8 speed
6JGKPVGTPCNIGCTJWDFTKXGVTCKPKUOCFGWRQHVJGHQNNQYKPIURGEKƂEEQORQPGPVU
- Shifters
- Rear hub
- Gear cable.
The drivetrain is sealed; therefore, it stays lubricated with little maintenance. This section will
explain how to inspect, adjust and lubricate the internal drivetrain.
Inspection
A well-adjusted drivetrain is silent. If it makes any noise when shifting, or while you are pedaling,
the gear cable may need to be adjusted. If the noise gets louder after adjusting it, stop the bicy-
cle and analyze the origin of the noise. If necessary, take your bike to your authorized dealer.
Once a month, make sure that the shifters are correctly adjusted.
In a Nexus 8-speed hub, set the shift lever to 4. Check to be sure that the yellow setting lines on
the cassette joint bracket and pulley are aligned.
Once a month, check that the cables are not twisted, rusted, have any broken wires or frayed
ends. If you have any issues with the gear cable, do not use the bicycle. Change the gear cable
or take it to your authorized dealer.
Adjustment
Adjusting the rear drivetrain
- Set the shift lever to 4.
- Align the indicator on the pulley of the rear wheel hub with the cassette joint bracket.
- If they cannot be aligned, adjust the cassette cable tension to do so.
- Move the lever to 1 and then to 4, and check the adjustment.
Changing the drivetrain cable
.QQUGPVJGECDNGƂZKPIDQNV
7PUETGYVJGDQNVCPFJQNFVJGƂZKPIPWVCVVJGGPFQHVJGECDNG
5NKFGVJGƂZKPIPWVHTQOVJGGPFQHVJGECDNGHQTYCTFU
- Make a note of the length of the old cable for installing the new cable.
- Install the new cable.
#VVCEJVJGECDNGƂZKPIPWV
- Attach the shifter casing.
- Attach a metal end cap to the wire to prevent the end from fraying.
- Follow the instructions to adjust the rear drivetrain.
Lubrication
6JGTGCTFTKXGVTCKPOWUVDGNWDTKECVGFQPEGC[GCT6JKURTQEGUUTGSWKTGUURGEKƂEVQQNUCPF
special know-how. It should only be performed by an authorized dealer.
The cable must be lubricated whenever it is replaced.
6. FORK AND HEADSET
The headset is the set of bearings that allows the fork, stem and handlebar of the bicycle to
rotate. This section will explain how to inspect, lubricate and adjust the fork and headset.
If your bike is equipped with a suspension fork, read the chapter on suspension forks. If your bi-
E[ENGJCUCPCNWOKPWOQTECTDQPƂDGTHQTMTGCFVJGEJCRVGTQPECTKPIHQT[QWTHQTMCPFHTCOG
Inspection
Once a month, inspect your bike’s headset and check that it is not too loose or tight. If it is, do
not use the bicycle. Take it to your authorized dealer.
Checking headset play
- Stand over the horizontal tube of the bike with both feet on the ground.
- Squeeze the front brake while moving the bicycle forward and back.
If your bicycle does not have a front brake, turn the front wheel so that it is perpendicular the
force applied.
- Watch, listen and feel if the headset is loose.
Checking the tightness of the headset adjustment
- Stand over the horizontal tube of the bike with both feet on the ground.
- With the front wheel on the ground, turn the fork and the handlebar left to right and vice versa.
- Watch, listen and feel if the headset is tight, or if it makes noise or gets stuck at certain points.
WARNING #PKORTQRGTCFLWUVOGPVQHVJGJGCFUGVEQWNFECWUG[QWVQNQUGEQPVTQNCPFHCNN/CMG
sure the headset is correctly adjusted prior to use.