EasyManua.ls Logo

Oregon Scientific RMR132HG User Manual

Oregon Scientific RMR132HG
15 pages
To Next Page IconTo Next Page
Page #1 background imageLoading...
Page #1 background image
1
EN
Multi-Channel IN-OUT Thermo-Hygrometer
with Cable Free Sensor and RF Clock
MODEL: RMR132HG
USER MANUAL
INTRODUCTION
Congratulations on your purchase of the RMR132HG
Multi-Channel In-Out Thermo-Hygrometer with 433MHz cable
free sensor and radio-controlled calendar clock.
The basic package comes with a main unit, which is the
temperature and calendar clock station, and a remote unit, the
Thermo-Hygrometer sensor.
The main unit has large read-outs for indoors temperature and
humidity, calendar clock, temperatures and relative humidity
collected and transmitted by the remote unit. The main unit can
support up to 3 remote units.
The main unit is capable of keeping track of the maximum and
minimum recordings of different sites. And no wire installation is
required and the RMR132HG operates at 433MHz.
As for the calendar clock, it is radio-controlled. It automatically
synchronizes its current time and date when it is brought within an
approximate 1500km radius of the radio signal generated from
Frankfurt, Germany (DCF77).
You can also set the calendar clock manually when it is off range.
Other features include 4-language display, 4-step crescendo dual
alarms and interchangeable display modes.
MAIN FEATURES
D
B
A
E
C
G
H
I
F
O
P
S
L
N
M
K
J
R
Q
RMR132HG_M_EN_R01 8/13/04, 12:30 PM1
Question and Answer IconNeed help?

Do you have a question about the Oregon Scientific RMR132HG and is the answer not in the manual?

Oregon Scientific RMR132HG Specifications

General IconGeneral
DisplayLCD
Temperature SensorYes
Humidity SensorYes
Alarm FunctionYes
Wireless SensorYes
ProjectionNo
AlarmDual Alarm
Time Format12/24 Hour
Power SourceBattery
Featurescalendar, indoor/outdoor temperature and humidity
Temperature DisplayCelsius/Fahrenheit

Summary

Introduction to the Thermo-Hygrometer

Main Unit Features

LCD Display and Indicators

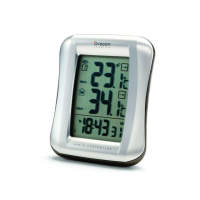
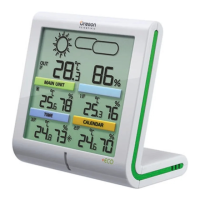
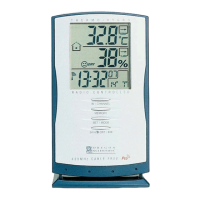
Details on the three-line LCD, battery status, and radio reception signal.

Control Buttons Overview

Explanation of buttons for channel selection, mode setting, memory, and reset.

Alarm and Clock Functions

Information on alarm icons, alarm activation/disabling, and clock settings.

Mounting and Power Options

Covers wall-mount hole, battery compartment, and removable table stand.

Remote Sensor Features

Remote Sensor Display and Controls

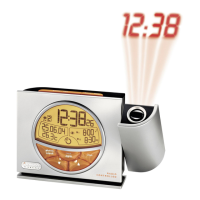
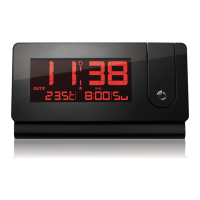
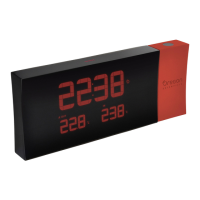
Description of the two-line LCD, LED indicator, and slide switches for settings.

Remote Sensor Power and Mounting

Details on battery compartment, door, wall-mount holder, and table stand.

Before You Begin Setup

Unit Installation and Battery Setup

Remote Unit Battery and Channel Setup

Instructions for installing batteries and selecting channels on the remote unit.

Main Unit Battery Installation

Procedure for inserting batteries into the main unit.

Standing and Mounting Options

Low Battery Warning System

Reset Functionality

Initial Operation and Synchronization

Displaying and Reading Data

Checking Remote and Indoor Readings

How to select and view temperature/humidity from main or remote units.

Understanding Kinetic Wave Display

Interpreting the kinetic wave icon for signal status.

Interpreting Comfort-Level Icons

Explanation of icons indicating comfort, dry, or wet conditions.

Data Trends and Scans

Temperature and Humidity Trend Indicators

Understanding trend arrows for rising, steady, or falling measurements.

Remote Sensor Scanning Mode

Activating and deactivating automatic scanning of remote sensors.

Maximum and Minimum Recording Display

How to view and recall stored maximum and minimum temperature/humidity.

Memory Management and Alarm Setup

Clearing Maximum/Minimum Memory

Procedure to clear recorded maximum and minimum temperature/humidity data.

Channel-1 Alarm Setup

Setting high/low temperature and humidity limits for channel-1 alarms.

Alarm and Signal Management

Stopping and Disabling Alarms

How to stop a ringing alarm or deactivate the alarm function.

Handling Disconnected Signals

Troubleshooting steps for lost remote sensor signals.

Understanding Transmission Collisions

Explanation of potential interference from other household devices.

Calendar Clock Display Modes

Clock and Alarm Settings

Manual Clock Setting Procedure

Step-by-step guide for manually setting the clock and date.

Setting and Arming Alarms

Instructions for setting alarm times for Alarm 1 and Alarm 2.

Operational Procedures and Safety

Stopping Ringing Alarms

Methods to stop an active alarm sound and disarm the alarm.

Time Zone and Offset Table

Reference for time zone settings and offsets.

General Product Precautions

Important safety and handling guidelines for the device.

Oregon Scientific Company Information

EC Declaration of Conformity

Related product manuals