12
Issued by the Technical Assistance and Publications Office
ALL RIGHTS RESERVED
A copy of this manual is delivered with each grinder.
NB: The descriptions and illustrations contained in this manual are not binding. The manufacturer reserves the right to bring about
any modifications without updating this manual.
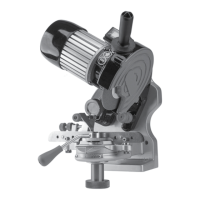
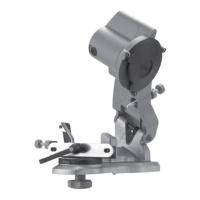
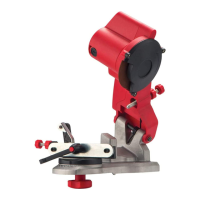
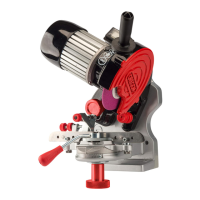
ELECTRICAL CHAIN GRINDER FOR SAWS
MINIGRINDER 230Vac
CHARACTERISTICS OF THE MACHINE:
- Manufacturer: Tecomec SpA - Via Secchi, 2 - 42011 Bagnolo in Piano - Reggio Emilia - ITALY
- Machine: Electrical chain grinder MINIGRINDER 106550 230Vac for saws
DATA AND MODELS:
- models: MINIGRINDER 106550 230Vac
- installed power: electrical motor 50Hz 85
W voltage 230Vac
- insulation class II
- grinding wheel dimensions: outside diameter105mm, inside diameter 22.3mm
- thickness: 3.2 - 4.7 - 6mm
- maximum speed: 5000 min
-1
(15 min)
- sound pressure level: 76dB (A)
- level of vibrations transmitted to the handle: < 2,5 m/S
2
- type of chains: pitches – 1/4” .325” – 3/8” - .404” – 1/2”
- weight of the complete machine: 19.6N (2 kg)
- accessories provided: 1 wheel (thickness: 4.7mm), 1 wheel guard, 1 dressing stone; 1 template ; 1 handle. 1 screw M6x25
INTRODUCTION:
Keep this manual with care.
To ensure the correct use of the grinder and to prevent accidents, do not start working without having read this manual carefully. This
manual explains the operation of the machine components and provides instructions for carrying out the checks and maintenance required.
WARNING – Any maintenance operations not described in this manual shall only be carried out by an authorized service center. To
guarantee the efficient and consistent operation of your grinder, worn or broken parts shall only be replaced using ORIGINAL SPARE
PARTS
SAFETY RULES:
WARNING – When correctly used, your grinder is a fast, easy, and efficient work tool. For pleasant and safe working, carefully comply
with the safety rules listed below and as well as with those provided throughout this manual
1. The grinder shall only be used by adults. Users shall be in good physical condition and familiar with the instructions for use.
2. Never wear rings, bracelets and/or loose clothing that could come into contact with the grinding wheel.
3. Always wear gloves and protective eyewear while operating the grinder and while sharpening the wheel.
4. Never stop the grinding wheel with your hands, even after stopping the motor.
5. Check that the plug is disconnected when fitting the grinding wheel and during maintenance or transport.
6. Never start the grinder without the wheel guard in place. The guard is supplied together with the accessories’ bag and must be installed
after assembling the wheel (photo 6). The guard can be removed only while the wheel is being replaced; then, it must be reinstalled.
7. Check that the voltage and frequency indicated on the grinder tag correspond to the mains values.
8. Never use defective and/or non-standard cables, plugs or extension cables.
9. Remove the plug from the mains immediately if the cable is damaged or cut. For cable repair or replacement, contact your authorized
dealer or service center. The power supply cable is complete with terminals. For internal electrical connection insert the deeding cable
terminals directly in the switch. The electrical connection to the mains shall be made in order to prevent damages by people or vehicles
which could endanger both their safety and yours.
10. Before starting up the grinder, check that the working area is free of tools or other objects.
11. Check the cable position during operation, making sure that it remains outside the grinding wheel operating area and that it is not
energized. Never work near other electrical cables.
12. Never advance the chain with your hands until the grinding wheel has moved entirely outside the working area.
13. Do not allow other people to remain near the grinder during its operation or to touch its supply cable.
14. Always keep the hand-grips clean and dry.
15. Before starting the grinder, check that the grinding wheel is correctly secured and out of the working area.
16. Always work in a stable and safe position, and be particularly careful.
17. Always work with the machine fastened on a bench or to a wall.
18. Always comply with maintenance instructions.
19. Before using the grinder, check that all safety (and other) devices are properly working.
20. Never work with a damaged, improperly repaired/ fitted or arbitrarily modified grinder. Do not remove, damage, or neutralize any
safety devices.
21. Use only the grinding wheels specified in the chain table at the end of the handbook (columns I and L)
22. Never use the grinder as a cutter or for grinding objects other than saw chains.
23. Deliver or lend your grinder only to expert users who are familiar with its operation and correct use.
24. Store your grinder in a dry place, raised off the ground. Keep it away from children.
25. Damage risk, caused by accidental start-up. Do not use in a place where children may be present.
26. The grinder can be used continuously for no more than 15 minutes; then, turn it off for an adequate period of time.
27. Never let your grinder in the rain, in wet environments, or in any place accessible to children.
28. Never expose your grinder in explosive or inflammable atmosphere.
29. When your grinder can no longer be used, do not abandon it. Take it to your dealer who will store or dispose of it correctly.
30. Always refer to your dealer for any explanations or important maintenance or servicing.
31. Never jerk the cable to disconnect it from the outlet. Keep the cable away from heat, oil, and sharp objects.
11
32. To avoid the hazard of cutting your hands, move the chain by grasping it correctly on the link, and not on the cutting part
33. Do not start the grinder holding the wheel with your hands.
34. Do not force the tool while you’re working.
ATTENTION – SETTING UP THE GRINDER - the grinder shall only be used in a place protected from dust and dampness, well-lighted,
away from children, gases, or other flammable or explosive liquids. The grinder shall be placed near a suitable earthed outlet, not to
use dangerous extension cables.
- fasten the grinder onto the bench (photo 1 ) or to the wall (photo 2) with two M8 bolts (not provided). For fastening the grinder onto a
bench, carefully position it, using the relevant reference notches.
- when the grinder is fastened onto the bench or to the wall (photo 2) use a suitable square support (not provided), making sure that the
machine is not fastened at the level of the operator’s eyes. We recommend that you install the grinder at a max. height of 120-130cm
from ground level.
- insert screw M6x25 provided, making it slide up to the end of its seat on the arm (photo 3)
- screw the handle provided on screw M6x25, checking that the screw is still at the end of its seat. If not, the wheel guard cannot be installed
(photo 4)
- after installing the grinder properly, assemble the wheel.
ASSEMBLY AND WARNINGS ABOUT THE GRINDING WHEEL:
- use a wheel fit for the type of chain to be ground, consulting the chain table enclosed at the end of the handbook (column I - L)
- before using the machine, check that the grinding wheels are in perfect condition. To do so, hang the wheels by the central hole and
tap them lightly with a non-metal object on the side near the perimeter. If they are in perfect condition you should hear a metallic sound.
A dull sound means that the wheel is cracked or broken, and shall be replaced.
- do not force the grinding wheel on the hub and do not modify the diameter of the assembly hole. Be careful not to use grinding wheels
which do not perfectly match the machine
- to install the wheel, use only clean and perfect hub and ring nut
- make sure that the outside diameters of the hub/ring nut are identical (fig. 1)
- the hub is steadily fastened onto the electrical motor’s shaft
- unscrew the ring nut manually, center and install the wheel on the hub, and re-screw the ring nut manually (photo 5)
- be careful with the ring nut assembly, since its discharge must be on the wheel side (fig. 2)
- if the grinding wheel’s ring nut is too tightened, the wheel could break or disintegrate during operation, seriously damaging the operator.
To avoid this risk, do not overtight, since this ring nut is made of thermoplastic material
- position the wheel guard on the motor casing properly, inside its seat (photo 6), and secure it in the position provided on the casing
(photo 6)
CHECKING THE GRINDING WHEEL:
- stand beside the wheel, start the grinder, and examine it to ensure that it does not oscillate either laterally or transversally, creating any
anomalous vibration
- if the wheel oscillates, immediately stop the machine and make sure that the wheel has been assembled properly. If necessary, replace
the wheel with an original spare part
- with the machine off, check the wheel profile by means of the special orange template (fig.3 point C)
- if necessary, after wearing suitable goggles and gloves, start the grinder and retouch the wheel profile with the dressing stone provided,
working carefully, grasping the dressing stone with two hands. The contact with the grinding wheel revolving at high speed could cause
burns and injuries
- before initiating grinding operations, test the assembled grinding wheel at working speed for at least one minute, keeping far from the
machine and checking that nobody is standing on the trajectory of its rotation plane.
N.B.: Replace the grinding wheels when their minimum diameter is about 80mm (3.14 inches)
START-UP:
- after fastening the machine onto the bench or to the wall, properly install the wheel, its guard, and the handle, make sure that the direction
of rotation of the wheel is the one indicated on the wheel guard; then, start up the machine
- the machine is equipped with a safety switch with a release coil, i.e. in case of sudden power failure, this switch is deactivated, leaving
the machine on stand-by in case of a sudden return of current (to restart the grinder, push the switch again)
- the machine must be connected with an outlet that ensures a 230Vac.
GRINDING:
- clean the chain before grinding it
- since this grinder has a fixed angle for the wheel inclination, the upper cutting angle of the tooth is fixed at 60° (measured anticlockwise)
- position the chain to be ground on the two jaws, making sure that the depth gauge is on the right, as indicated (photo 7-points 1)
- loosen the ring nut at the back of the grinder (photo 7 – point 2), and turn the vise clockwise, considering the grade that corresponds
to the upper grinding angle of the right tooth, using the graduated scale (photo 7 – point 3)
- make one of the right teeth hit the chain stop, and, with the register screw (photo 8 – point 1), adjust the tooth feeding
- the chain stop is installed on a pin installed on a plastic connecting rod. This pin has two position notches, so that the chain stop can be
positioned just at the center of the tooth to be ground
- stop the motor and lower the arm; then, with the chain feed register screws, try to approach the tooth to the wheel, until it is slightly
touched, always starting from the worst tooth identified using the template (fig. 3 point D)
- start the grinder and, with the tooth feed register screw, determine the quantity to be removed
- after determining the quantity to be removed, lock the register screw with the ring nut (photo 8 – point 2)
- to avoid overloading the motor and to prevent the chain from being damaged, remove minimum quantities of material and do not
work too long on the same tooth, so as not to damage the cutter
- adjust the grinding depth with the register screw positioned on the arm, without nicking connecting links (photo 9)
- after determining the grinding depth, lock the register screw with the ring nut (photo 9 – point 1)
- adjust the clamping lever; press the red push-button and pull the lever. The correct tightening of both jaws (photo 10) is set by a
slight clockwise rotation (clockwise rotation increases tightening, whilst anti-clockwise rotation loosen it). The tightening system with
clamping lever allows a uniform deformation of the two chain support jaws, so that the chain is always positioned just at the center
of the vise rotation. This is an essential requirement for perfect grinding, because the length of the right and left teeth must be the same.
- if the clamping lever is turned clockwise, the chain is locked between the two jaws, for precise and safe grinding (photo 11)
- grind all teeth of the same type (right) before turning the vise on the opposite side, to start grinding left teeth (photo 12), without touching
the chain feed register screw (photo 8 – point 1)
Tecomec
1190117_R05_DEF.indd 10 23/04/2010 15.08.09
ENGLISH
10
Issued by the Technical Assistance and Publications Office
ALL RIGHTS RESERVED
A copy of this manual is delivered with each grinder.
NB: The descriptions and illustrations contained in this manual are not binding. The manufacturer reserves the right to bring about
any modifications without updating this manual.
ELECTRICAL CHAIN GRINDER FOR SAWS
MINIGRINDER 230Vac
CHARACTERISTICS OF THE MACHINE:
- Manufacturer: Tecomec SpA - Via Secchi, 2 - 42011 Bagnolo in Piano - Reggio Emilia - ITALY
- Machine: Electrical chain grinder MINIGRINDER 106550 230Vac for saws
DATA AND MODELS:
- models: MINIGRINDER 106550 230Vac
- installed power: electrical motor 50Hz 85
W voltage 230Vac
- insulation class II
- grinding wheel dimensions: outside diameter105mm, inside diameter 22.3mm
- thickness: 3.2 - 4.7 - 6mm
- maximum speed: 5000 min
-1
(15 min)
- sound pressure level: 76dB (A)
- level of vibrations transmitted to the handle: < 2,5 m/S
2
- type of chains: pitches – 1/4” .325” – 3/8” - .404” – 1/2”
- weight of the complete machine: 19.6N (2 kg)
- accessories provided: 1 wheel (thickness: 4.7mm), 1 wheel guard, 1 dressing stone; 1 template ; 1 handle. 1 screw M6x25
INTRODUCTION:
Keep this manual with care.
To ensure the correct use of the grinder and to prevent accidents, do not start working without having read this manual carefully. This
manual explains the operation of the machine components and provides instructions for carrying out the checks and maintenance required.
WARNING – Any maintenance operations not described in this manual shall only be carried out by an authorized service center. To
guarantee the efficient and consistent operation of your grinder, worn or broken parts shall only be replaced using ORIGINAL SPARE
PARTS
SAFETY RULES:
WARNING – When correctly used, your grinder is a fast, easy, and efficient work tool. For pleasant and safe working, carefully comply
with the safety rules listed below and as well as with those provided throughout this manual
1. The grinder shall only be used by adults. Users shall be in good physical condition and familiar with the instructions for use.
2. Never wear rings, bracelets and/or loose clothing that could come into contact with the grinding wheel.
3. Always wear gloves and protective eyewear while operating the grinder and while sharpening the wheel.
4. Never stop the grinding wheel with your hands, even after stopping the motor.
5. Check that the plug is disconnected when fitting the grinding wheel and during maintenance or transport.
6. Never start the grinder without the wheel guard in place. The guard is supplied together with the accessories’ bag and must be installed
after assembling the wheel (photo 6). The guard can be removed only while the wheel is being replaced; then, it must be reinstalled.
7. Check that the voltage and frequency indicated on the grinder tag correspond to the mains values.
8. Never use defective and/or non-standard cables, plugs or extension cables.
9. Remove the plug from the mains immediately if the cable is damaged or cut. For cable repair or replacement, contact your authorized
dealer or service center. The power supply cable is complete with terminals. For internal electrical connection insert the deeding cable
terminals directly in the switch. The electrical connection to the mains shall be made in order to prevent damages by people or vehicles
which could endanger both their safety and yours.
10. Before starting up the grinder, check that the working area is free of tools or other objects.
11. Check the cable position during operation, making sure that it remains outside the grinding wheel operating area and that it is not
energized. Never work near other electrical cables.
12. Never advance the chain with your hands until the grinding wheel has moved entirely outside the working area.
13. Do not allow other people to remain near the grinder during its operation or to touch its supply cable.
14. Always keep the hand-grips clean and dry.
15. Before starting the grinder, check that the grinding wheel is correctly secured and out of the working area.
16. Always work in a stable and safe position, and be particularly careful.
17. Always work with the machine fastened on a bench or to a wall.
18. Always comply with maintenance instructions.
19. Before using the grinder, check that all safety (and other) devices are properly working.
20. Never work with a damaged, improperly repaired/ fitted or arbitrarily modified grinder. Do not remove, damage, or neutralize any
safety devices.
21. Use only the grinding wheels specified in the chain table at the end of the handbook (columns I and L)
22. Never use the grinder as a cutter or for grinding objects other than saw chains.
23. Deliver or lend your grinder only to expert users who are familiar with its operation and correct use.
24. Store your grinder in a dry place, raised off the ground. Keep it away from children.
25. Damage risk, caused by accidental start-up. Do not use in a place where children may be present.
26. The grinder can be used continuously for no more than 15 minutes; then, turn it off for an adequate period of time.
27. Never let your grinder in the rain, in wet environments, or in any place accessible to children.
28. Never expose your grinder in explosive or inflammable atmosphere.
29. When your grinder can no longer be used, do not abandon it. Take it to your dealer who will store or dispose of it correctly.
30. Always refer to your dealer for any explanations or important maintenance or servicing.
31. Never jerk the cable to disconnect it from the outlet. Keep the cable away from heat, oil, and sharp objects.
11
32. To avoid the hazard of cutting your hands, move the chain by grasping it correctly on the link, and not on the cutting part
33. Do not start the grinder holding the wheel with your hands.
34. Do not force the tool while you’re working.
ATTENTION – SETTING UP THE GRINDER - the grinder shall only be used in a place protected from dust and dampness, well-lighted,
away from children, gases, or other flammable or explosive liquids. The grinder shall be placed near a suitable earthed outlet, not to
use dangerous extension cables.
- fasten the grinder onto the bench (photo 1 ) or to the wall (photo 2) with two M8 bolts (not provided). For fastening the grinder onto a
bench, carefully position it, using the relevant reference notches.
- when the grinder is fastened onto the bench or to the wall (photo 2) use a suitable square support (not provided), making sure that the
machine is not fastened at the level of the operator’s eyes. We recommend that you install the grinder at a max. height of 120-130cm
from ground level.
- insert screw M6x25 provided, making it slide up to the end of its seat on the arm (photo 3)
- screw the handle provided on screw M6x25, checking that the screw is still at the end of its seat. If not, the wheel guard cannot be installed
(photo 4)
- after installing the grinder properly, assemble the wheel.
ASSEMBLY AND WARNINGS ABOUT THE GRINDING WHEEL:
- use a wheel fit for the type of chain to be ground, consulting the chain table enclosed at the end of the handbook (column I - L)
- before using the machine, check that the grinding wheels are in perfect condition. To do so, hang the wheels by the central hole and
tap them lightly with a non-metal object on the side near the perimeter. If they are in perfect condition you should hear a metallic sound.
A dull sound means that the wheel is cracked or broken, and shall be replaced.
- do not force the grinding wheel on the hub and do not modify the diameter of the assembly hole. Be careful not to use grinding wheels
which do not perfectly match the machine
- to install the wheel, use only clean and perfect hub and ring nut
- make sure that the outside diameters of the hub/ring nut are identical (fig. 1)
- the hub is steadily fastened onto the electrical motor’s shaft
- unscrew the ring nut manually, center and install the wheel on the hub, and re-screw the ring nut manually (photo 5)
- be careful with the ring nut assembly, since its discharge must be on the wheel side (fig. 2)
- if the grinding wheel’s ring nut is too tightened, the wheel could break or disintegrate during operation, seriously damaging the operator.
To avoid this risk, do not overtight, since this ring nut is made of thermoplastic material
- position the wheel guard on the motor casing properly, inside its seat (photo 6), and secure it in the position provided on the casing
(photo 6)
CHECKING THE GRINDING WHEEL:
- stand beside the wheel, start the grinder, and examine it to ensure that it does not oscillate either laterally or transversally, creating any
anomalous vibration
- if the wheel oscillates, immediately stop the machine and make sure that the wheel has been assembled properly. If necessary, replace
the wheel with an original spare part
- with the machine off, check the wheel profile by means of the special orange template (fig.3 point C)
- if necessary, after wearing suitable goggles and gloves, start the grinder and retouch the wheel profile with the dressing stone provided,
working carefully, grasping the dressing stone with two hands. The contact with the grinding wheel revolving at high speed could cause
burns and injuries
- before initiating grinding operations, test the assembled grinding wheel at working speed for at least one minute, keeping far from the
machine and checking that nobody is standing on the trajectory of its rotation plane.
N.B.: Replace the grinding wheels when their minimum diameter is about 80mm (3.14 inches)
START-UP:
- after fastening the machine onto the bench or to the wall, properly install the wheel, its guard, and the handle, make sure that the direction
of rotation of the wheel is the one indicated on the wheel guard; then, start up the machine
- the machine is equipped with a safety switch with a release coil, i.e. in case of sudden power failure, this switch is deactivated, leaving
the machine on stand-by in case of a sudden return of current (to restart the grinder, push the switch again)
- the machine must be connected with an outlet that ensures a 230Vac.
GRINDING:
- clean the chain before grinding it
- since this grinder has a fixed angle for the wheel inclination, the upper cutting angle of the tooth is fixed at 60° (measured anticlockwise)
- position the chain to be ground on the two jaws, making sure that the depth gauge is on the right, as indicated (photo 7-points 1)
- loosen the ring nut at the back of the grinder (photo 7 – point 2), and turn the vise clockwise, considering the grade that corresponds
to the upper grinding angle of the right tooth, using the graduated scale (photo 7 – point 3)
- make one of the right teeth hit the chain stop, and, with the register screw (photo 8 – point 1), adjust the tooth feeding
- the chain stop is installed on a pin installed on a plastic connecting rod. This pin has two position notches, so that the chain stop can be
positioned just at the center of the tooth to be ground
- stop the motor and lower the arm; then, with the chain feed register screws, try to approach the tooth to the wheel, until it is slightly
touched, always starting from the worst tooth identified using the template (fig. 3 point D)
- start the grinder and, with the tooth feed register screw, determine the quantity to be removed
- after determining the quantity to be removed, lock the register screw with the ring nut (photo 8 – point 2)
- to avoid overloading the motor and to prevent the chain from being damaged, remove minimum quantities of material and do not
work too long on the same tooth, so as not to damage the cutter
- adjust the grinding depth with the register screw positioned on the arm, without nicking connecting links (photo 9)
- after determining the grinding depth, lock the register screw with the ring nut (photo 9 – point 1)
- adjust the clamping lever; press the red push-button and pull the lever. The correct tightening of both jaws (photo 10) is set by a
slight clockwise rotation (clockwise rotation increases tightening, whilst anti-clockwise rotation loosen it). The tightening system with
clamping lever allows a uniform deformation of the two chain support jaws, so that the chain is always positioned just at the center
of the vise rotation. This is an essential requirement for perfect grinding, because the length of the right and left teeth must be the same.
- if the clamping lever is turned clockwise, the chain is locked between the two jaws, for precise and safe grinding (photo 11)
- grind all teeth of the same type (right) before turning the vise on the opposite side, to start grinding left teeth (photo 12), without touching
the chain feed register screw (photo 8 – point 1)
Tecomec
1190117_R05_DEF.indd 10 23/04/2010 15.08.09
ENGLISH
- The declared vibration total value has been measured in accordance with a standard test method and may be used for comparing one
tool with another.
- The declared vibration total value may also be used in a preliminary assessment of exposure.
- the vibration emission during actual use of the power tool can differ from the declared total value depending on the ways in which the
tool is used; and of the need to identify safety measures to protect the operator that are based on an estimation of exposure in the actual
conditions of use (taking account of all parts of the operating cycle such as the times when the tool is switched off and when it is running
idle in addition to the trigger time).
SAFETY
ATTENTION! When you use electrical machines, you should always observe basic safety precautions to reduce the risk of re,
electric shocks and personal injuries.
- Do not leave the machine out in the rain.
- Do not use the machine in damp or wet places.
- Keep the work area well lit.
- Do not use the machine near ammable liquids or gas.
- Make sure the voltage and the frequency written on the rating
nameplate match those of the mains.
- Make sure the switch is turned off (pos. 0) before you plug the
machine into the mains to prevent it from starting up accidentally.
- Unplug the machine from the mains when it is not in use, before
you start any maintenance jobs and when you replace any
accessories (i.e. grinding wheel).
- Before you actually use the machine, make sure it is able to work
appropriately and efciently: check the integrity of the shield
guard in particular.
- Check the alignment and adherence of moving parts, make sure
nothing is broken, check the overall assembly and any other
conditions that may affect operation.
- The grinding wheel safety guards and any other parts damaged
shall be repaired or replaced by a skilled technician, unless
specied otherwise in this manual.
- Have faulty switches replaced by a skilled technician.
- Keep anyone that is not involved in the job well away from
the work area, especially children. Do not let them touch the
machine or the extension lead.
- Wear safety goggles and gloves.
- Wear a face mask or dust mask if the process creates dust.
- Do not wear baggy clothing or jewelry, which could get caught up
in moving parts.
- Wear a protection cap and tie long hair back.
- Wear non-slip shoes when working outdoors.
- Always stand appropriately and balanced on both feet.
- Always keep your eyes on the job, without distraction. Use your
common sense and do not use the machine if you are tired.
- Always make sure the hex spanners have been taken off the
machine before using it.
- Keep the work area clean and tidy. Untidy work areas and
benches could cause accidents.
- Do not touch earthed surfaces with any part of your body.
- Always use the vise to rmly hold the chain to be sharpened.
Never sharpen the chain while holding it with your hands.
- Do not force the machine to work at a higher speed than that
envisaged.
- Never stop the grinding wheel with your hands, even after the
motor has been switched off.
- When using the machine outdoors, use extension leads
approved for such use and marked accordingly.
- Never pull on the power cable to unplug the machine from the
mains. Keep the cable away from heat, oil and sharp edges.
- Do not use the machine if the switch does not switch on or off.
- The use of accessories (i.e. grinding wheel) different from those
recommended by the manufacturer could cause injuries.
- Do not tamper with the safety devices.
- Look after the machine with care.
- Follow the instructions when replacing accessories.
- Every now and again, visually check the machine cable and have
it repaired by a specialist if you should notice any damages.
- Every now and again, visually check the extension leads and
replace them if damaged.
- Keep the operating handles dry, clean and free from oil and
grease.
- When the machine is not used, keep it in a dry and safe place
away from children’s reach.
- This electrical machine complies with related safety provisions.
Repairs shall be carried out exclusively by a skilled technician,
590181 230 Volt
590181 230 Volt
230 Volt
230 Volt
7000
54.1dB (A)
26.3N (2,7 kg)
1 wheel (thickness: 3.2mm); 1 screw Ø3,5x9,5
;

 Loading...