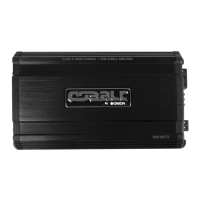
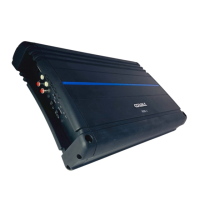
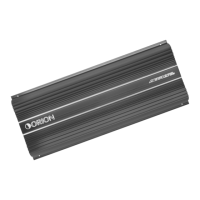
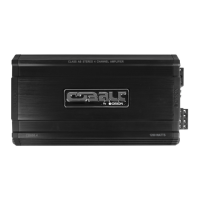
This document serves as an owner's manual for Orion High Performance Car Audio amplifiers, specifically the Cobalt series. It covers various amplifier models, including 4-channel, 2-channel, 5-channel, monoblock Class AB 2 Ohm, monoblock Class D 1 Ohm, and monoblock Class D 2 Ohm amplifiers. The manual provides detailed information on the functions, operation, troubleshooting, fuse replacement, wiring instructions, and specifications of these devices.
Function Description
The Orion Cobalt series amplifiers are designed to enhance car audio systems by providing powerful and clear sound output. They come in different configurations to suit various audio setups:
- 4-Channel Amplifiers (CB600.4, CB1000.4, CB1500.4, CB2000.4, CB3400.4): These amplifiers are versatile, allowing for the connection of multiple speakers (e.g., front and rear speakers) or a combination of speakers and a subwoofer in bridged mode. They feature input mode selection, gain control, LPF/HPF (Low Pass Filter/High Pass Filter) control, bass boost, and LED indicators for power and protection.
- 2-Channel Amplifiers (CB300.2, CB600.2, CB2700.2): Ideal for powering a pair of speakers or a single subwoofer in bridged mode, these amplifiers offer input mode, gain control, LPF/HPF control, and bass boost.
- 5-Channel Amplifiers (CB1500.5, CB2700.5): These are comprehensive solutions for complete car audio systems, typically powering four speakers and a dedicated subwoofer channel. They include input mode, gain control, LPF/HPF control, sub sonic control, bass boost, and LED indicators.
- Monoblock Class AB 2 Ohm Amplifiers (CB700.1M2, CB1100.1M2): These amplifiers are optimized for driving subwoofers, offering robust power output. They feature input mode, gain control, LPF control, sub sonic control, phase control, bass boost, and LED indicators.
- Monoblock Class D 1 Ohm Amplifiers (CB1200.1D, CB2400.1D, CB3200.1D, CB5000.1D): Designed for high-power subwoofer applications, these Class D amplifiers are highly efficient. They include input mode, gain control, LPF control, sub sonic control, phase control, bass boost, and LED indicators.
- Monoblock Class D 2 Ohm Amplifiers (CB2400.1D2): Similar to the 1 Ohm Class D monoblocks but optimized for 2 Ohm loads, these also provide input mode, gain control, LPF control, sub sonic control, phase control, bass boost, and LED indicators.
Common features across most models include:
- Input Mode: Allows selection between low input and high input, catering to different head unit output types.
- Gain Control: Adjusts the input sensitivity to match the output level of the car stereo, preventing distortion.
- LPF/HPF Control: Filters out unwanted frequencies, ensuring that speakers receive only the frequencies they are designed to reproduce (e.g., LPF for subwoofers, HPF for full-range speakers).
- Sub Sonic Control: (Monoblock amplifiers) Filters out extremely low frequencies that are inaudible and can cause damage to subwoofers.
- Bass Boost Control: Enhances low-frequency output for a more pronounced bass response.
- Phase Control: (Monoblock amplifiers) Adjusts the phase of the subwoofer output to align with other speakers, improving bass integration.
- Mosfet Power Supply: Provides efficient and stable power delivery to the amplifier.
- Thermal Protection: A built-in safety feature that protects the amplifier from overheating.
- LED Power and Protection Indicator: Visual cues for the amplifier's operational status (green for power, red for protection mode).
Usage Features
The manual emphasizes proper installation and setup for optimal performance and longevity of the amplifier.
- Wiring Connections: Detailed diagrams are provided for various speaker configurations, including stereo and bridged modes, across different amplifier models. This ensures correct impedance matching and prevents damage to both the amplifier and speakers.
- Ground Connection (GND): It is crucial to connect the GND terminal to the chassis ground of the car with the best possible electrical and mechanical contact. The ground cable should be short, and the connection point on the chassis should be free of paint or dirt.
- Power Supply (+12V): The +12V terminal must be connected directly to the positive pole of the car battery using a sufficiently thick lead cable (minimum 4mm² for 3m, 6mm² for 6m). An inline fuse, placed within 30cm of the battery, is mandatory for protection.
- Remote Control (REM): This terminal connects to the car radio's automatic antenna connector, allowing the amplifier to switch on and off automatically with the car radio. A thin cable (0.5mm²) is sufficient for this connection.
- Input Mode Selection: Users can select between low-level (RCA) and high-level (speaker) inputs depending on their car stereo's outputs. For stereos without low-level outputs, an AUTOCRAFT line converter can be used with the high-level outputs.
- Gain Adjustment: The manual provides a step-by-step guide for setting the gain control to achieve the best sound without distortion. This involves tuning the car radio volume to 2/3 maximum and then slowly increasing the amplifier's gain until distortion is heard, then backing off slightly.
- Filter Controls (LPF/HPF/Sub Sonic): These controls allow users to fine-tune the frequency response, ensuring that each speaker or subwoofer reproduces its intended frequency range, leading to better sound quality and system protection.
- Bass Boost and Phase Controls: These features enable users to customize the bass response and optimize subwoofer integration for a more impactful and cohesive audio experience.
- Bridged Mode: Instructions are provided for bridging channels to combine power output, typically for driving a single subwoofer with higher power. This requires specific speaker impedance (e.g., 4-8 Ohm for 4-channel amplifiers).
- Bridged Connections for Monoblock Amplifiers: For certain monoblock models (e.g., CB1200.1D, CB2400.1D, CB3200.1D, CB5000.1D, CB2400.1D2), the manual illustrates how to connect two identical amplifiers in a master-slave configuration to achieve even higher power output for a single subwoofer. This involves specific wiring for power, ground, remote, and signal connections between the two amplifiers and the car stereo.
Maintenance Features
The manual outlines several precautions and troubleshooting steps to ensure the safe and reliable operation of the amplifier.
- Fuse Replacement: If a fuse blows, it indicates a fault. Users should check the power connection and replace the fuse with one of the specified amperage. Using a higher amperage fuse or bridging a blown fuse can cause serious damage. If the fuse blows again, it suggests an internal malfunction requiring professional service.
- Protection Circuit: The amplifier is equipped with a protection circuit that safeguards transistors and speakers from damage due to overheating or short-circuited speaker terminals. If the red LED indicator illuminates, it means the protection circuit is active. The amplifier will automatically resume operation after cooling down or after the fault is resolved.
- Troubleshooting Guide: The manual provides solutions for common issues:
- No Function: Check power, ground, and remote connections, as well as the fuse.
- No Sound/Red LED Protection Shines: Inspect speaker cable connections for shorts or incorrect impedance. If overloaded, reduce the gain control.
- Poor Sound Quality (Distortions): Lower the volume level and check gain control positions, as speakers might be overloaded.
- No Stereo Sound/Weak Bass: Check speaker cable polarity, as reversed polarity can cause phase issues.
- Interference Reduction: The manual offers extensive advice on minimizing noise and interference in the car audio system:
- Use screened audio cables and keep signal, speaker, and power cables separate.
- Avoid ground loops by establishing a single central ground point for all components.
- Twist core leads of speaker cables if external electrical sources cause pickups.
- Add an interference suppression choke to the power wiring if car electronics cause noise.
- Use thicker ground cables or additional ground cables to the chassis if humming noises persist.
- Tin cable ends or use multi-core cable ends/spade terminals for better contact and lower resistance.
- If all else fails, a ground loop isolator may be necessary.
- Installation Environment: Avoid installing the unit in locations exposed to high temperatures (direct sunlight, heater vents), rain, moisture, dust, or dirt. If the car has been in direct sunlight, allow the unit to cool before operation. Ensure that heatsink fins are not covered to allow proper ventilation.
- Battery Condition: Do not use the amplifier with a weak car battery, as optimal performance relies on a normal battery supply voltage.
- Volume Control: For safety, maintain a moderate volume level to remain aware of external traffic sounds.