Do you have a question about the Orion Cobalt CB2000.4 and is the answer not in the manual?
Details on how to obtain warranty service and what is covered by Orion's limited warranty.
Exclusions from the warranty, including damage from improper installation or misuse.
Steps to follow for warranty claims, including RMA number and return shipping.
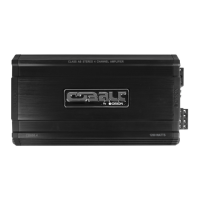
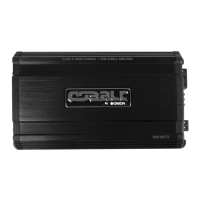
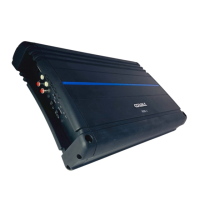
Overview of the car audio amplifier and advice on reading the manual.
Guidance on mounting, ventilation, and routing wires for optimal performance.
Instructions to record model, serial number, purchase date, and dealer for warranty.
Details on controls for CB600.4, CB1000.4, CB1500.4, CB2000.4, CB3000.4 models.
Details on controls for CB300.2, CB600.2, CB1200.2 models.
Details on controls for CB1500.5, CB2700.5 models.
Details on controls for CB2700.2, CB1000.1M2, and various Class D mono models.
Guidance on connecting power leads and understanding the power indicator.
Important warnings regarding installation, temperature, and battery voltage.
Solutions for common problems like no function, no sound, or poor quality.
Instructions for replacing fuses and understanding the protection circuit.
Wiring diagrams for connecting speakers in stereo mode for four-channel amps.
Wiring diagrams for connecting speakers in stereo mode for two-channel amps.
Wiring diagrams for connecting speakers in stereo mode for five-channel amps.
Wiring diagrams for mono amplifiers in stereo mode.
Diagrams for connecting speakers to CB600.4, CB1000.4, CB1500.4, CB2000.4.
Diagrams for connecting speakers to CB300.2, CB600.2, CB1200.2, CB2700.2.
Diagrams for connecting speakers to CB1500.5, CB2700.5.
Diagrams for connecting speakers to various mono amplifier models.
Wiring diagrams for bridged mode on four-channel amplifiers.
Wiring diagrams for bridged mode on two-channel amplifiers.
Wiring diagrams for bridged mode on five-channel amplifiers.
Diagrams for connecting mono amplifiers in bridged mode (Master/Slave).
Details on power supply leads, notes, and power connection.
Instructions for ground, remote turn-on, speaker, and input connections.
Understanding power/protect LEDs and adjusting level controls.
Tips for minimizing interference through proper cabling and grounding.
Technical specifications for CB600.4, CB1000.4, CB1500.4, CB2000.4, CB3000.4.
Technical specifications for CB300.2, CB600.2, CB1200.2, CB2700.2.
Technical specifications for CB1500.5, CB2700.5.
Technical specifications for Class AB and Class D mono amplifiers.
The ORION High Performance Car Audio amplifier is designed to provide high-quality audio performance with minimal maintenance. Before installation and use, it is crucial to read the instruction manual carefully to familiarize yourself with the product's features and ensure proper setup.
The amplifier is designed for negative ground 12V DC operation. It supports speakers with an impedance of 2 or 4 Ohms in stereo mode, and 2 or 4 Ohms when used as a bridging amplifier. The unit features a Mosfet power supply and is available in 1 to 5 channel power amplifier configurations.
Key controls and indicators include:
| Channels | 4 |
|---|---|
| RMS Power @ 4 Ohms | 100W x 4 |
| RMS Power @ 2 Ohms | 200W x 4 |
| RMS Power @ 4 Ohms Bridged | 400W x 2 |
| Minimum Impedance Unbridged | 2 Ohms |
| Minimum Impedance Bridged | 4 Ohms |
| THD @ Rated Power | <0.05% |
| Damping Factor | >200 |
| Input Voltage | 14.4V |
| Input Sensitivity | 200mV - 6V |
| Bass Boost | 0-12dB |
| Bass Boost Frequency | 45Hz |
| Frequency Response | 10Hz - 30kHz |
| Power Output (RMS) | 100W x 4 @ 4 Ohms |
| Fuse Rating | 40A |