7
NOTE: This nder has two brightness settings. When the
switch is set all the way over to the ON position, the red dot
is brightest. But in between the OFF and ON positions is a
middle setting in which the red dot is dim. Typically the dim
setting is used under dark skies and the brighter setting is
used under light-polluted skies or in daylight.
4. You’ll want to center the target object on the red dot. To do
so, without moving the telescope, use the nder scope’s
vertical and horizontal adjustment knobs (shown in Figure
13) to position the red dot on the object.
5. When the red dot is centered on the distant object, check
to make sure the object is still centered in the telescope’s
eyepiece. If it isn’t, re-center it then adjust the finder
scope’s alignment again. When the object is centered in
the telescope eyepiece and on the nder scope’s red dot,
the nder scope is properly aligned with the telescope.
The red dot nder scope’s alignment should be checked
before every observing session.
At the end of your observing session, be sure to slide the power
switch on the red dot nder scope to OFF to preserve battery life.
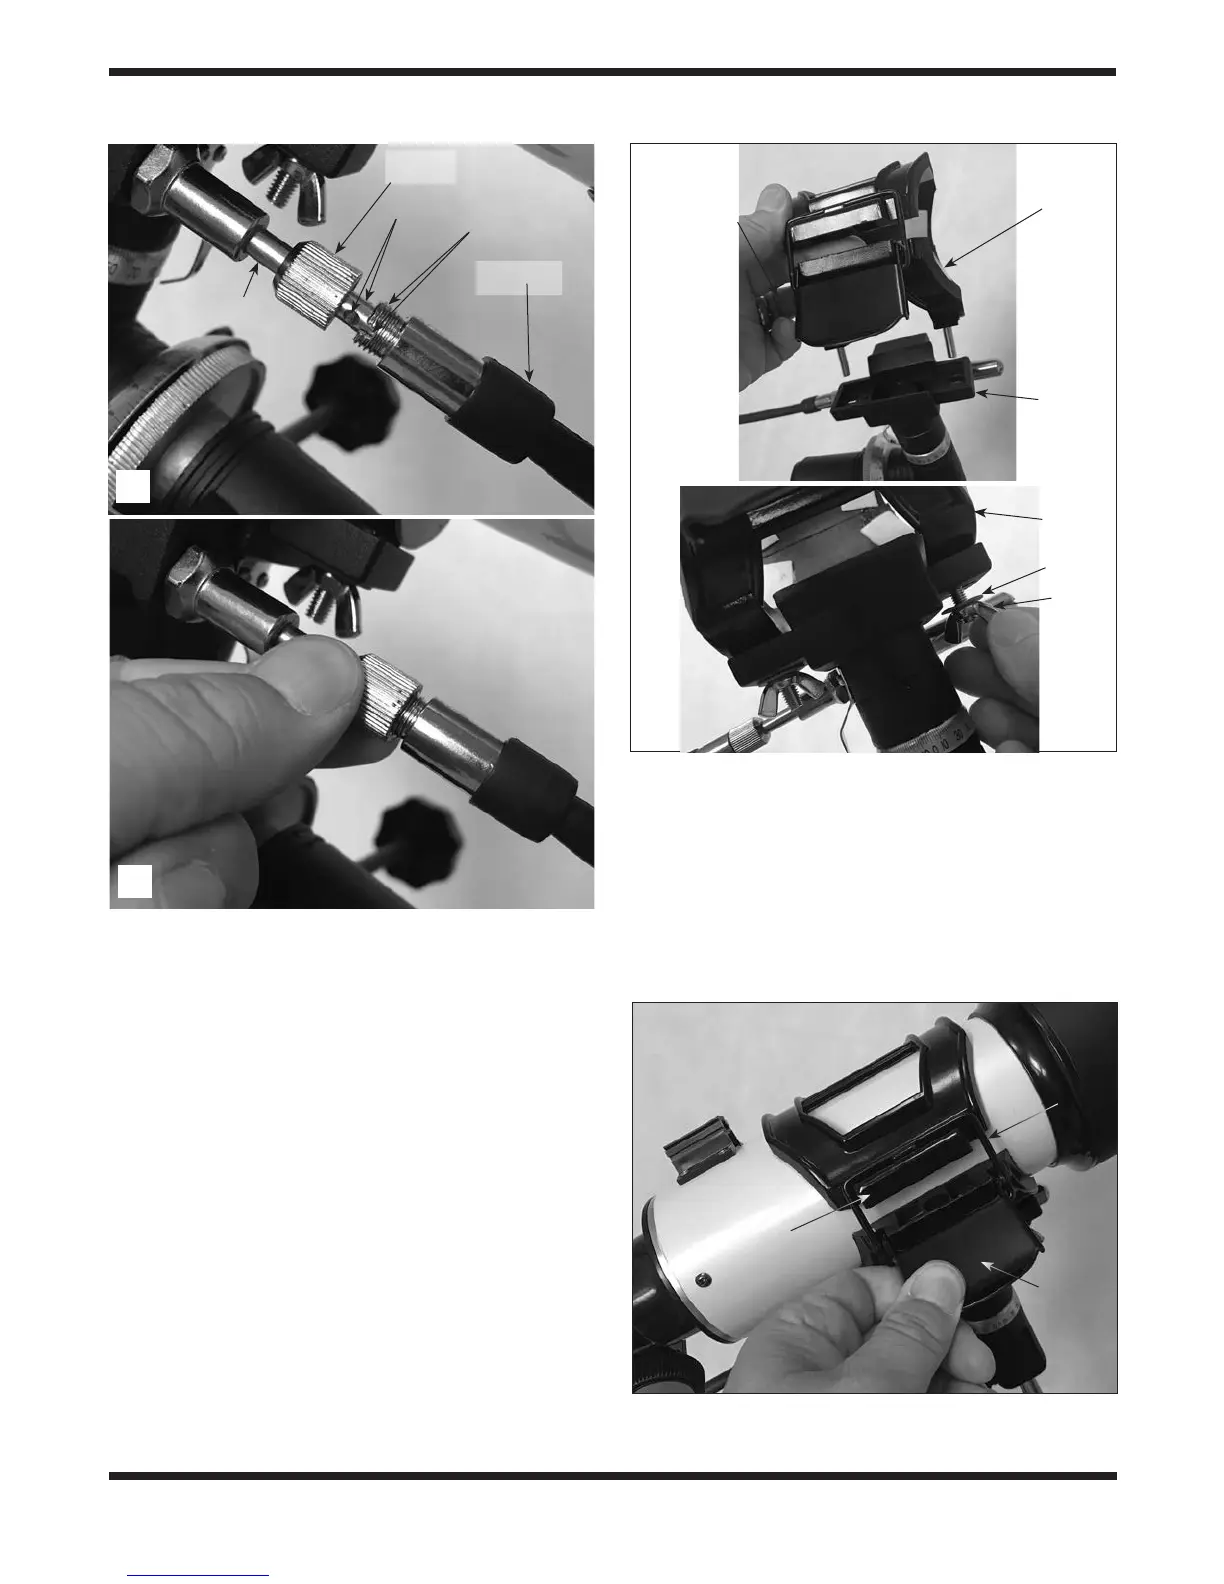
Figure 8.
A) Slide the slow-motion cable onto the gear shaft as
shown, B) then thread the knurled nut into the threaded end of the
cable until tight.
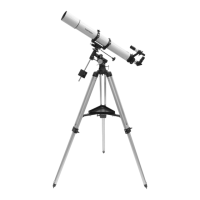
Figure 9. A) Install the tube mounting clamp onto the mount
saddle. B) Secure the clamp to the saddle with the two wing nuts.
Figure 10. Lay the optical tube in the open clamp, then close the
clamp and lock it in with the lock latch.
Slow-motion
cable
Saddle
Mounting
clamp
Washer
Wing
nut
Knurled
knob
Tube
mounting
clamp
Pins
Gear shaft
Slots
Lock latch
D-ring
Upper
clamp
ange
A
A
B
B