8
Balancing the Telescope
In order for the telescope to move smoothly on its mechanical
axes, it must rst be balanced as follows:
1. Keeping one hand on the telescope optical tube, loosen
the R.A. lock knob. Make sure the Dec. lock knob is locked,
for now. The telescope should now be able to rotate freely
about the R.A. axis. Rotate it until the counterweight shaft
is parallel to the ground, i.e., horizontal (Figure 14A).
2. Now loosen the counterweight lock knob and slide the
weight along the shaft until it exactly counterbalances the
telescope. That’s the point at which the shaft remains hori-
zontal even when you let go of the telescope with both
hands.
3. Retighten the counterweight lock knob. The telescope is
now balanced on the R.A. axis.
4. To balance the telescope on the Dec. axis, rst tighten
the R.A. lock knob, with the counterweight shaft still in the
horizontal position.
5. With one hand on the telescope optical tube, loosen the
Dec. lock knob. The telescope should now be able to rotate
freely about the Dec. axis (Figure 14B). If the tube rotates
on its own due to imbalance, you will need to reposition it a
little forward or back in the tube clamp until it is balanced.
(You’ll have to unlatch the clamp’s lock latch to do this.)
Then re-tighten the Dec. lock knob.
When you are actually observing with the telescope, you can
adjust the eyepiece and focuser orientation by unlatching the
tube clamp and rotating the optical tube to the desired position.
Be sure to hold onto the tube when you unlatch the clamp!
The telescope is now balanced on both axes. Now when you
loosen the lock knob on one or both axes and manually point the
telescope, it should move without resistance and should not drift
from where you point it.
4. Understanding and Using
the Equatorial Mount
When you look at the night sky, you no doubt have noticed
the stars appear to move slowly from east to west over time.
That apparent motion is caused by the Earth’s rotation (from
west to east). An equatorial mount is designed to compensate
for that motion, allowing you to easily “track” the movement of
astronomical objects, thereby keeping them from drifting out
of the telescope’s eld of view while you’re observing.
An equatorial mount has two perpendicular axes: right ascen-
sion and declination (Figure 7). The R.A. axis, also known as
the “polar” axis, can be aligned to be parallel with the Earth’s
axis of rotation, thus allowing easy tracking of the night sky.
This is accomplished by slowly rotating the telescope on its
R.A. axis. The process of aligning the mount’s R.A. axis with
the Earth’s rotational (polar) axis is called polar alignment.
Polar Alignment
For Northern Hemisphere observers, approximate polar align-
ment is achieved by pointing the mount’s R.A. axis at the
North Star (Polaris). It lies within 1° of the north celestial pole
(NCP), which is an extension of the Earth’s rotational axis
out into space. Stars in the Northern Hemisphere appear to
revolve around the NCP.
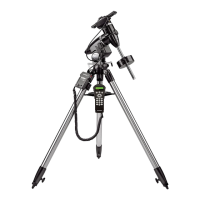
Figure 11. Slide the red dot nder scope’s bracket into its base.
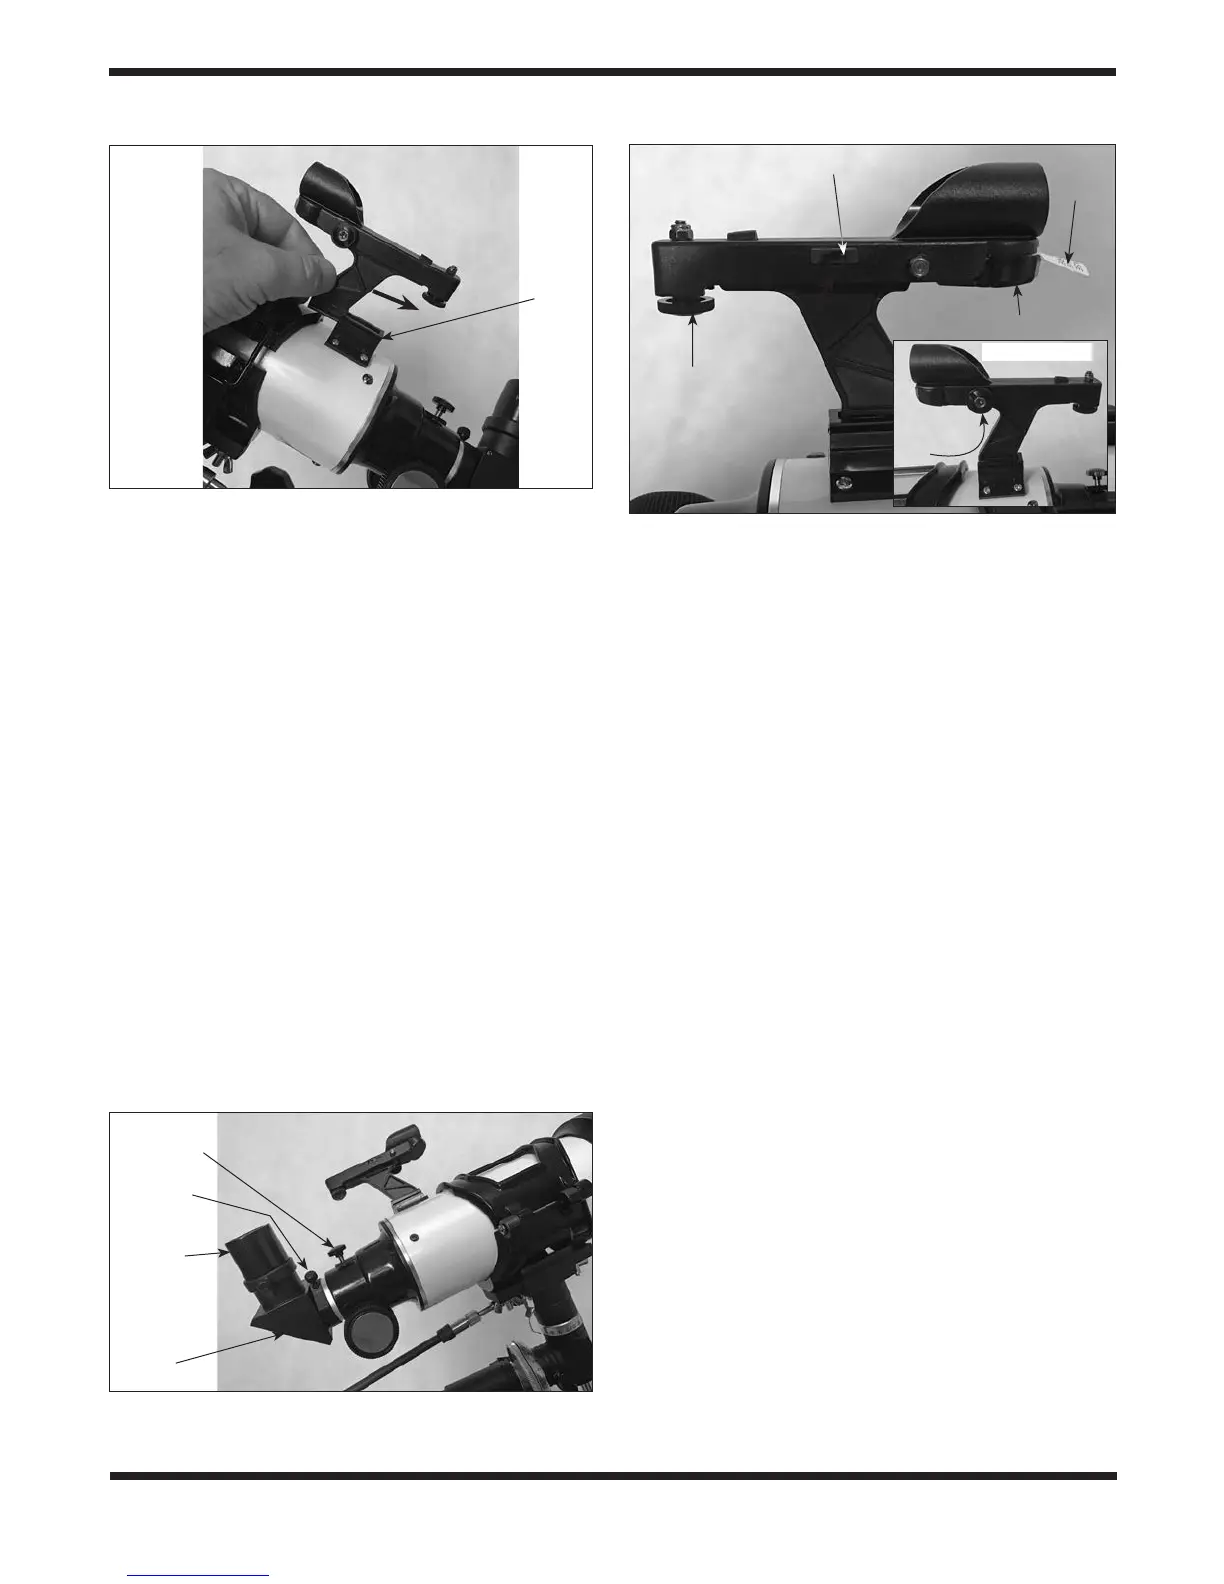
Figure 12. Install the diagonal and eyepiece in the focuser as
shown.
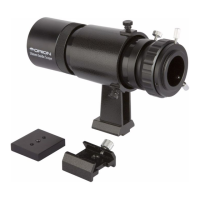
Figure 13. The red dot nder scope has vertical and (inset)
horizontal adjustment knobs for aligning it with the telescope.
Drawtube
tension knob
Accessory
collar
Eyepiece
Star
diagonal
Battery compartment
Vertical
adjustment
knob
Power switch
Ta b
Finder
scope
base
Horizontal
adjustment
knob
Opposite side