38
a.
Control the piercing needle (Q1): Check if the piercing
needle (Q1), inside the cartridge bushing (Q), is intact.
The piercing needle should be easily visible.
(see page .)
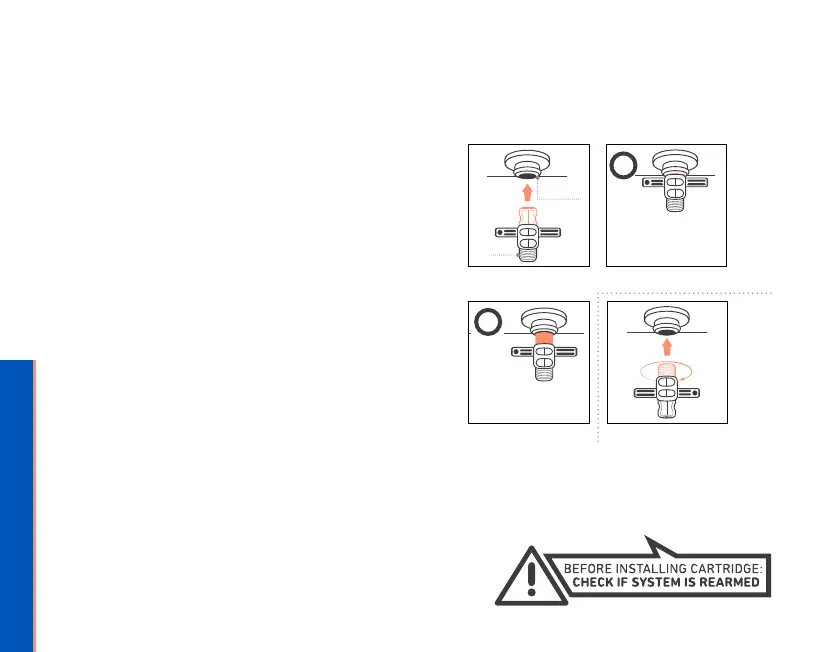
b.
Insert the unthreaded side (smooth surface) of the
AVABAG re-arming tool (1) without force into the
cartridge bushing (Q). If you can insert the re-arming
tool (1) right up to the stop (see illustration), the
AVABAG system is (P) armed and ready to activate.
If the re-arming tool (1) cannot be completely inserted,
you must re-arm the system.
c.
To re-arm the AVABAG system (P), screw the threaded
side of the re-arming tool (1) into the cartridge bushing
(Q) without force right up to the stop. Repeat step a to
once again check that the activation mechanism has
been re-armed.
WARNING: If the activation mechanism has not been
checked or armed before screwing in a cartridge, it
could lead to a failed or false activation.
System activated
System not activated System activated (b.)
SYSTEM PREPARATION CHECK BEFORE EACH USE:
3. CHECKING / RE-ARMING THE AVABAG SYSTEM (P) ACTIVATION MECHANISM
YOU WILL FIND A CORRESPONDING
WARNING IN THE BACKPACK:
✗
Q
1
✔
b.
 Loading...