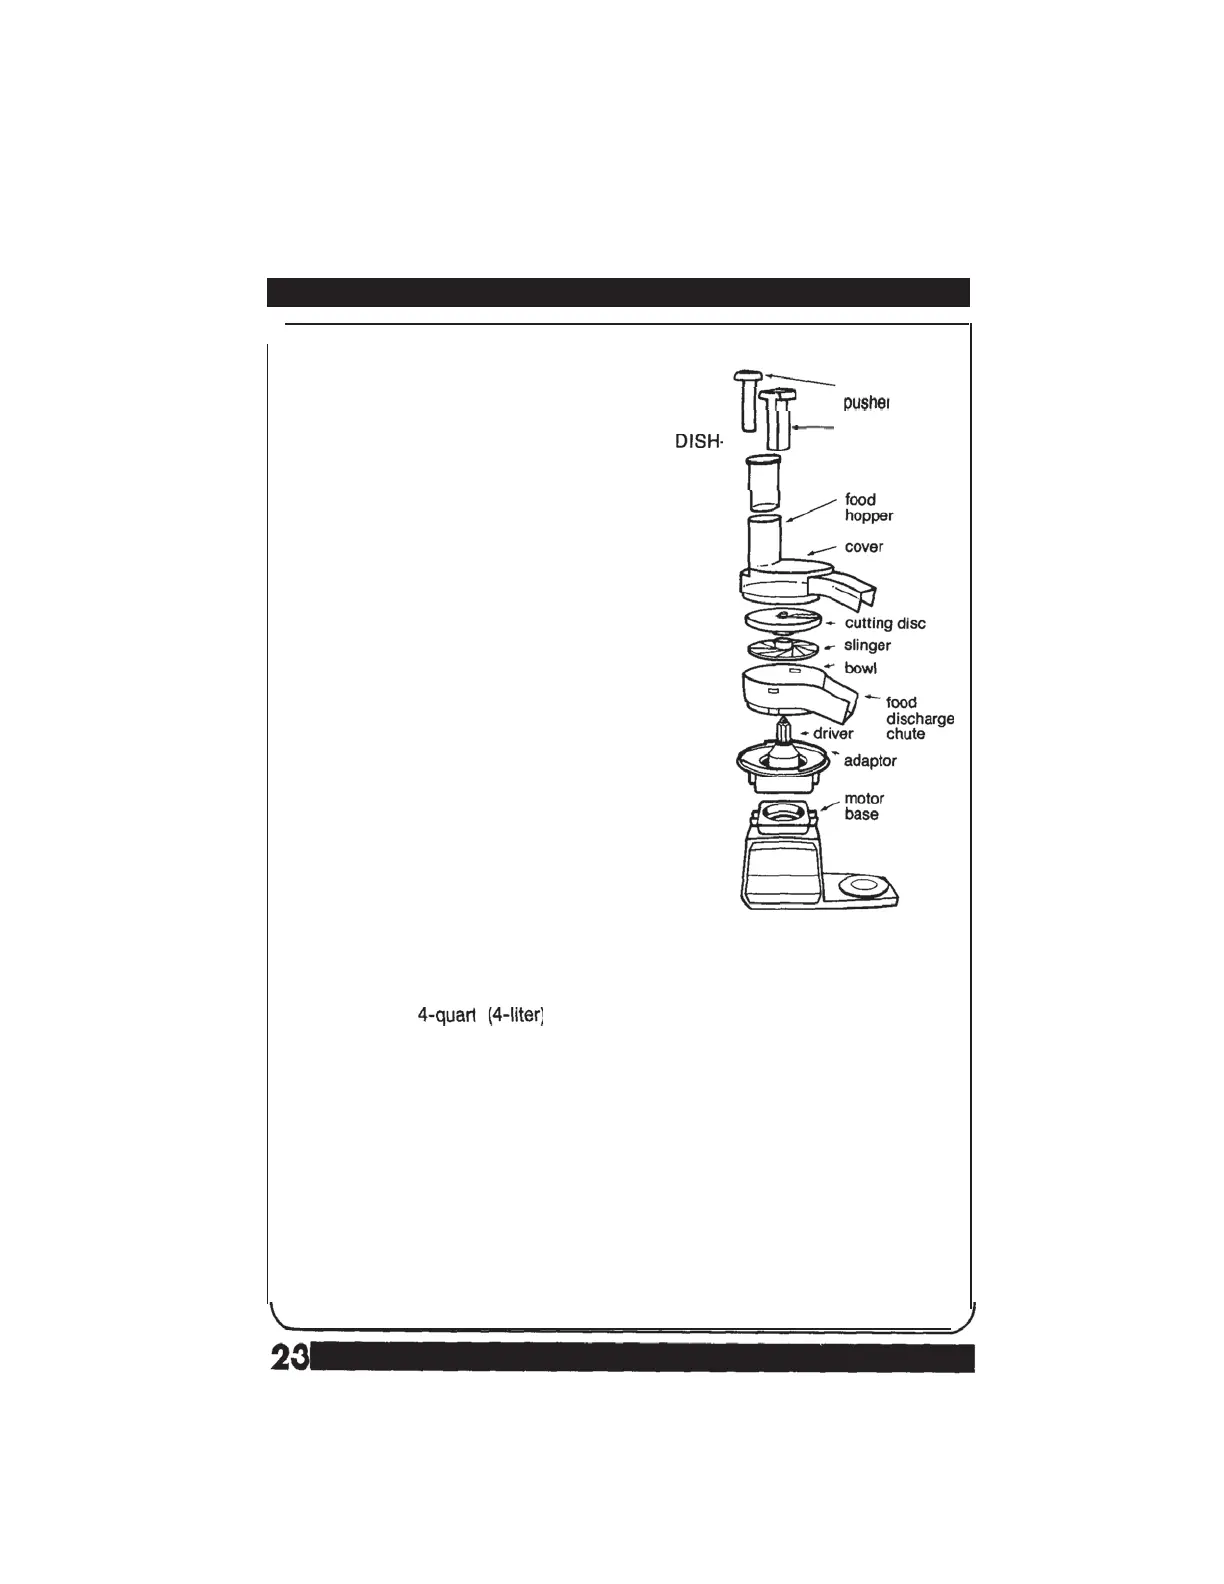
ASSEMBLING YOUR SALAD MAKER
After unpacking, disassemble unit before using first
time. Refer to “How to Disassemble” for directions.
small
Wash all parts except adaptor and motor base in
warm, soapy water. Rinse and dry immediately. DO
NOT PUT ANY PARTS IN AUTOMATIC
medium pusher
WASHER. DO NOT IMMERSE ADAPTOR OR
,
large pusher
MOTOR BASE IN WATER.
ASSEMBLY
1. Position adaptor base on motor base by lining up
“slots” on adaptor base with pivot pins on motor
base. Seat firmly.
2. Place bowl on adaptor and turn counterclockwise
until slots on bowl interlock with notches on adap-
tor base.
3. Place slinger into bowl, positioning center hole
over driver.
4. Place desired cutting disc into position on driver.
5. Place cover on bowl, lining up notches. Push
down and turn counterclockwise until cover inter-
locks on bowl. Cover and food discharge chute
will meet.
6. Select proper pusher.
7. Unit is now assembled for proper operation.
OPERATING THE SALAD MAKER
NOTE: This unit is designed with a safety interlock. Refer to “Maintenance
Instructions” for proper operation of safety interlock.
1. Place large
mixing bowl under food discharge chute.
2. Turn Control Dial to recommended speed as indicated on Food Processing Chart.
3. Place food into hopper.
4. Push “ON” button to start processing operation. Many foods will self-feed and
need only to be guided by pusher. DO NOT use excessive pressure on food
pusher. DO NOT put hands in food hopper or discharge chute at any time. If unit
at any time seems to labor, push “OFF” button and clear of any obstructions.
5. To momentarily stop the salad maker, press “OFF” button. To start motor again,
press “ON” button.
6. When processing is complete, push “OFF” button.