Chapter 3: Configuration
9
F
F
o
o
r
r
W
W
i
i
n
n
d
d
o
o
w
w
s
s
M
M
E
E
Step 1 Click on the Start menu, point to Settings and click on Control Panel.
Step 2 Double-click the Network icon.
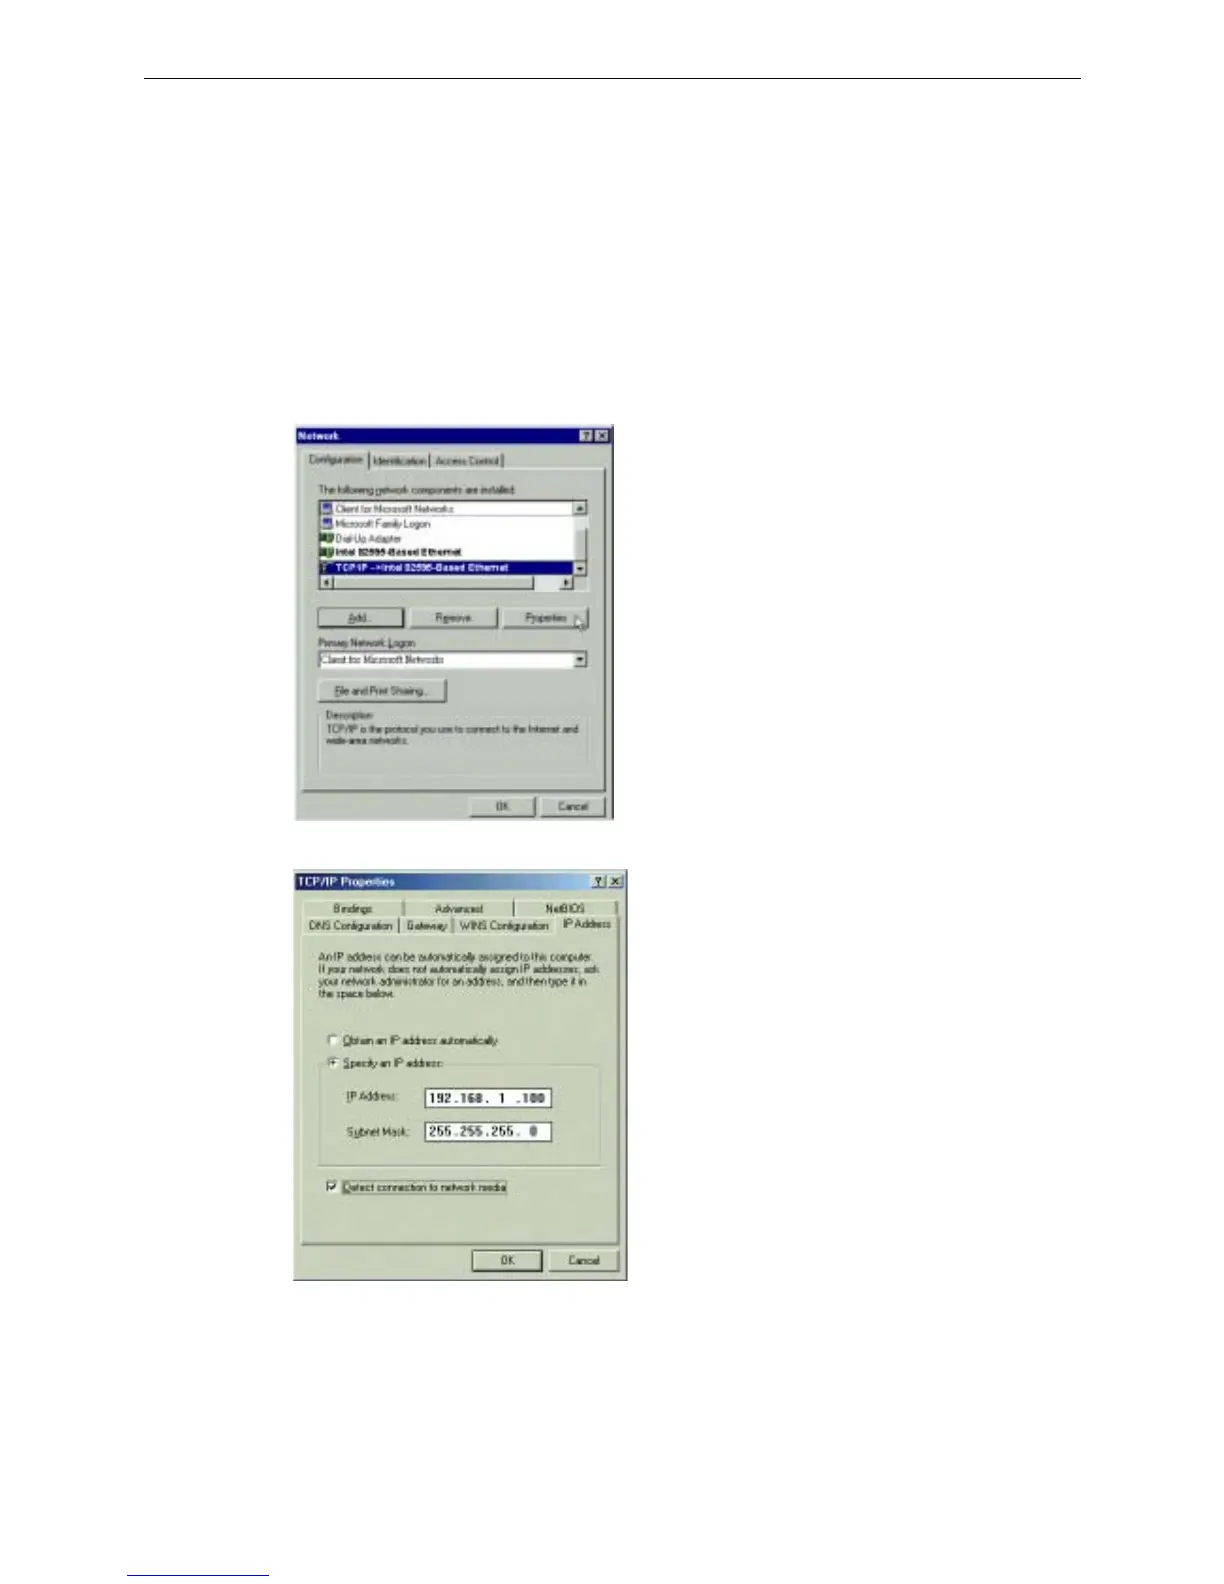
Step 3 The Network window appears. On the Configuration tab, check out the list of installed network
components.
Option 1: If you have no TCP/IP protocol, click Add.
Option 2: If you have TCP/IP protocol, go to Step 6.
Step 4 Highlight Protocol and click Add.
Step 5 On the left side of the windows, highlight Microsoft and then select TCP/IP on the right side. Then click
OK.
Step 6 While returning to Network window, highlight TCP/IP protocol for your NIC and click Properties.
Step 7 On the IP Address tab, select Specify an IP address. Enter the IP address: 192.168.1.x (x is between 2 and
254) and Subnet Mask: 255.255.255.0. Then click OK.
Step 8 While returning to the Network window, click OK.
Step 9 Wait for Windows copying files.
Step 10 When prompted with the System Settings Change dialog box, click Yes to restart your computer.
F
F
o
o
r
r
W
W
i
i
n
n
d
d
o
o
w
w
s
s
N
N
T
T
1. Click Start, point to Settings, and then click Control Panel.