7
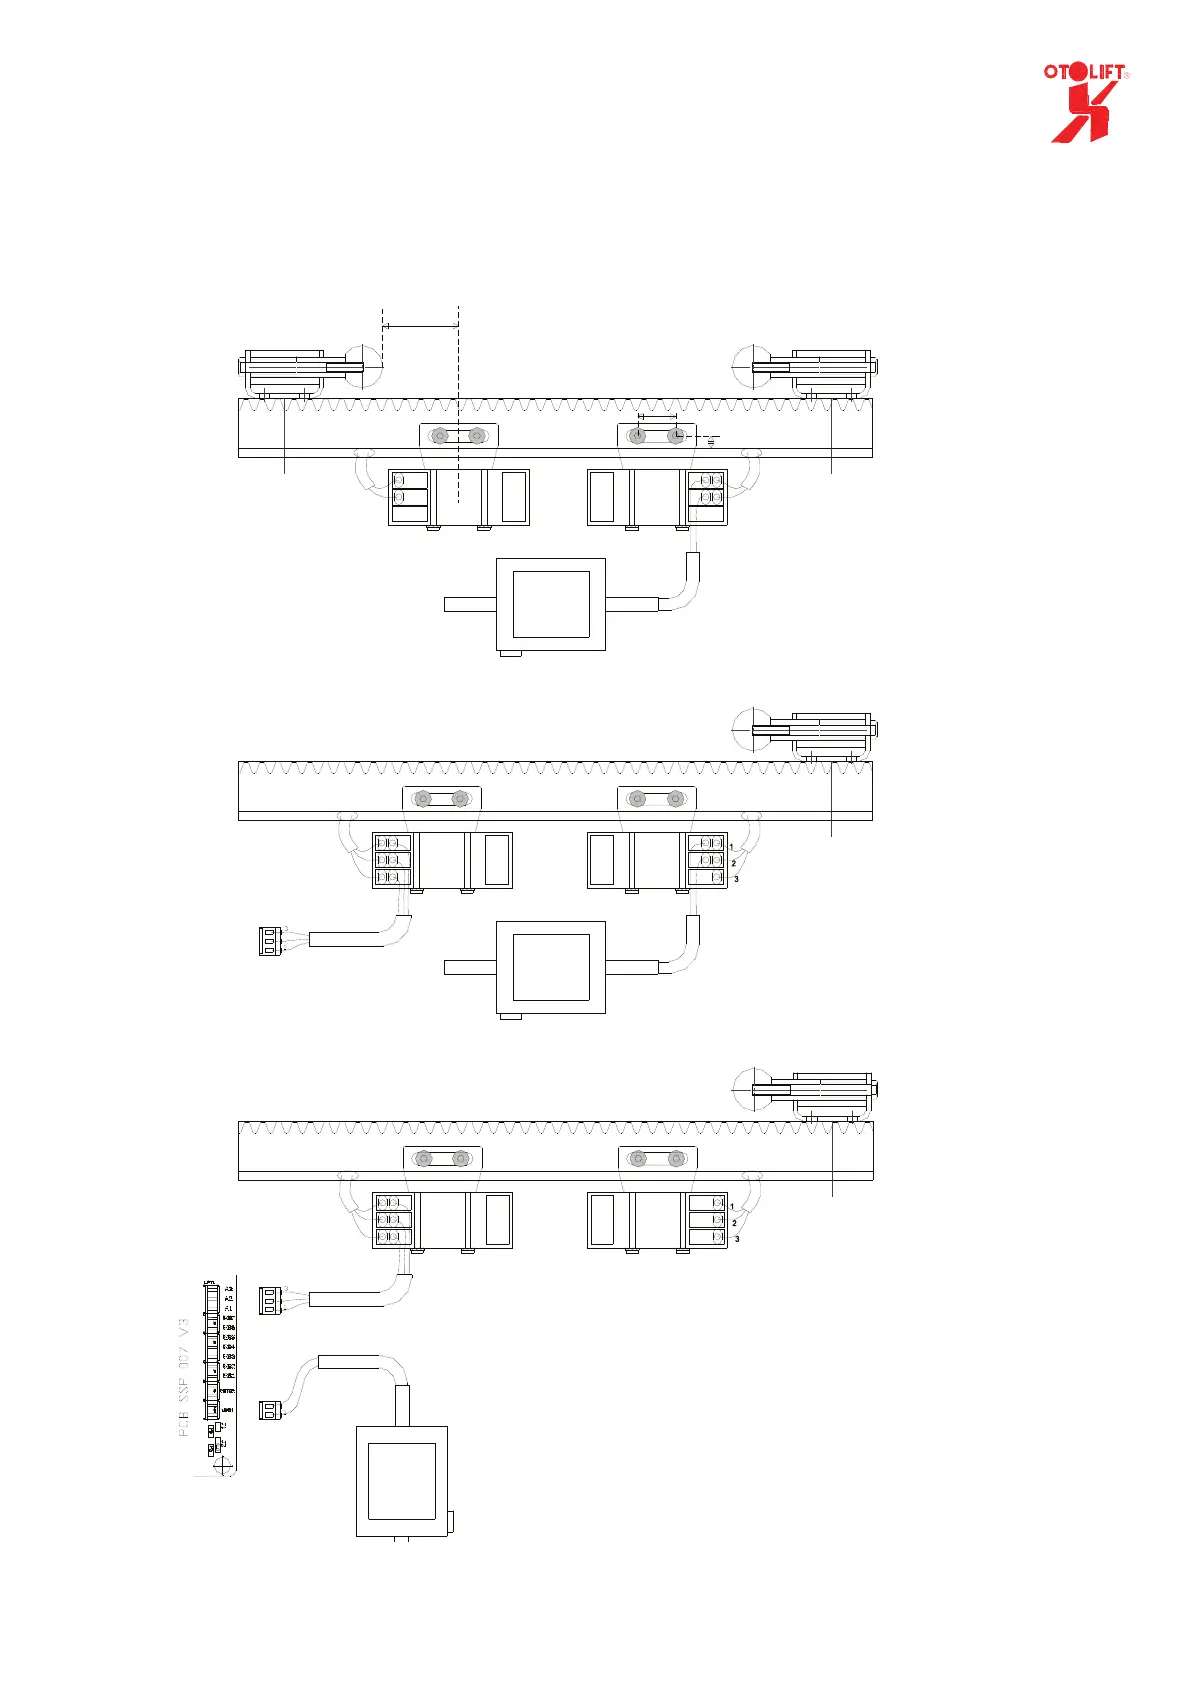
2.2 charge points
• Connect the transformer to the charge point of the rail as shown in the drawing.
• Connect the transformer to the wall socket (mains voltage 230Vac)
Powered hinge (folding)
1
2
3
1
2
1=red (voltage for charging)
2=black (0V)
1=brown (voltage for charging)
2=blue (0V)
1
2
1
2
3
1=red (voltage for charging)
2=black (0V)
3=grey (24V output)
1
3
Connector J6
(PCB ssp 042 v6)
2
Powered hinge (sliding)
Standard
47mm
25mm
6.5mm
Connector A/B
(ssp 007 V3)
1=red (voltage for charging)
2=black (0V)
3=grey (24V output)
1=red (charging-voltage indirect)
2=black (0V)
3=grey (24V output swithing)
2
1=red (chargingvoltage indirect)
2=black (0V)
3=grey (24V output swithing)
Transformer
24Vdc output
Fuse =1,6AT
brown
blue
blue
brown
Transformer
24Vdc output
Fuse =1,6At
1=red (voltage for charging)
2=black (0V)
2
2
3
1
2
Transformer
24Vdc output
Fuse =1,6AT
brown
blue
1=brown (voltage for charging)
2=blue (0V)
NOTE. In case of a folding rail the
transformer should always be connected
to the rail PCB SSP007v3.
NEVER directly to the chargepoints